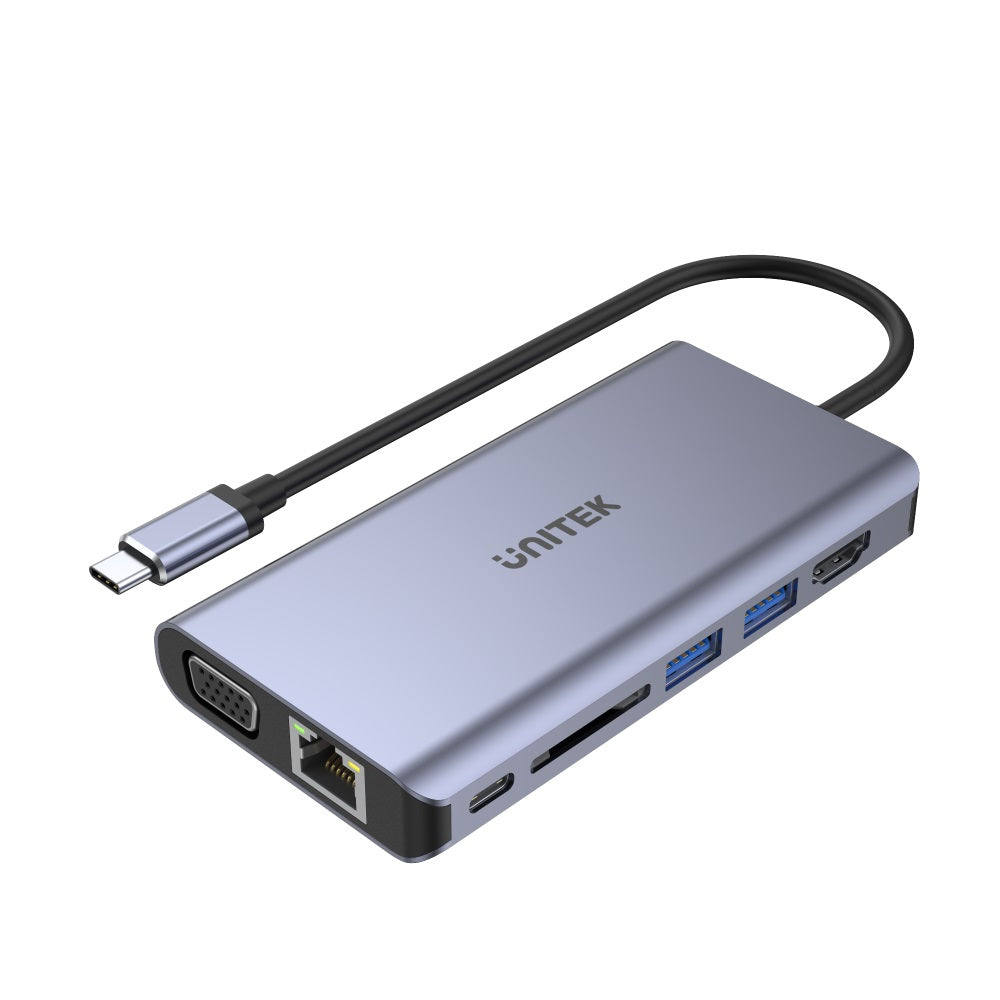
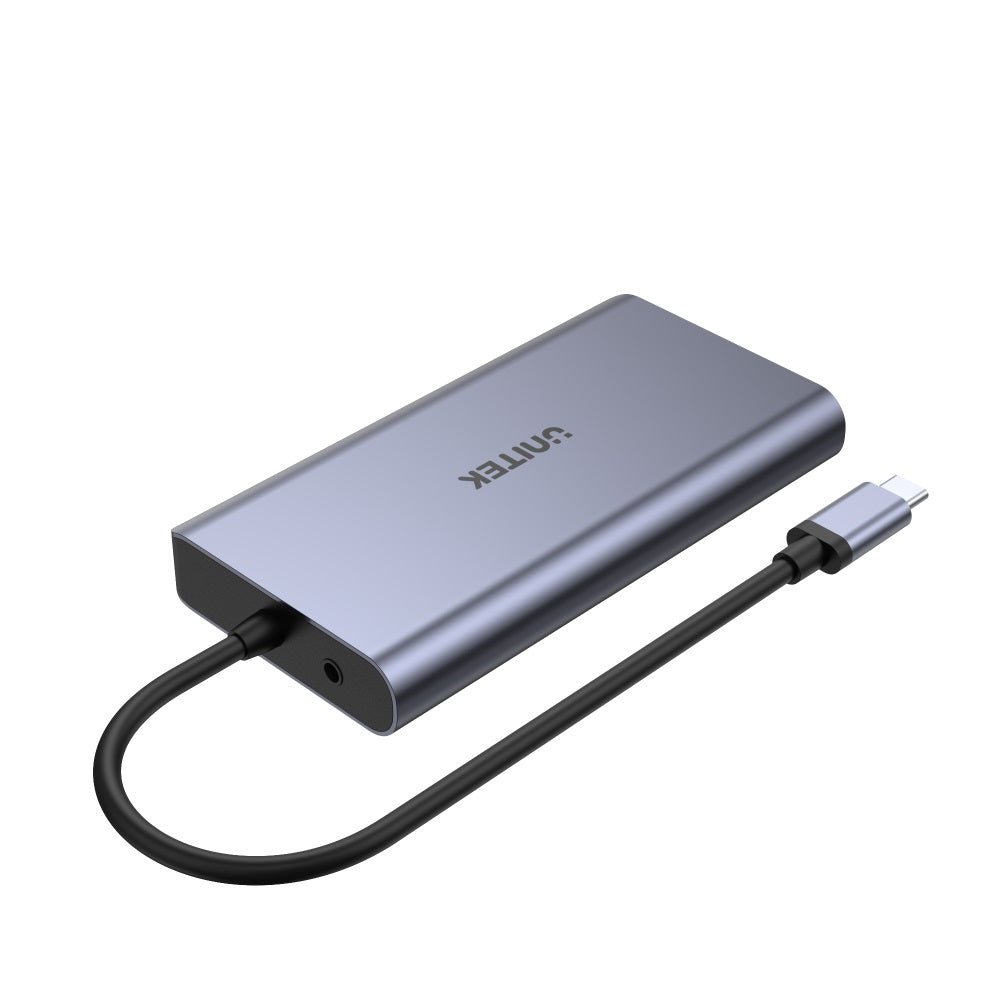
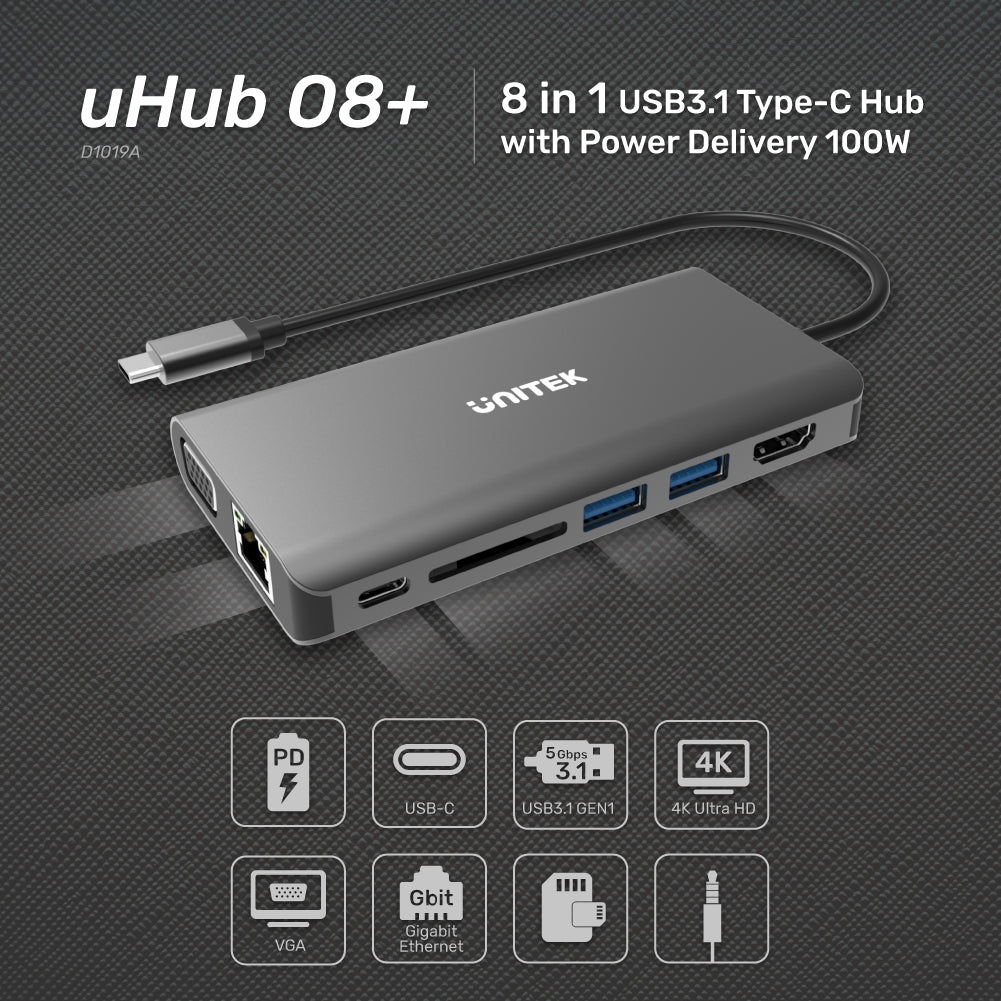


uHUB O8+ 8-in-1 USB-C Ethernet Hub with Dual Monitor, 100W Power Delivery and Card Reader
This powerful aluminium USB-C hub combines a USB-C port supporting USB 3.0 5Gbps data plus the forceful Power Delivery 100W charging, 4K HDMI & full HD VGA, a Gigabit Ethernet RJ45, a card reader, dual USB ports and a 3.5mm audio jack.
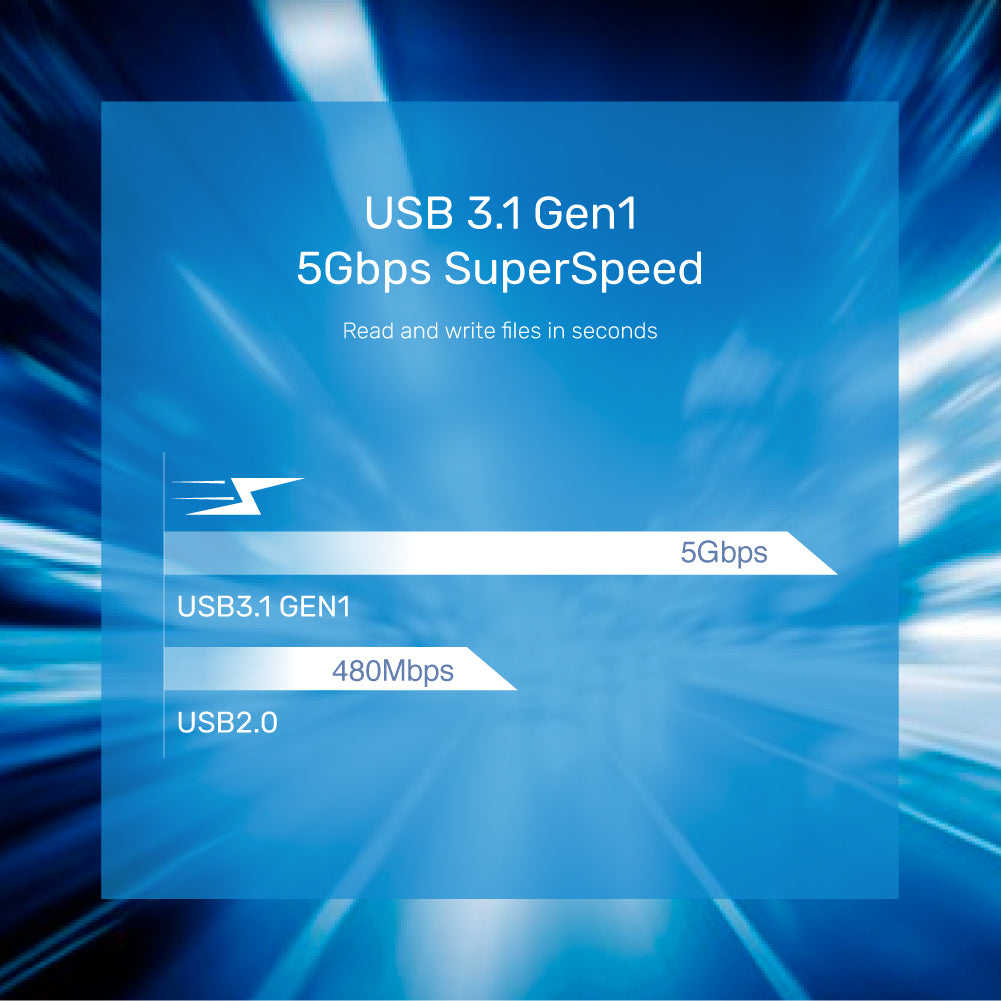
- USB-C female port supporting USB Power Delivery Revision 3.0 Ver 1.1 is able to charge and sync simultaneously, up to 100W (20V/5A) and 5Gbps.
- TWO USB-A female ports support SuperSpeed USB, data transfer rate up to 5Gbps. Backward compatible with USB2.0/USB1.1.
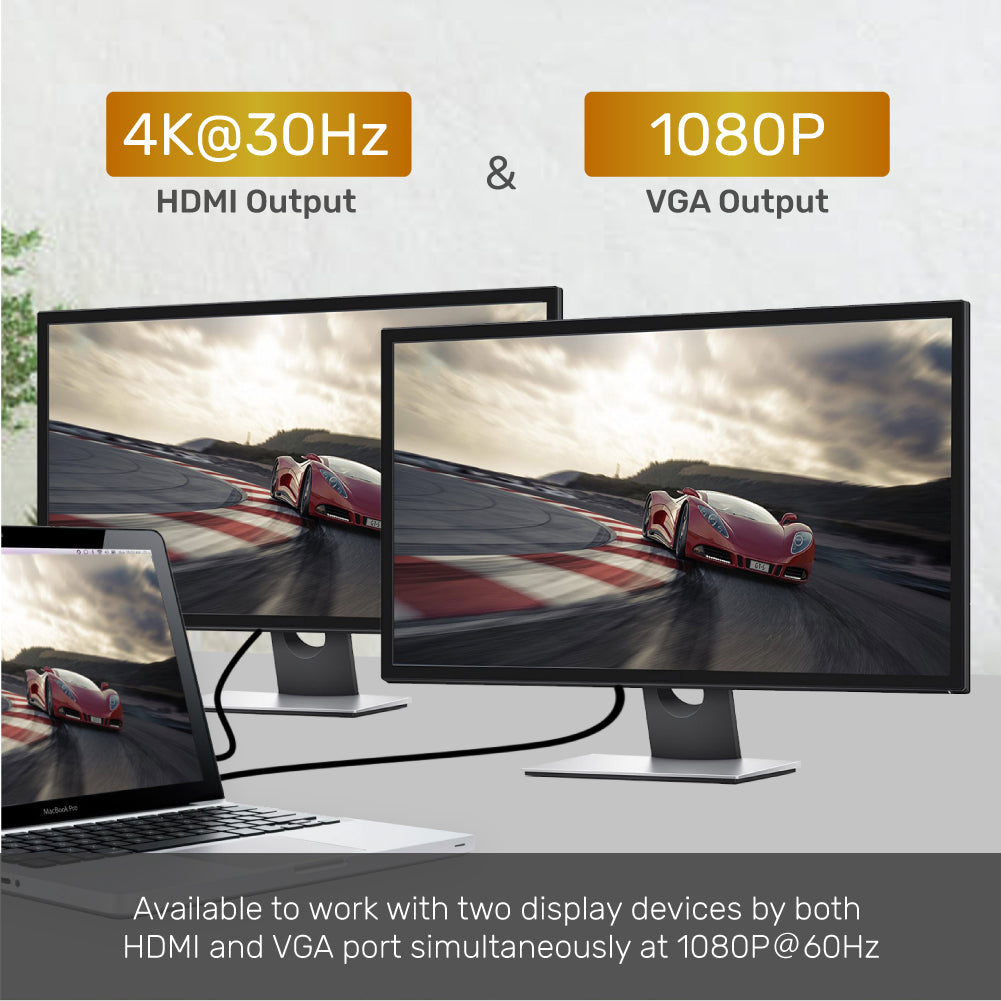
- With HDMI1.4 port, supports HDCP 1.4, output as 4K 30Hz resolution.
- With VGA port, supports Full HD 1080P resolution. While HDMI and VGA output ports work simultaneously, the max. resolution of both ports is 1080P 60Hz.
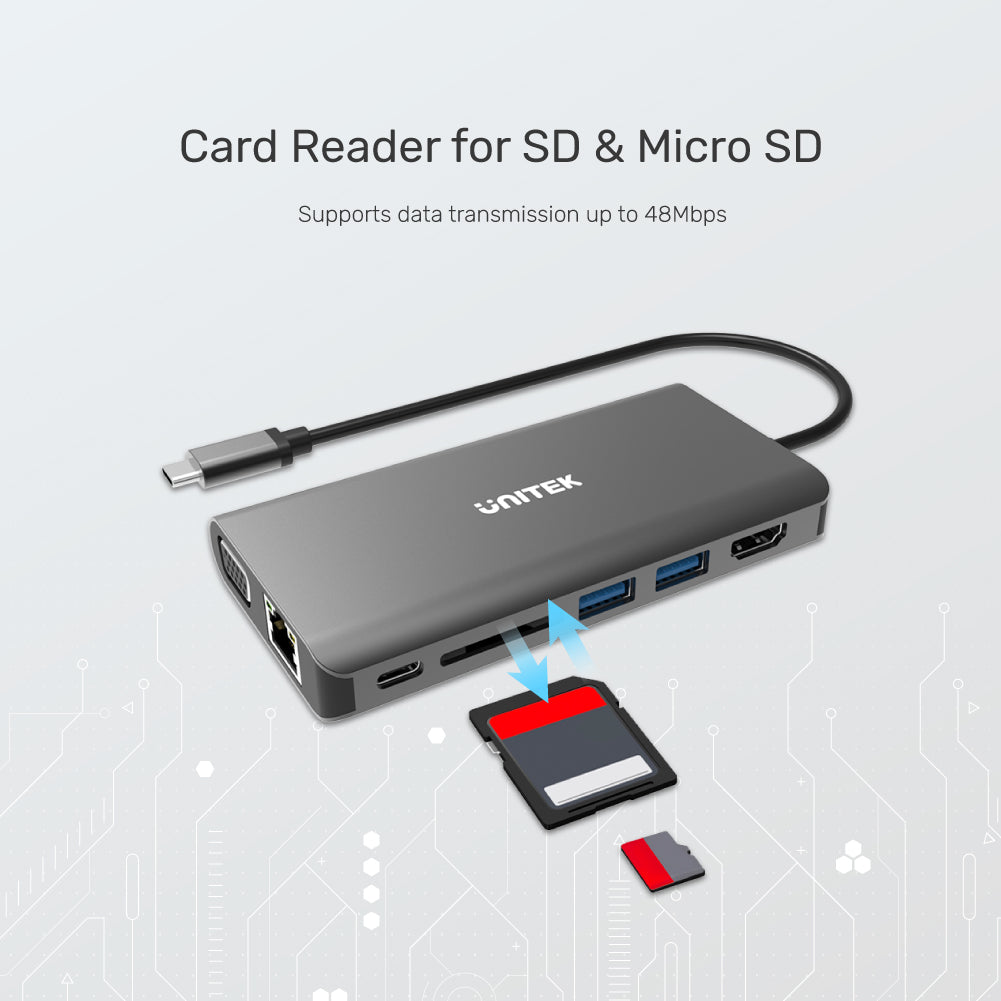
- With card reader for SD Card and Micro SD Card, up to 48Mbps.
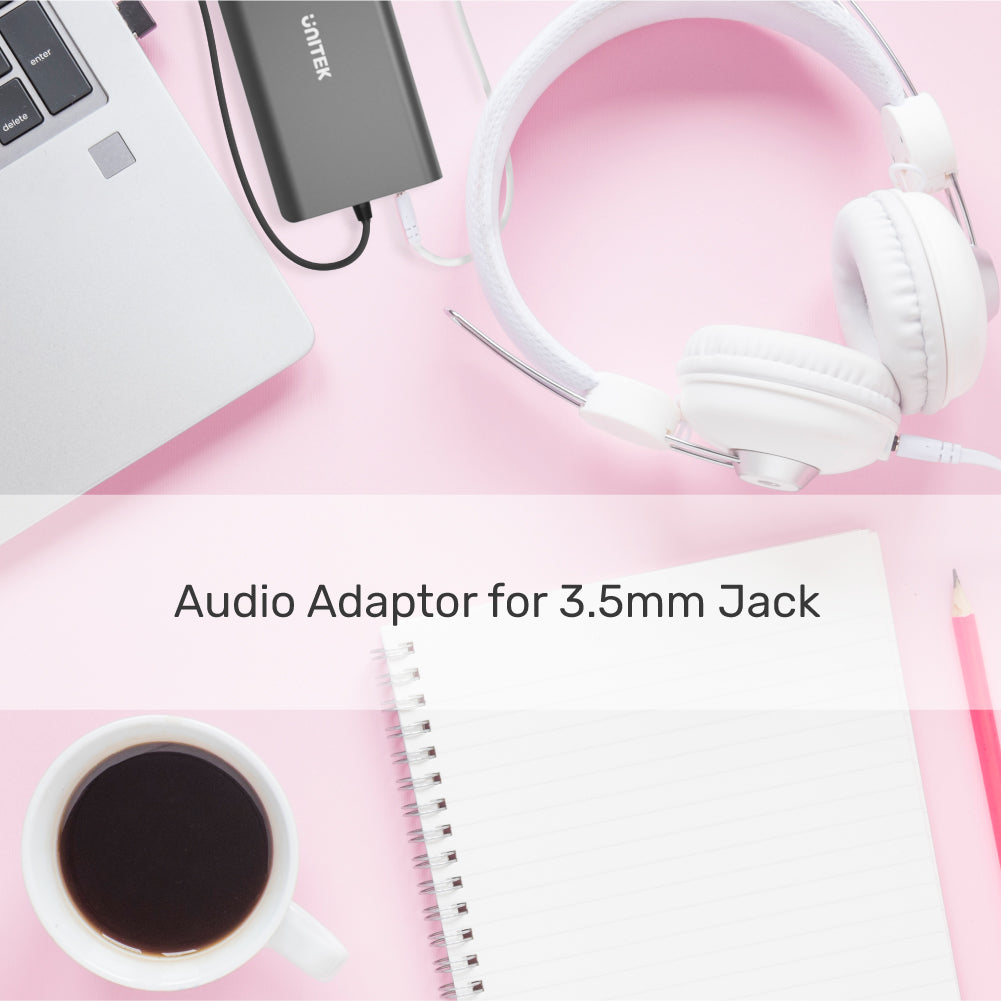
- With 3.5mm jack adapter, supports 48 k/Hz with a 16-bit sampling rate.
- Gigabit Ethernet for your internet connection, automatically adapts to the network transmission with 10M/100M/1000Mbps and supports IEEE 802.3 standard.
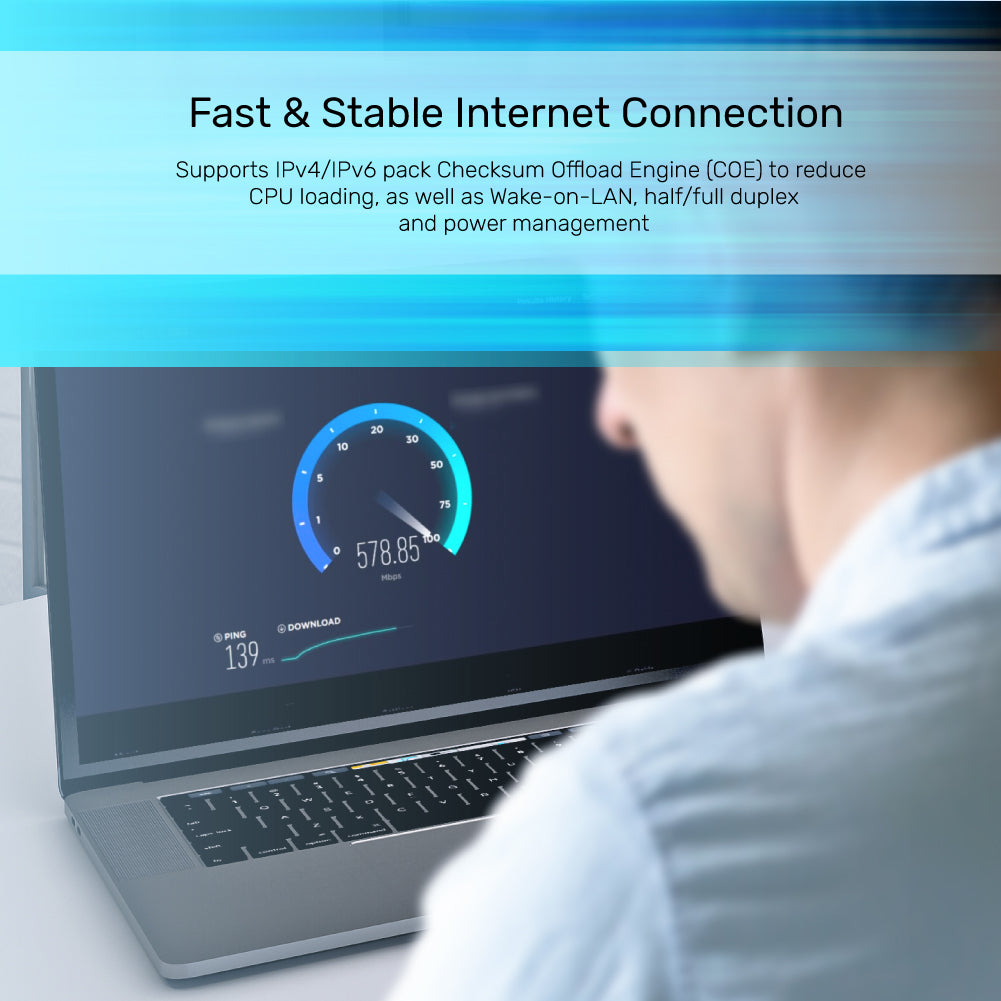
- Supports IPv4/IPv6 pack Checksum Offload Engine (COE) to reduce CPU loading, Wake-on-LAN, half/full duplex and power management.
- Plug and play, no need to install the driver.
- Dimension: 116mm x 61mm x16.2mm
- Upstream: USB-C Male
- Downstream: USB-C with PD, 2 x USB-A, HDMI, VGA, RJ45, SD Card Slot, Audio
- Color: Space Grey
Shipping cost will be calculated during checkout. International duties & taxes may apply and are not calculated at checkout.
Shipping & Delivery
For shipping quotes, "Checkout" the item you want to buy, enter your shipping details and the shipping rates will automatically generate based on the item's weight and the delivery location.
If the shipping rates do not generate, please contact us.
Normal Shipping Times: 3-14 business days
The final shipping days depend on local logistics and transportation times.
Delays:
Unitek is not responsible for delays in shipping caused by extraneous factors (such as incorrect addresses, weather, inspections, labor disputes, and/or transportation problems). We cannot be responsible for lost or damaged packages.
Duties & Taxes:
When customs clearance is required for cross-border shipments, any import taxes, customs duties, fees, or VAT (Value Added Tax) imposed by the receiving area are the responsibility of the recipient.
These charges are beyond Unitek's control, and we cannot predict their amount. You are responsible for paying any such additional costs and for complying with the laws and regulations applicable to your country of residence.
If you refuse to pay the applicable charges upon arrival, the goods may be returned to us at your expense.
In such cases, you will receive a refund for the product value paid, minus return shipping costs. Initial shipping fees are non-refundable. If return shipping costs exceed the product value, no refund or return will be processed. For more information, please contact your local customs office.
Global Shipping Notes:
China and Taiwan: Customers in China are required to email a copy of their Resident ID or passport after order confirmation
Korea: Please use your Korean name (not in English) and include your Personal Customs Code.
South Africa: Provide your ID number.
Brazil: Provide your CPF tax number.
Chile: Provide your RUT number.
Turkey: Provide your Turkish ID number.
For any other questions or inquiries, please contact us.
Go through the following:
1. Press the Windows Key plus R, type "devmgmt.msc", and press Enter.
2. In Device Manager, under the appropriate heading, confirm that your expansion card is listed and that there isn't an exclamation mark next to it. For example, a USB controller card would be under Universal Serial Bus controllers.
3. Your USB device is listed according to the name of the chipset or the dedicated name.
Go through the following:
1. Click the Apple icon.
2. Click About This Mac.
3. Click More Info or System Report.
4. Under the appropriate heading, please check that your USB device is listed (according to the name of the chipset or the dedicated name) and that there isn't an error. For example, a network card would be under Ethernet Cards.
5. You may have to refresh the System Information page after you plug in your device. To do so, press Command + R with the System Information page open.
If you disconnect a USB-C power input from the multiport USB hub during the transmission of the files to or from an attached storage device, it will stop the transmission and may cause file corruption. It is also possible that there will be a loss of function if the power input is removed from the USB hub while it is in operation.
It is important to always follow the disconnection steps listed following:
1. Complete all data transfers over USB to and from the attached storage device.
2. Disconnect the USB hub from the host computer.
3. Disconnect your power input from the USB hub.
4. Eject your attached storage device.
It is likely that Windows has automatically turned off the USB Root hub to save power and caused the issue.
The steps below instruct how to configure the USB root hub to stay on during the sleep mode of the upstream computer, to prevent this from happening.
Windows 10 / 8
On your keyboard, press the Windows Key plus X and select Control Panel.
Click Hardware and Sound, then click Power Options.
Click Change plan settings for the plan you want to change.
Click Change advanced power settings.
Click the plus sign (+) next to “USB settings” and “USB selective suspend setting” to expand the options and change the setting to Disabled.
Click OK to apply the setting.
Note: You may need to disconnect and re-connect your USB hub after applying these settings to re-establish the connection.
Windows 7 / Vista
Click the Start button and select Control Panel.
Click Hardware and Sound, then click Power Options.
Click Change plan settings for the plan you want to change.
Click Change advanced power settings.
Click the plus sign (+) next to “USB settings” and “USB selective suspend setting” to expand the options and change the setting to Disabled.
Click OK to apply the setting.
Note: You may need to disconnect and re-connect your USB hub after applying these settings in order to re-establish the connection.
Windows XP
On your desktop, right-click the My Computer icon and select Properties.
Click the Device Manager tab.
Expand Universal Serial Bus controllers by clicking the arrow to the left of it.
Right-click the first USB Root Hub device and select Properties.
Click the Power Management tab.
Clear the box next to Allow the computer to turn off this device to save power.
Click OK to apply the setting.
Repeat steps 4-7 for any remaining devices in the Universal Serial Bus Controllers section with “Root Hub” in the name.
Note: You may need to disconnect and re-connect your USB hub after applying these settings to re-establish the connection.
We suggest you to rearrange the monitors in Windows to match the physical location of them on your desk.
Go through the following:
Windows 10 / 8
1. Press the Windows Key plus X and select Control Panel.
2. Click Appearance and Personalization, then click Display.
3. Click the Resolution or Adjust Resolution option from the left column, which will display your monitors as numbered icons.
4. Click Identify to display the numbers on each connected monitor, showing how the operating system has assigned their positions.
5. Click and drag the monitor icons to best match the physical location of monitors.
6. Click OK to apply the changes and close the window.
Windows 7 / Vista
1. Click the Start button and select Control Panel.
2. Click Appearance and Personalization, then click Display.
3. Click the Resolution or Adjust Resolution option from the left column, which will display your monitors as numbered icons.
4. Click Identify to display the numbers on each connected monitor, showing how the operating system has assigned their positions.
5. Click and drag the monitor icons to best match your physical setup.
6. Click OK to apply the changes and close the window.
Windows XP
1. Click the Start button and select Control Panel.
2. Double-click Display.
3. Click the Settings tab, which will display your monitors as numbered icons.
4. Click Identify to display the numbers on each connected monitor, showing how the operating system has assigned their positions.
5. Click and drag the monitor icons to best match your physical setup.
6. Click OK to apply the changes and close the window.
Go through the following:
Windows 10 / 8
1. Press the Windows Key plus X and select Control Panel.
2. Click Appearance and Personalization, then click Display.
3. Click the Resolution or Adjust Resolution option from the left column.
4. Expand the drop-down menu next to “Multiple displays” and select Duplicate these Displays.
5. Click OK to apply the changes and close the window.
Windows 7 / Vista
1. Click the Start button and select Control Panel.
2. Click Appearance and Personalization, then click Display.
3. Click the Resolution or Adjust Resolution option from the left column.
4. Expand the drop-down menu next to “Multiple displays” and select Duplicate these Displays.
5. Click OK to apply the changes and close the window.
Windows XP
1. Click the Start button and select Control Panel.
2. Double-click Display.
3. Click the Settings tab.
4. Un-check the box beside Extend my Windows desktop onto this monitor.
5. Click OK to apply the changes and close the window.
If your USB hub equips the USB Power Delivery (PD) port, you can use it to charge your laptop computer by connecting to a PD power adapter.
For more information on what the requirements are and about how much power this laptop docking station provides, refer to the product specifications.
MacBook and Mac Mini using the Apple Silicon chip support only one single external display over the Thunderbolt 3 ports, even when connected to a Thunderbolt 3 hub or adapter with multiple video output. Turning off the laptop display or using clamshell mode does not change this.
Using a USB-C DisplayLink-based hub or video adapter may be an option to allow more than one external display with an Apple M1-based Mac device.
Note: this limitation does not affect Intel-based Macs with Thunderbolt 3.