

Cat 6 UTP RJ45 플랫 이더넷 케이블(10M 이상)
Enhance your network setup with our Category 6 LAN Cable, designed to provide high-speed Gigabit Ethernet connectivity while maintaining an elegant and discreet appearance. Perfect for modern interiors, this cable ensures a reliable connection without compromising on aesthetics.

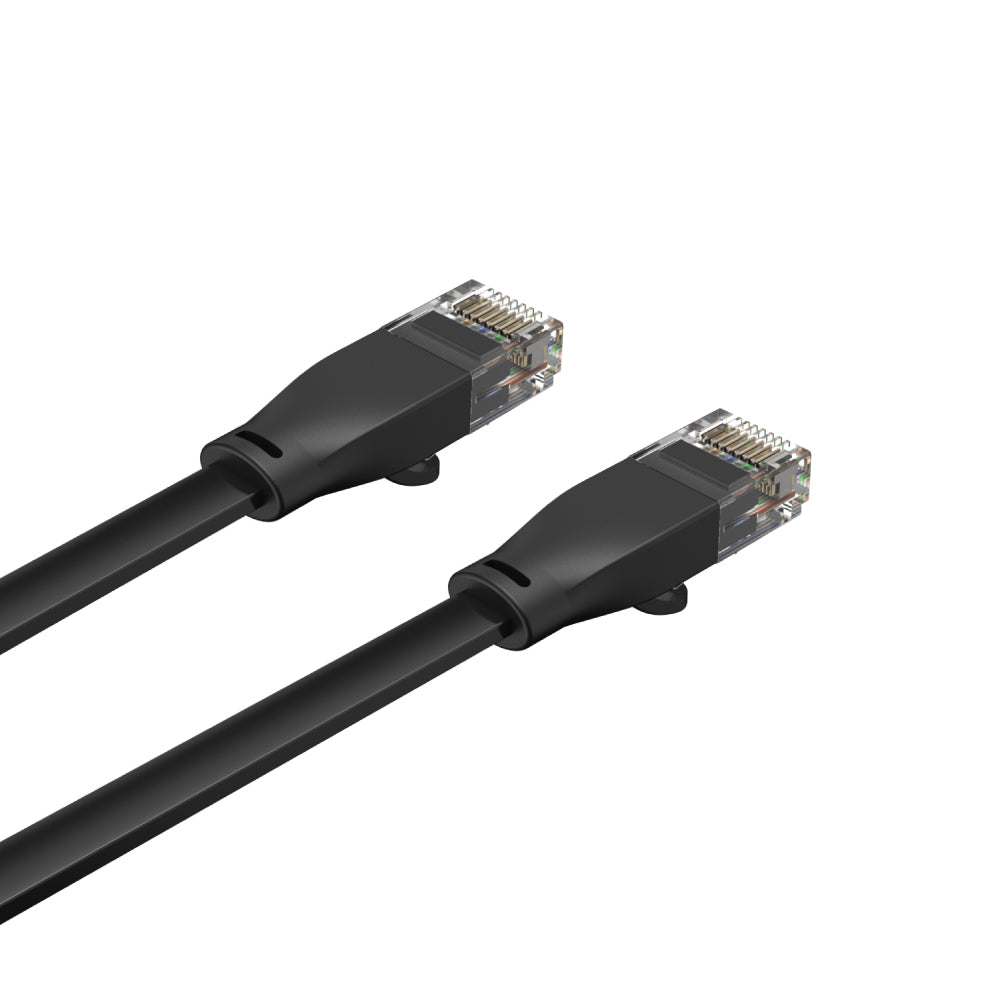
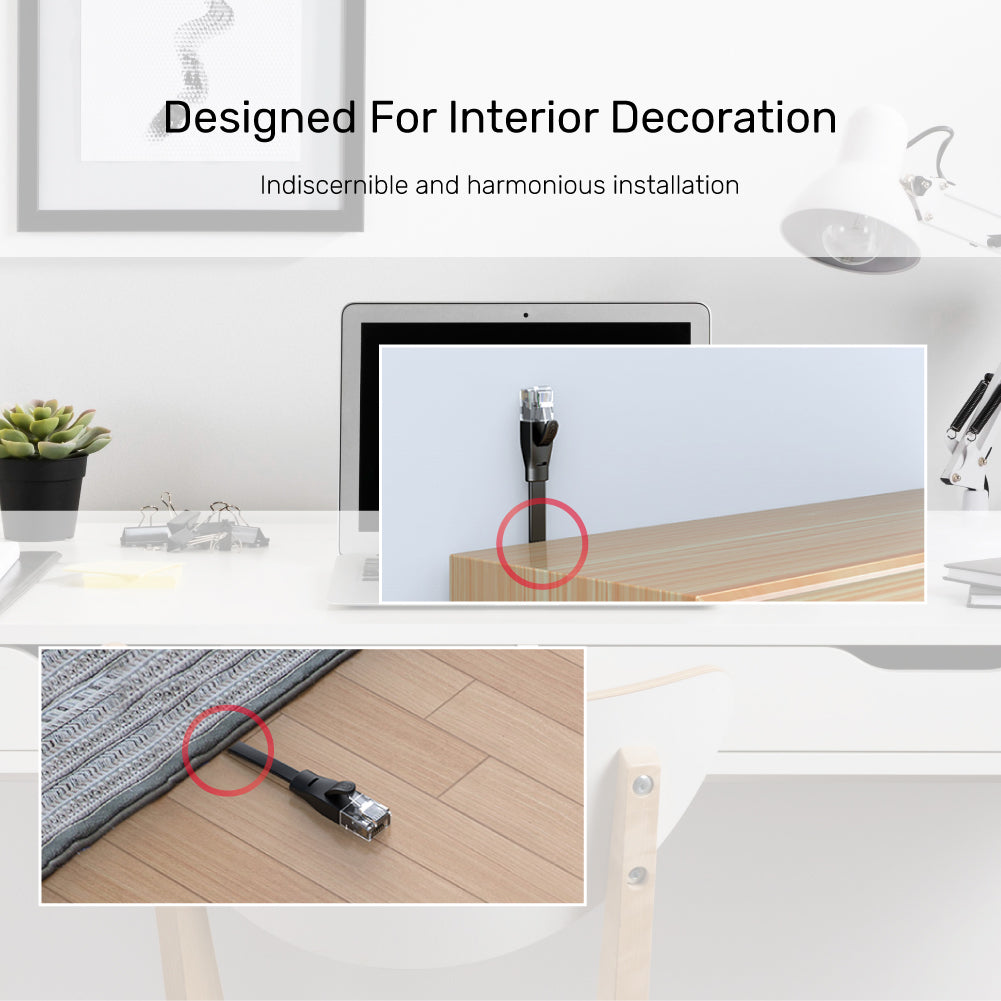
Ultra-Slim Cat 6 Flat Ethernet Cable for Seamless Interior Integration
At just 1.8mm thick, this Cat 6 flat cable blends discreetly into any décor for indiscernible, harmonious installation. Certified for Gigabit Ethernet with gold-plated RJ45 connectors, it delivers fast, stable 1Gbps connectivity—ideal for homes and offices seeking both style and performance.

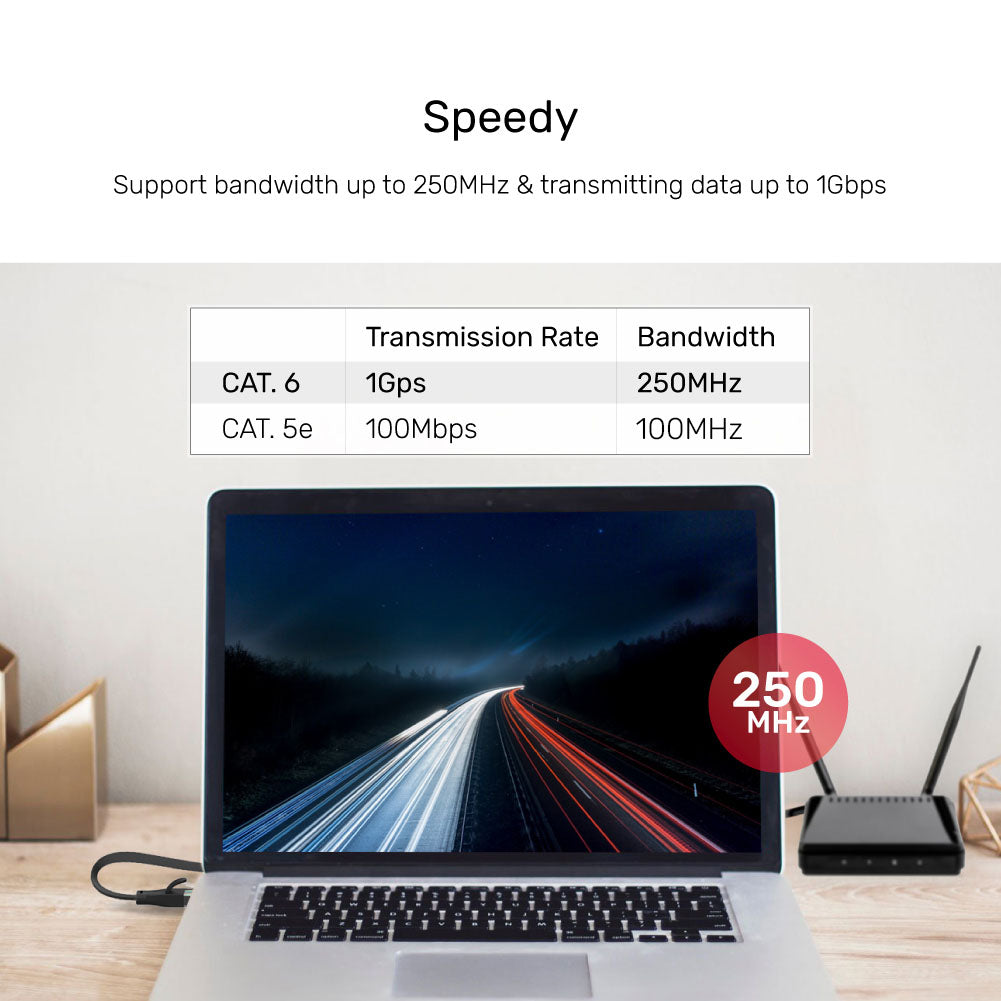
Fast, Reliable Cat 6 Networking with Superior Bandwidth
Enjoy high-speed data transmission up to 1Gbps and robust 250MHz bandwidth—this Cat 6 cable ensures speedy, stable connections, outperforming Cat 5e for seamless streaming, gaming, and work.

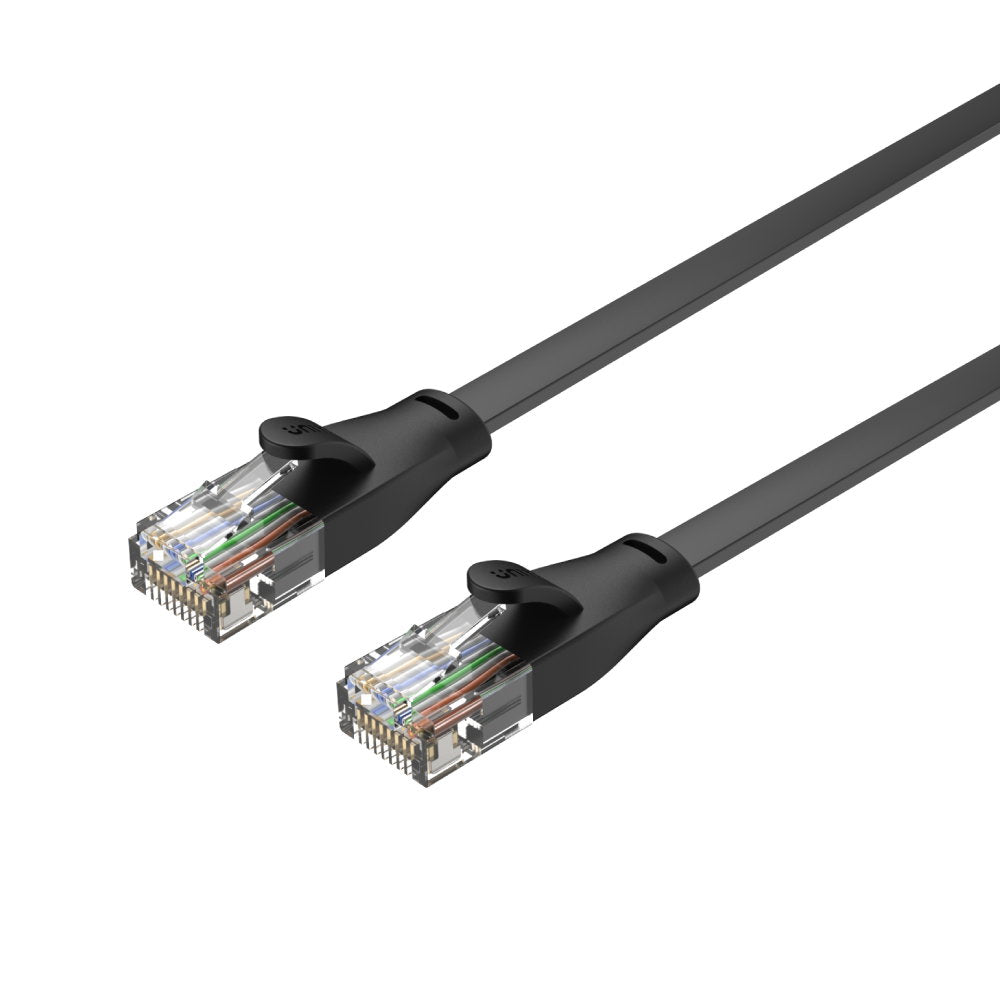
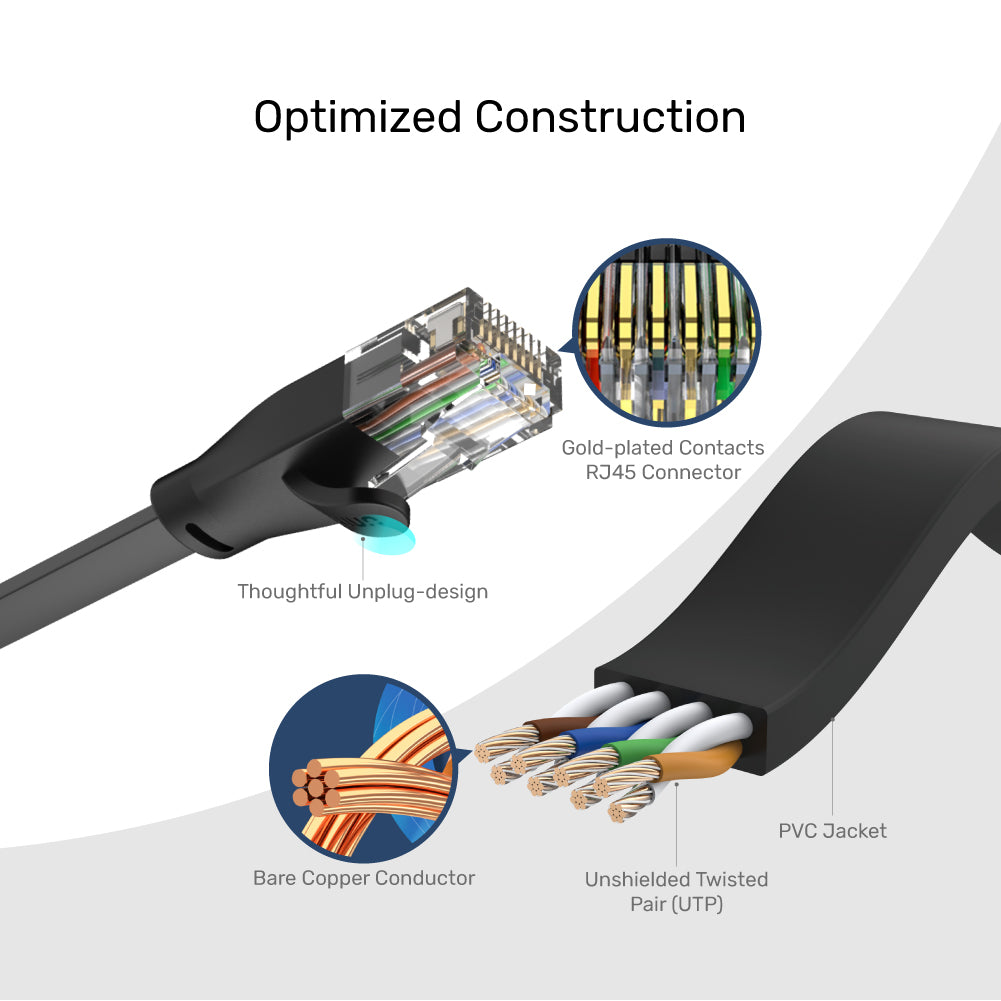
Premium Flat Cat 6 Cable with Optimized Construction
Engineered for performance, this Cat 6 cable features gold-plated RJ45 contacts, bare copper conductors, and a durable PVC jacket. Its thoughtful unplug design and unshielded twisted pair (UTP) construction ensure fast, stable Gigabit connectivity and easy installation in any environment.

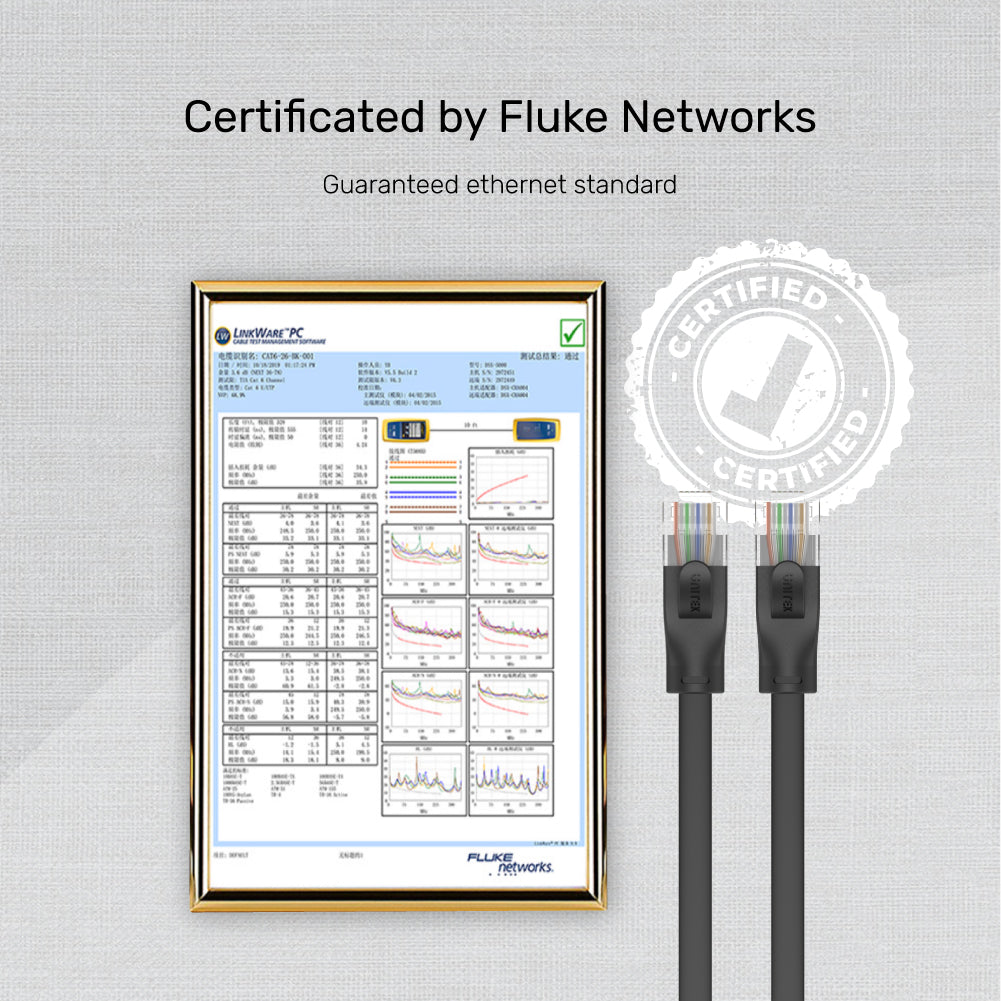
Certified Reliability: Fluke Networks Tested Cat 6 Cable
This Cat 6 cable is Fluke Networks certified, ensuring it meets strict Ethernet standards for guaranteed performance and stable, high-speed connectivity in any environment.
Enhance your network setup with our Category 6 LAN Cable, designed to provide high-speed Gigabit Ethernet connectivity while maintaining an elegant and discreet appearance. Perfect for modern interiors, this cable ensures a reliable connection without compromising on aesthetics.
Ultra-Slim Cat 6 Flat Ethernet Cable for Seamless Interior Integration
At just 1.8mm thick, this Cat 6 flat cable blends discreetly into any décor for indiscernible, harmonious installation. Certified for Gigabit Ethernet with gold-plated RJ45 connectors, it delivers fast, stable 1Gbps connectivity—ideal for homes and offices seeking both style and performance.
Fast, Reliable Cat 6 Networking with Superior Bandwidth
Enjoy high-speed data transmission up to 1Gbps and robust 250MHz bandwidth—this Cat 6 cable ensures speedy, stable connections, outperforming Cat 5e for seamless streaming, gaming, and work.
Premium Flat Cat 6 Cable with Optimized Construction
Engineered for performance, this Cat 6 cable features gold-plated RJ45 contacts, bare copper conductors, and a durable PVC jacket. Its thoughtful unplug design and unshielded twisted pair (UTP) construction ensure fast, stable Gigabit connectivity and easy installation in any environment.
Certified Reliability: Fluke Networks Tested Cat 6 Cable
This Cat 6 cable is Fluke Networks certified, ensuring it meets strict Ethernet standards for guaranteed performance and stable, high-speed connectivity in any environment.
| Ethernet RJ45 Jack | 250MHz |
|---|---|
| Data transfer rate | 1000Mbps |
| Cable Length | 1M |
| Cable Type | RJ45에서 RJ45로 |
| Cable OD | 6.0mm x 1.8mm |
| Material | Gold-Plated, Bare Copper, PVC |
| Colour | Black |
- 1 x Cat.6 UTP 플랫 케이블
Choose options