

305M의 Cat 5e UTP RJ45 이더넷 케이블
Optimize your network performance with our Cat 5e Ethernet Cable, meticulously designed to support high-speed data transmission for various applications. With a generous length of 305 meters, this cable is perfect for customizing your network setup, ensuring reliable connections throughout your space.

UNITEK Cat 5e UTP Ethernet Cable – 305m, 100MHz, Gigabit Speed for Reliable Connectivity
This grey Cat 5e UTP cable (305m) delivers Gigabit speeds (100MHz bandwidth) with bare copper conductors for stable performance. Ideal for routers, PCs, and more, it meets Fluke industrial standards and features a durable PVC jacket.

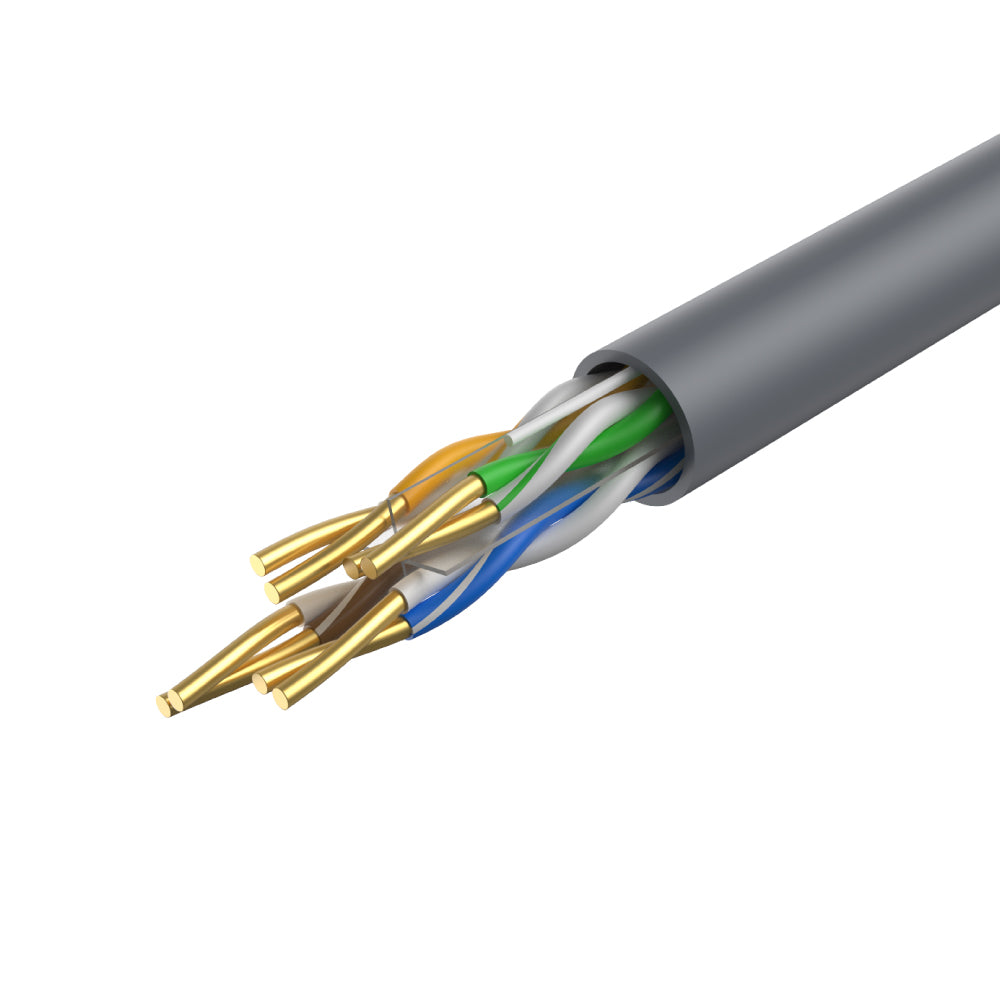
305M High-Speed Bare Copper, Fluke Certified
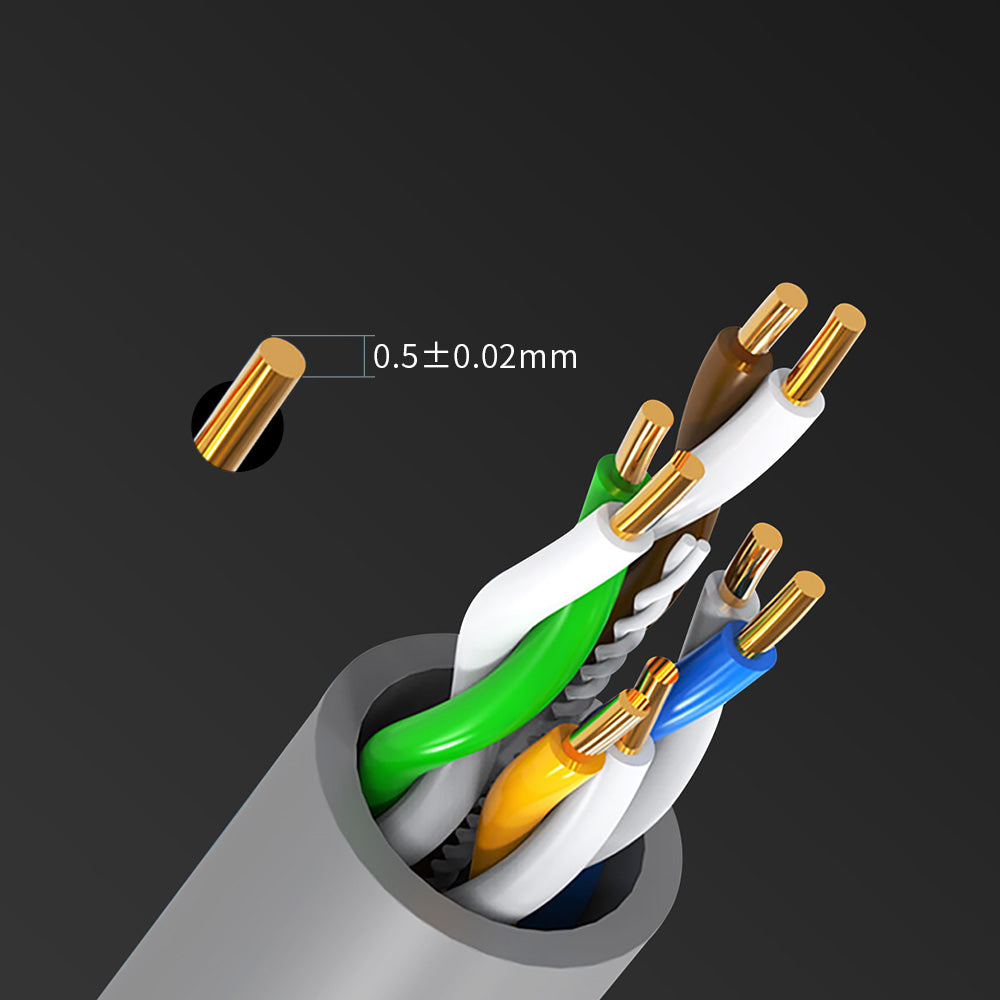
This 305M Cat 5e UTP Ethernet cable features 24AWG bare copper conductors and unshielded twisted pair design for stable 1Gbps data transfer at 100MHz bandwidth. Compact and flexible, it meets Fluke Networks industrial standards—ideal for custom-length connections in computers, laptops, printers, modems, and routers.

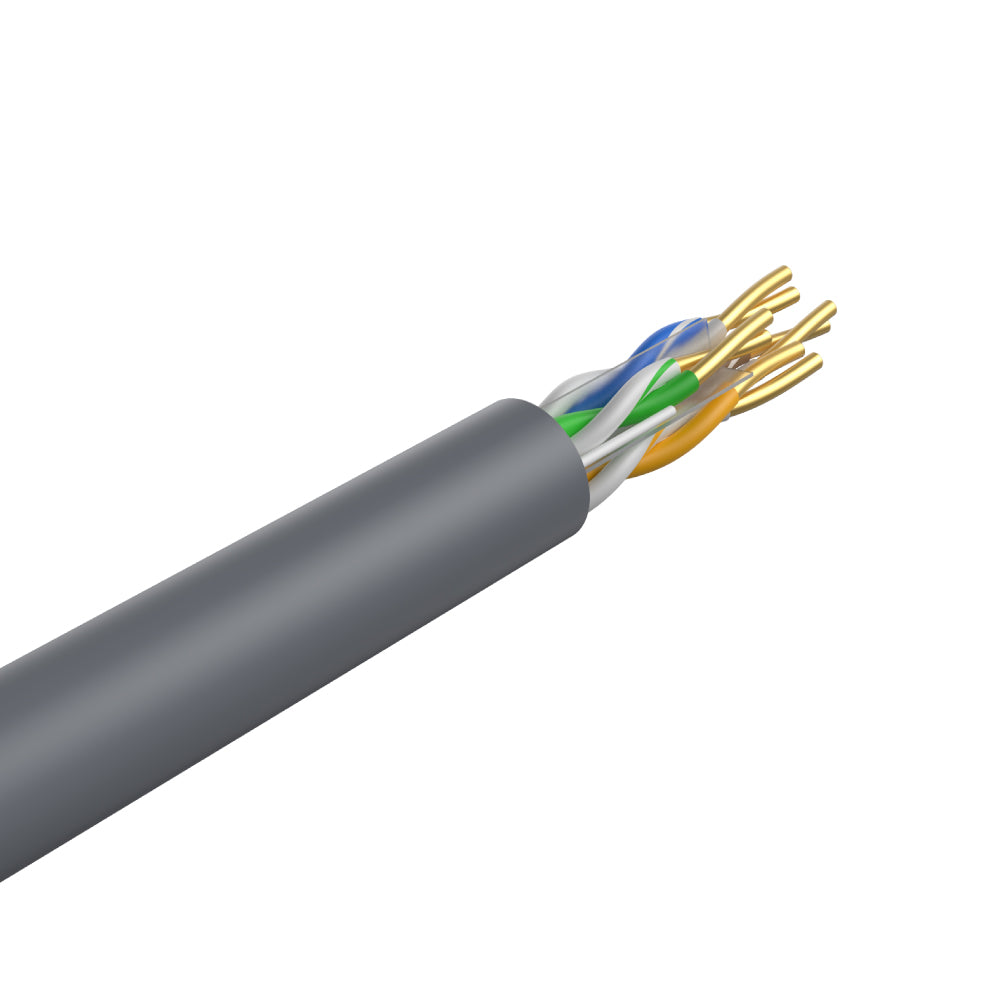
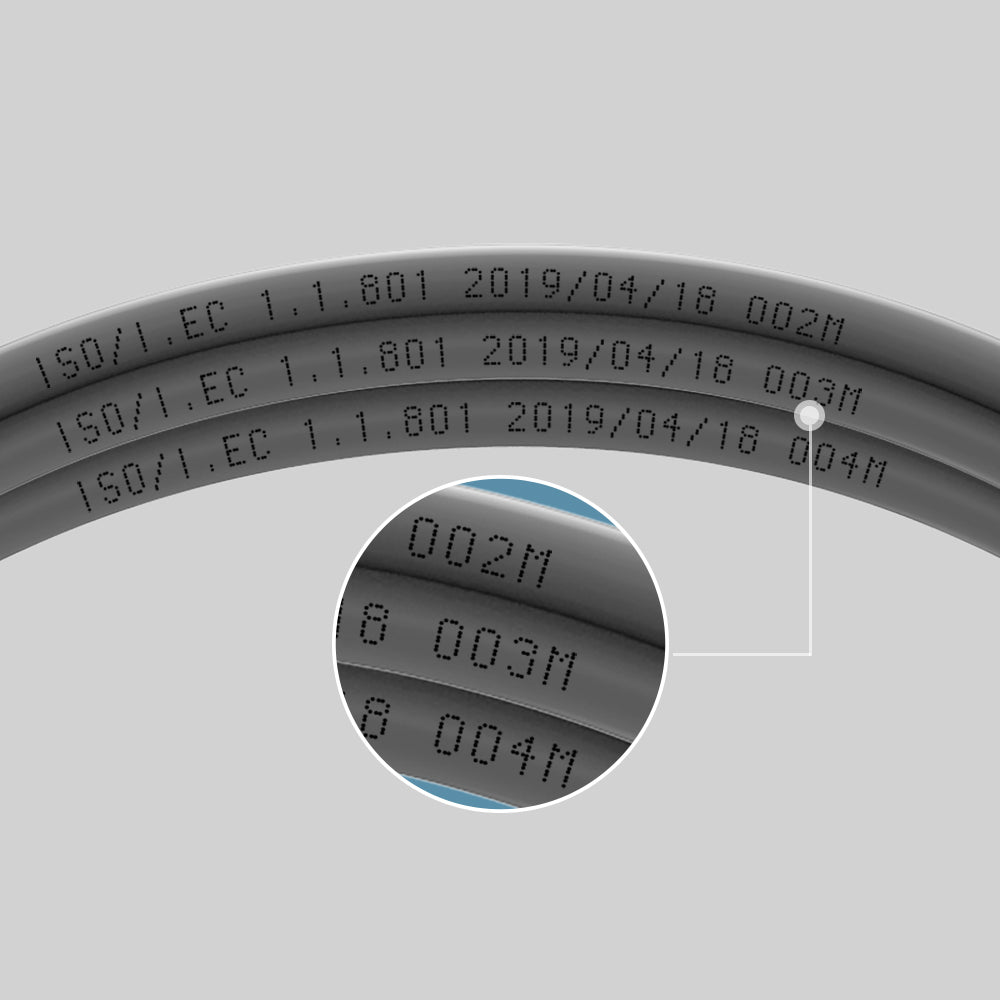
Easy Length Marking for Precise Installation
This Cat 5e UTP Ethernet cable features clear meter-by-meter length markings, making it simple to measure and cut precise cable runs. Perfect for custom installations, it delivers stable 1Gbps data transfer, uses 24AWG bare copper conductors, and meets Fluke Networks standards for reliable performance.

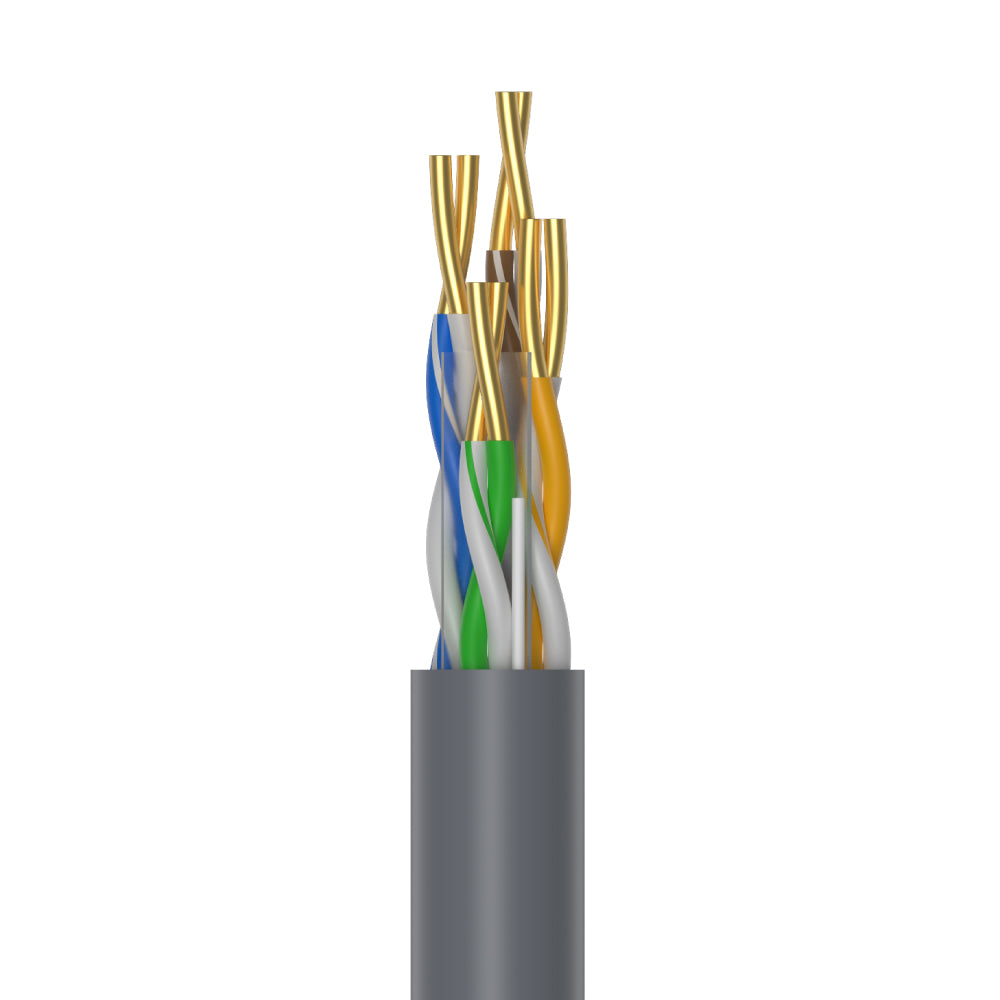
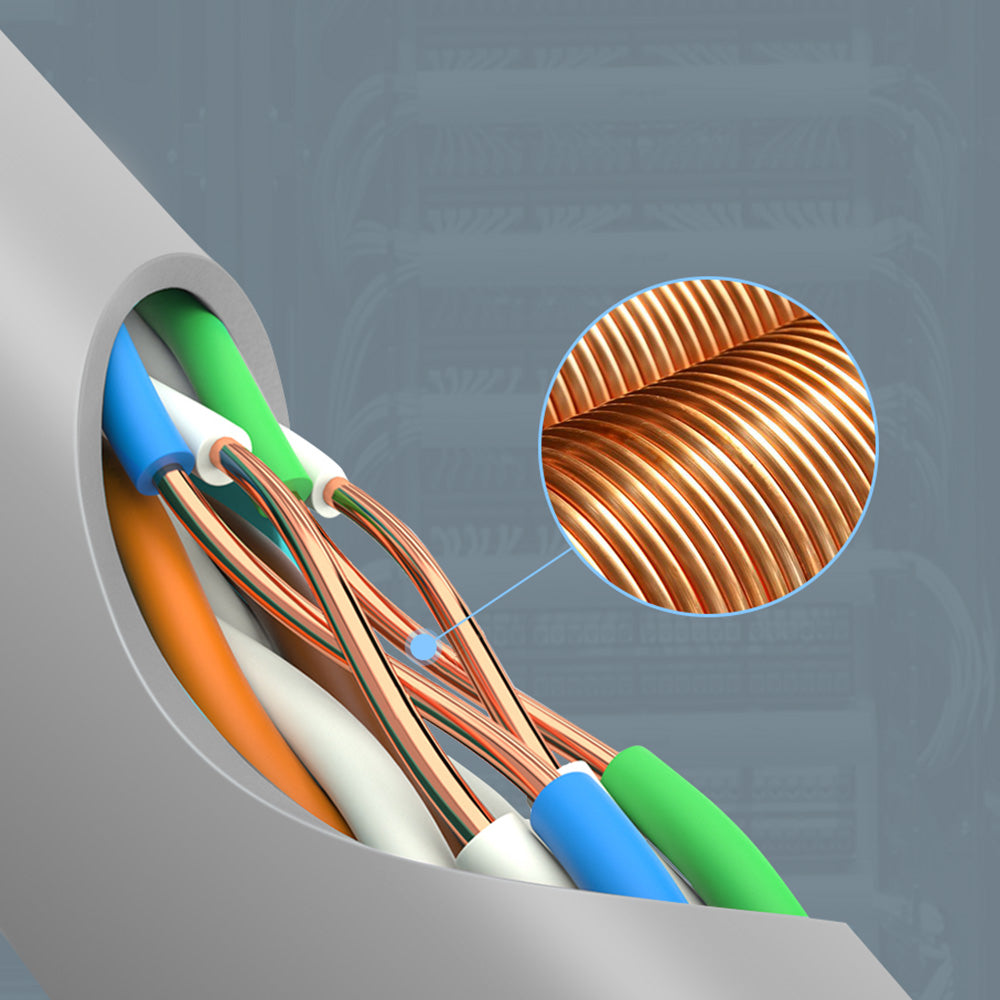
Pure Bare Copper for Reliable Performance
Featuring 24AWG bare copper conductors and unshielded twisted pairs, this Cat 5e cable ensures fast, stable 1Gbps data transfer and superior signal quality—ideal for custom network installations in homes and offices.
Optimize your network performance with our Cat 5e Ethernet Cable, meticulously designed to support high-speed data transmission for various applications. With a generous length of 305 meters, this cable is perfect for customizing your network setup, ensuring reliable connections throughout your space.
UNITEK Cat 5e UTP Ethernet Cable – 305m, 100MHz, Gigabit Speed for Reliable Connectivity
This grey Cat 5e UTP cable (305m) delivers Gigabit speeds (100MHz bandwidth) with bare copper conductors for stable performance. Ideal for routers, PCs, and more, it meets Fluke industrial standards and features a durable PVC jacket.
305M High-Speed Bare Copper, Fluke Certified
This 305M Cat 5e UTP Ethernet cable features 24AWG bare copper conductors and unshielded twisted pair design for stable 1Gbps data transfer at 100MHz bandwidth. Compact and flexible, it meets Fluke Networks industrial standards—ideal for custom-length connections in computers, laptops, printers, modems, and routers.
Easy Length Marking for Precise Installation
This Cat 5e UTP Ethernet cable features clear meter-by-meter length markings, making it simple to measure and cut precise cable runs. Perfect for custom installations, it delivers stable 1Gbps data transfer, uses 24AWG bare copper conductors, and meets Fluke Networks standards for reliable performance.
Pure Bare Copper for Reliable Performance
Featuring 24AWG bare copper conductors and unshielded twisted pairs, this Cat 5e cable ensures fast, stable 1Gbps data transfer and superior signal quality—ideal for custom network installations in homes and offices.
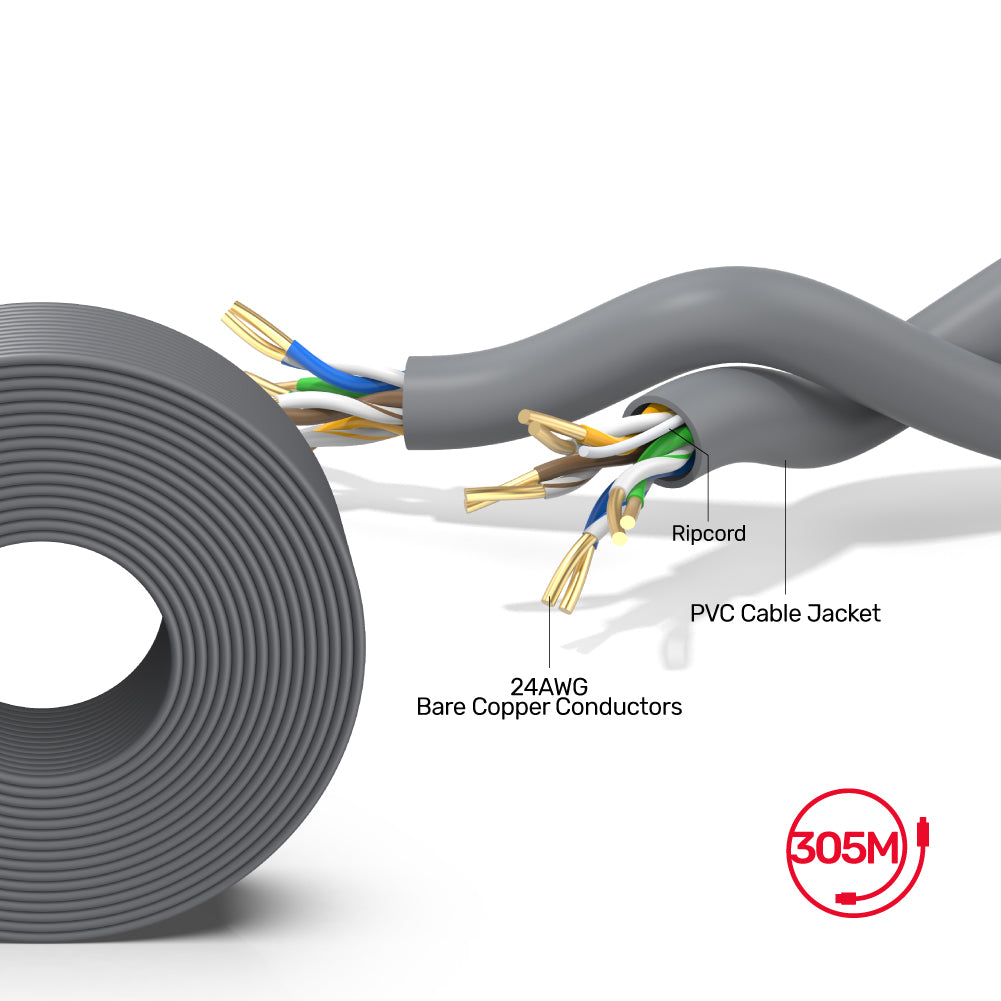
| Network Speed | 100MHz |
|---|---|
| Data transfer rate | 1000Mbps |
| Cable Length | 3억 5천만 |
| Material | Bare Copper, PVC, Ripcord |
| Colour | Space Grey |
- 1 x Cat 5e UTP 이더넷 케이블
- 1 x 사용자 설명서
Choose options