
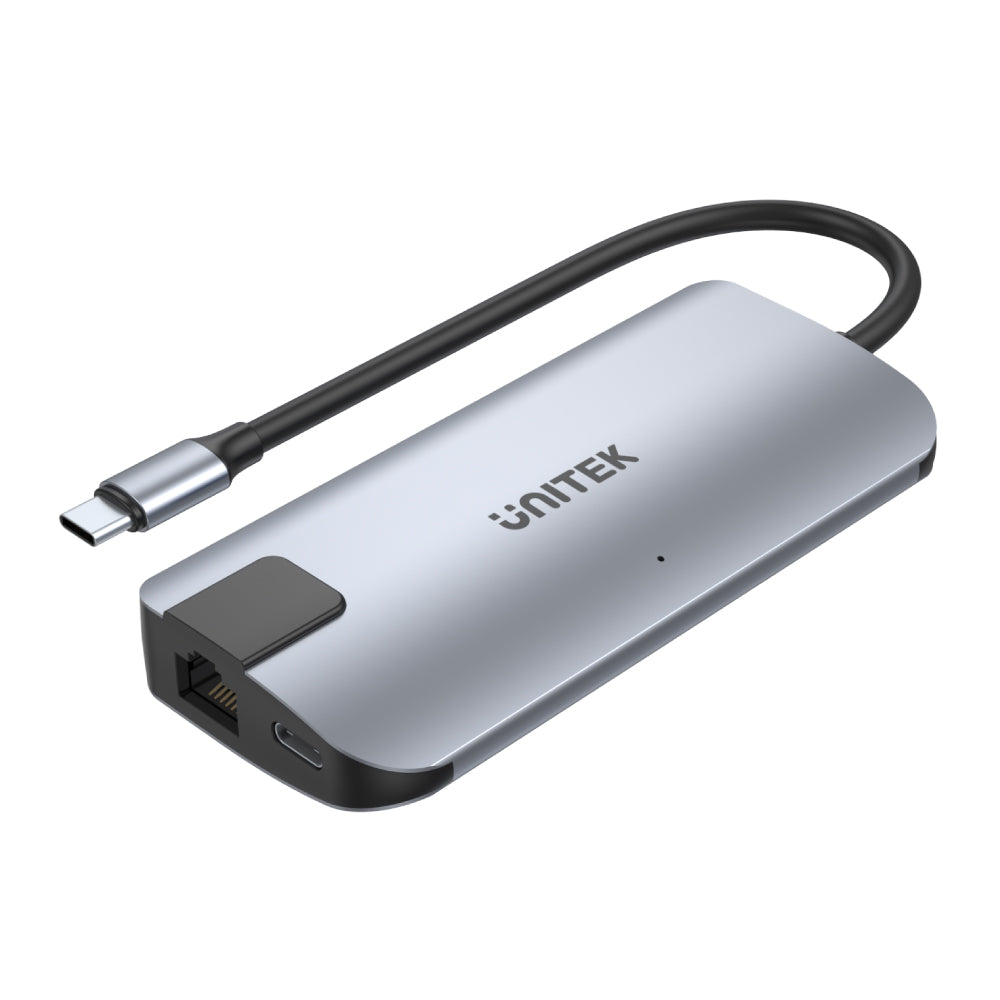
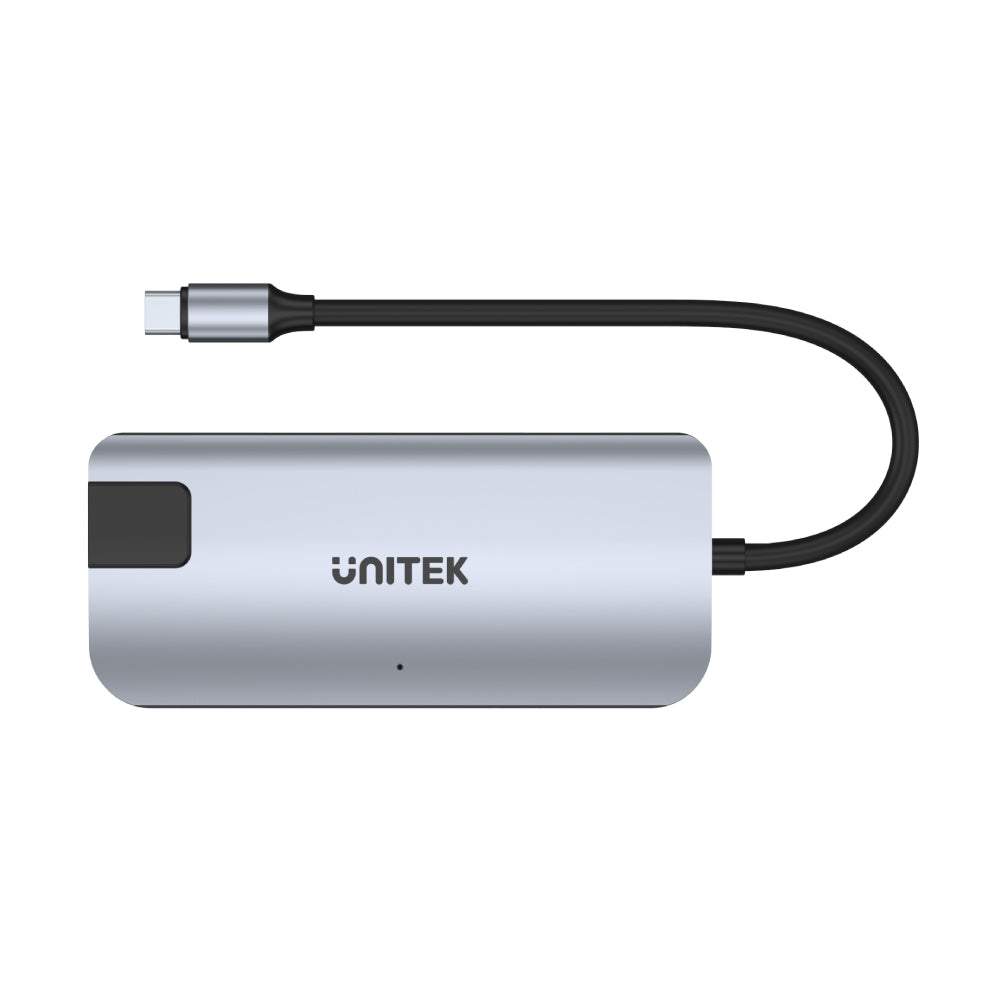

uHUB P5+ 5-in-1 USB-C イーサネット ハブ、HDMI および 100W 電力供給付き
Discover unparalleled connectivity and performance with our USB 3.2 Gen2 Hub, meticulously crafted to support today’s advanced devices and ensure smooth multitasking for your digital lifestyle.

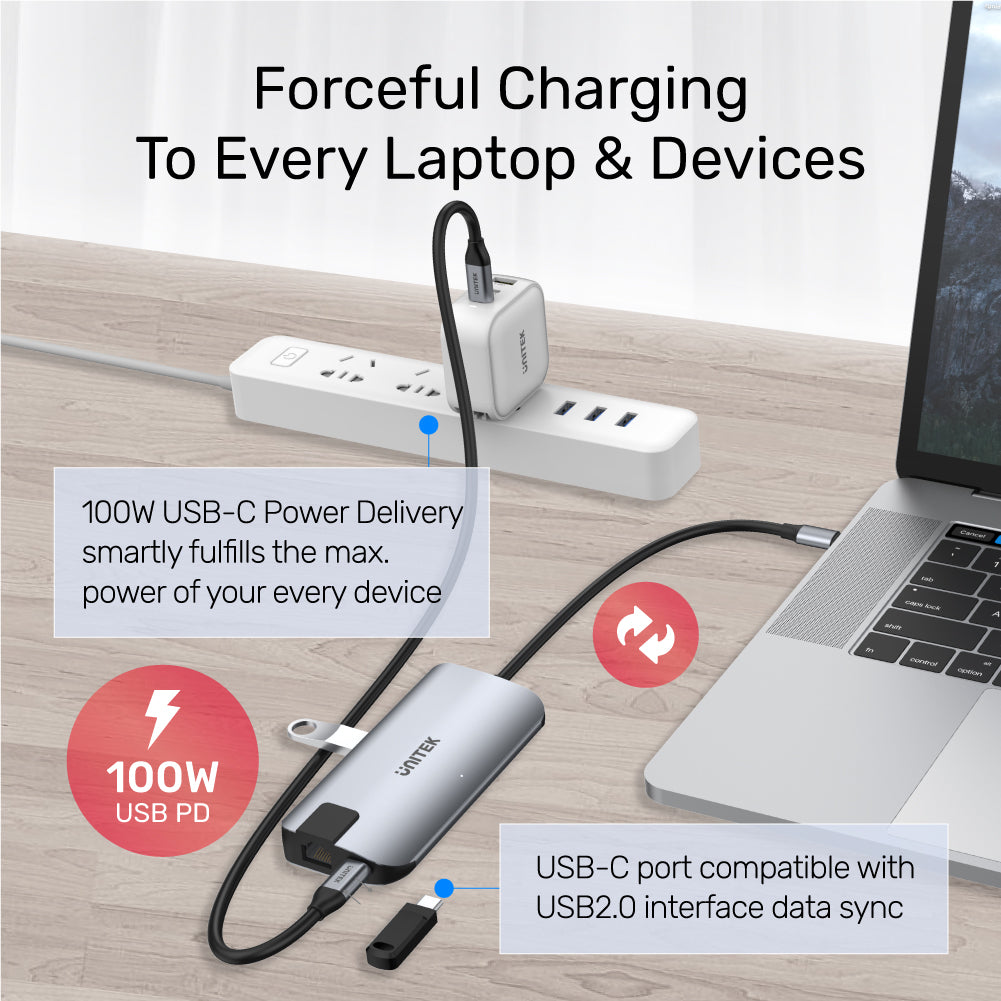
Forceful 100W Charging & High-Speed Connectivity in One Sleek USB-C Hub
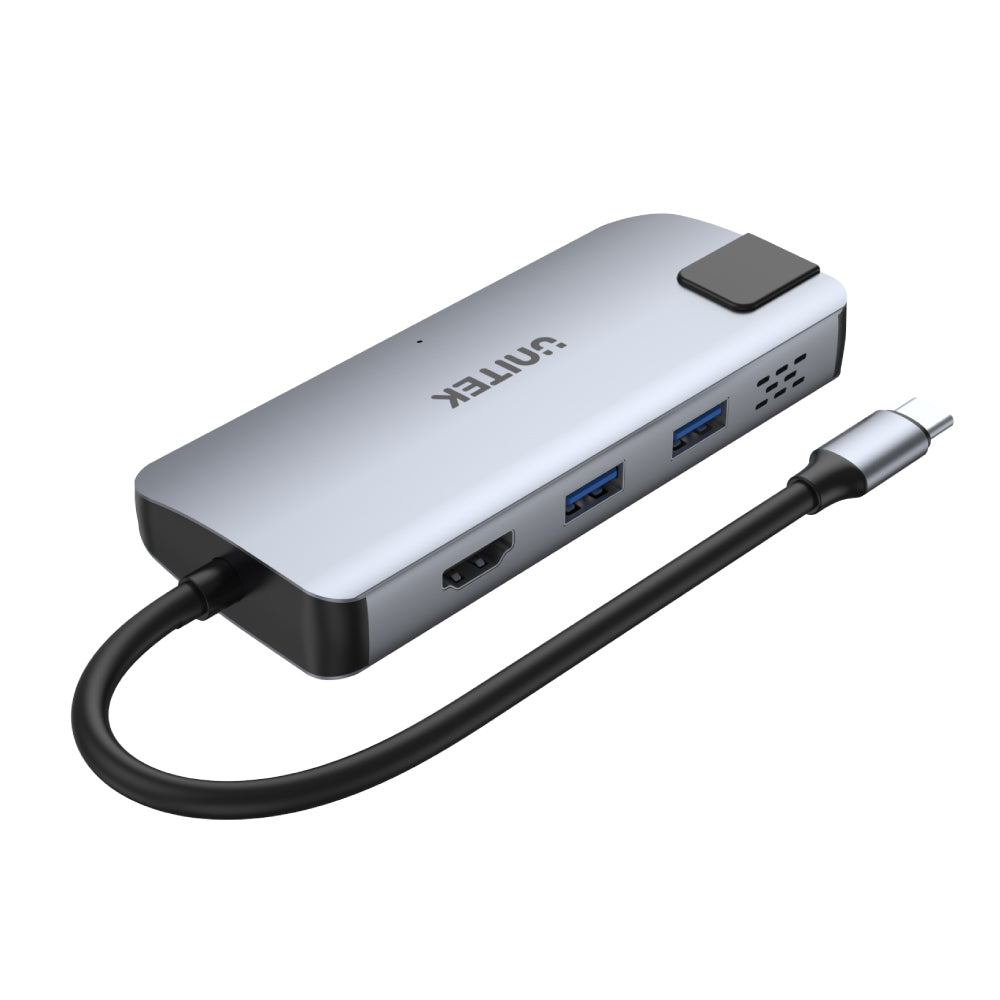
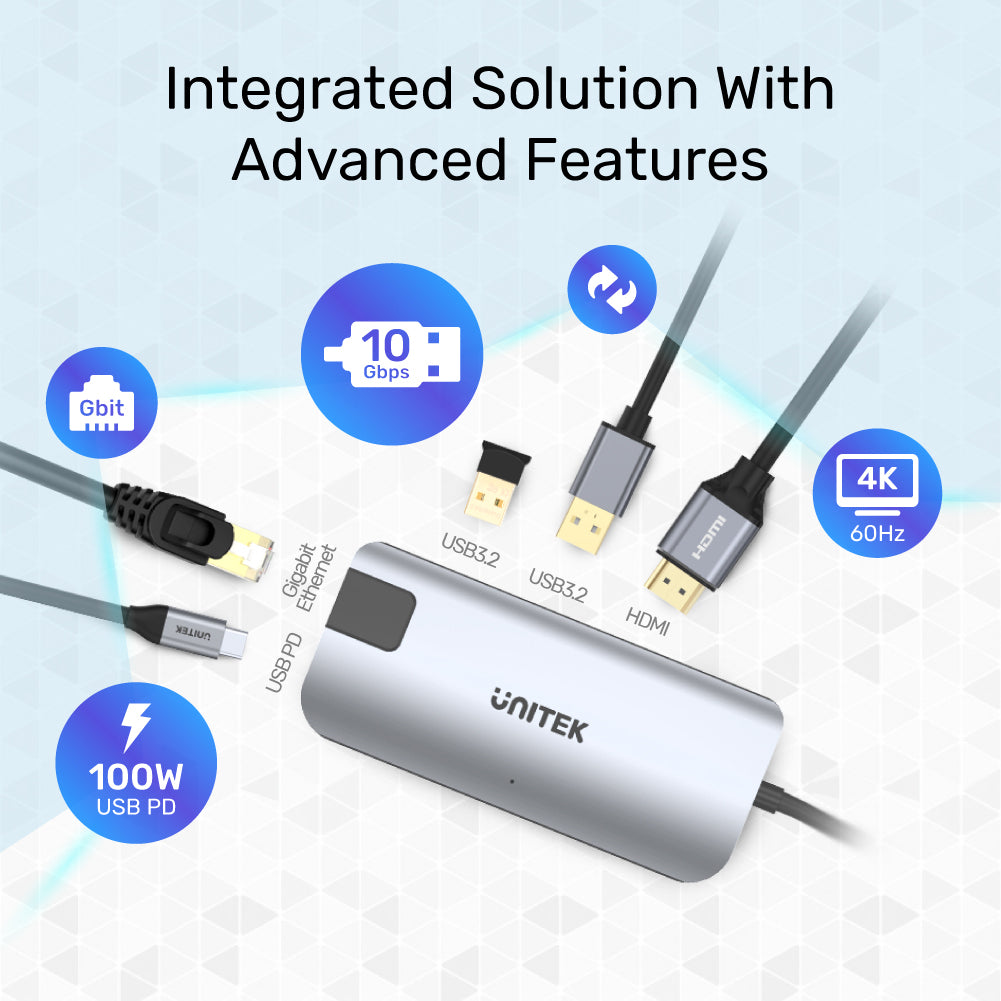
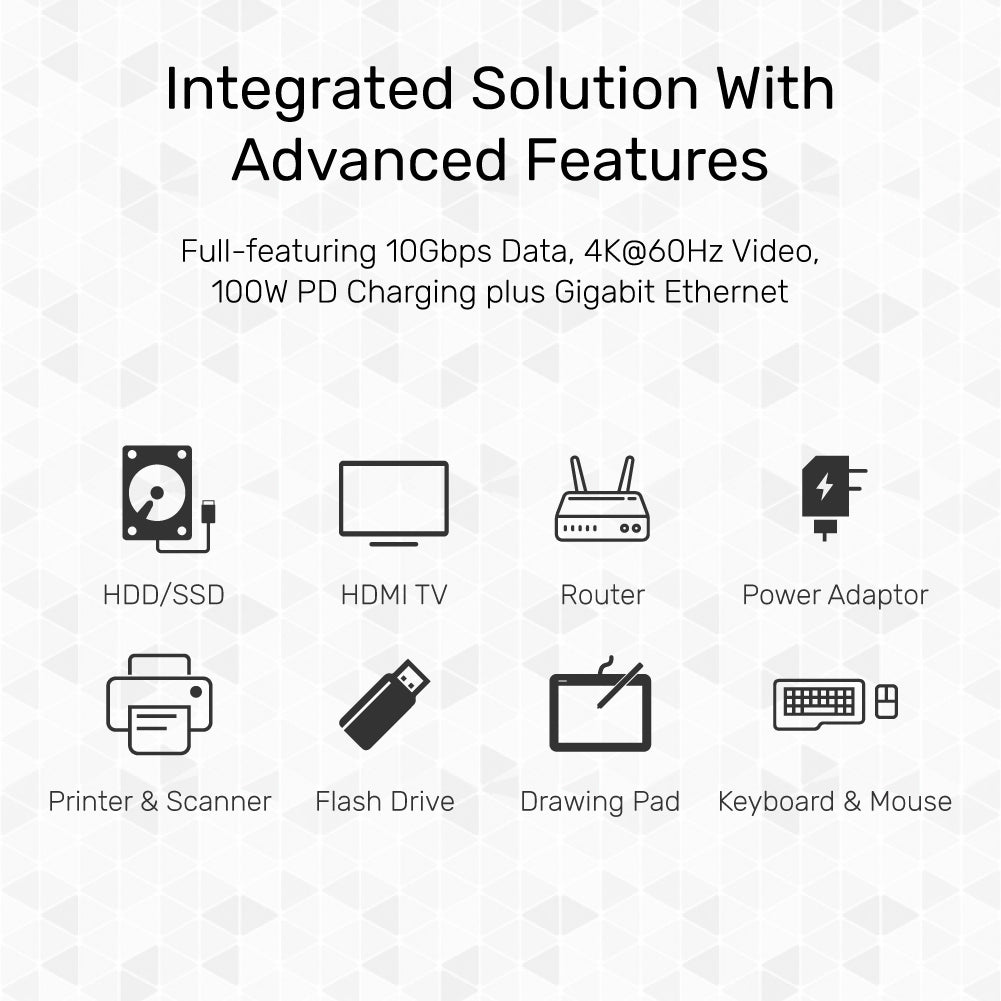
Power up every device with the uHUB P5+ 5-in-1 USB-C Ethernet Hub. Enjoy 100W USB-C Power Delivery for fast laptop charging, dual 10Gbps USB 3.2 ports, 4K@60Hz HDMI output, Gigabit Ethernet, and USB 2.0 data sync—all in a durable, plug-and-play aluminium-alloy design.

All-in-One USB-C Hub: 100W PD, 10Gbps, 4K HDMI & Gigabit Ethernet
Experience seamless connectivity with the UNITEK uHUB P5+ 5-in-1 USB-C Hub. Get ultra-fast 10Gbps data transfer, 100W Power Delivery charging, 4K 60Hz HDMI output, Gigabit Ethernet, and dual USB 3.2 ports—all in one compact, advanced solution.

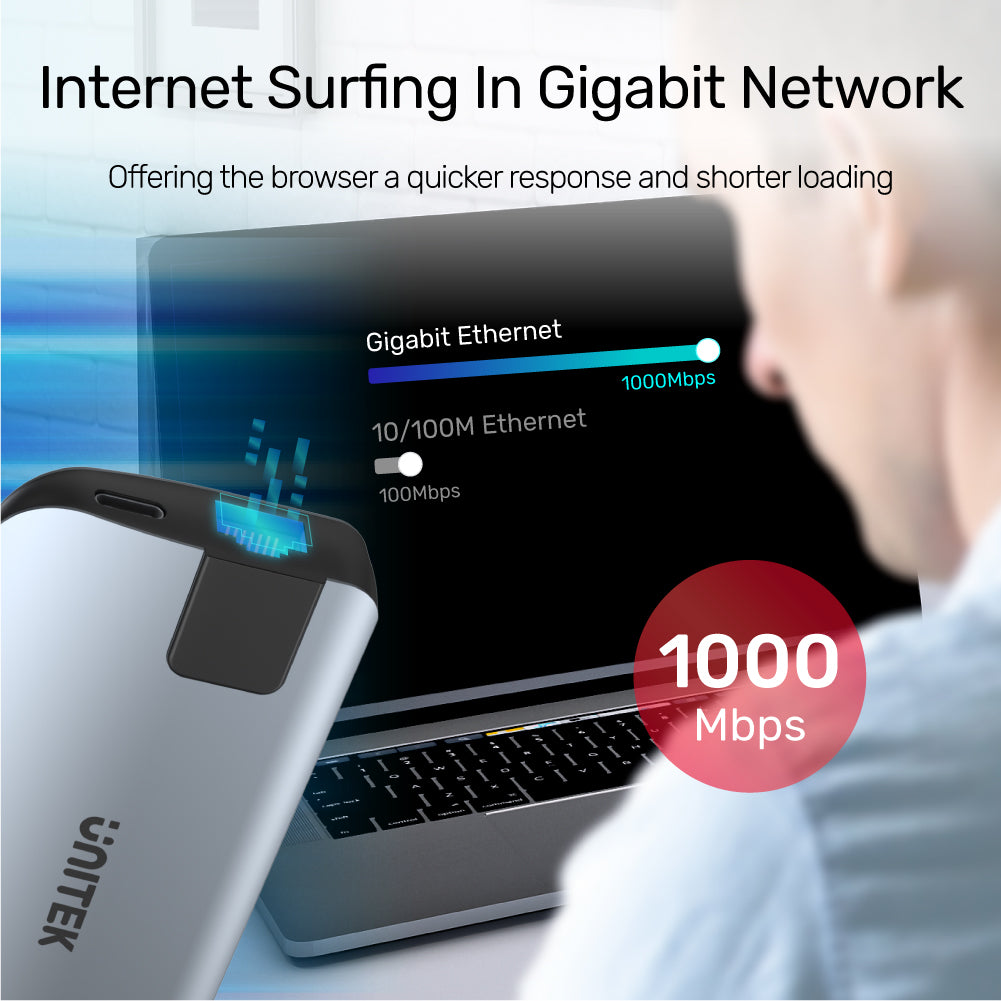
Blazing-Fast Gigabit Ethernet for Seamless Browsing
Enjoy ultra-responsive internet with the UNITEK uHUB P5+ 5-in-1 USB-C Hub, featuring a dedicated Gigabit Ethernet port for stable, high-speed 1000Mbps connectivity—perfect for smooth streaming, fast downloads, and lag-free online work.

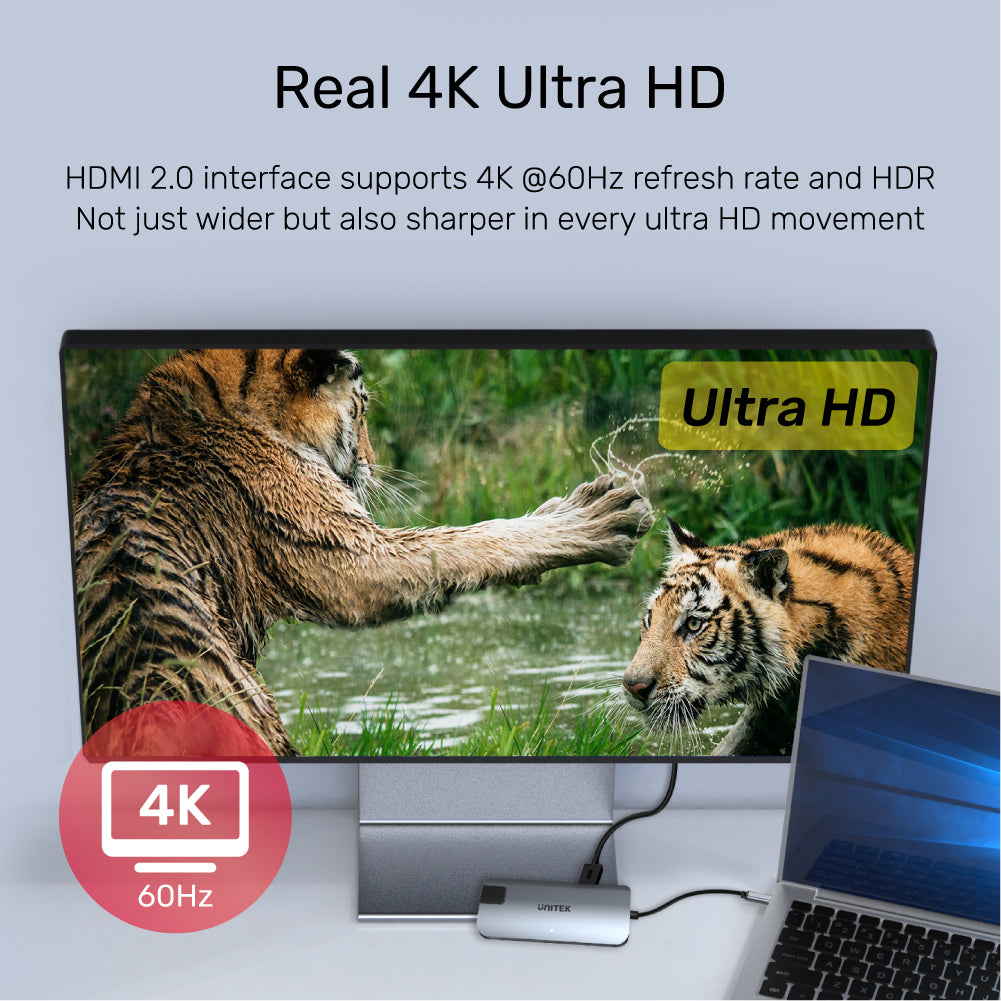
Stunning 4K Ultra HD Display with 60Hz HDR Support
Unlock vivid visuals with the UNITEK uHUB P5+ USB-C Hub. Its HDMI 2.0 port delivers true 4K resolution at 60Hz with HDR, ensuring every detail is sharper and every movement ultra-smooth for an immersive viewing experience.

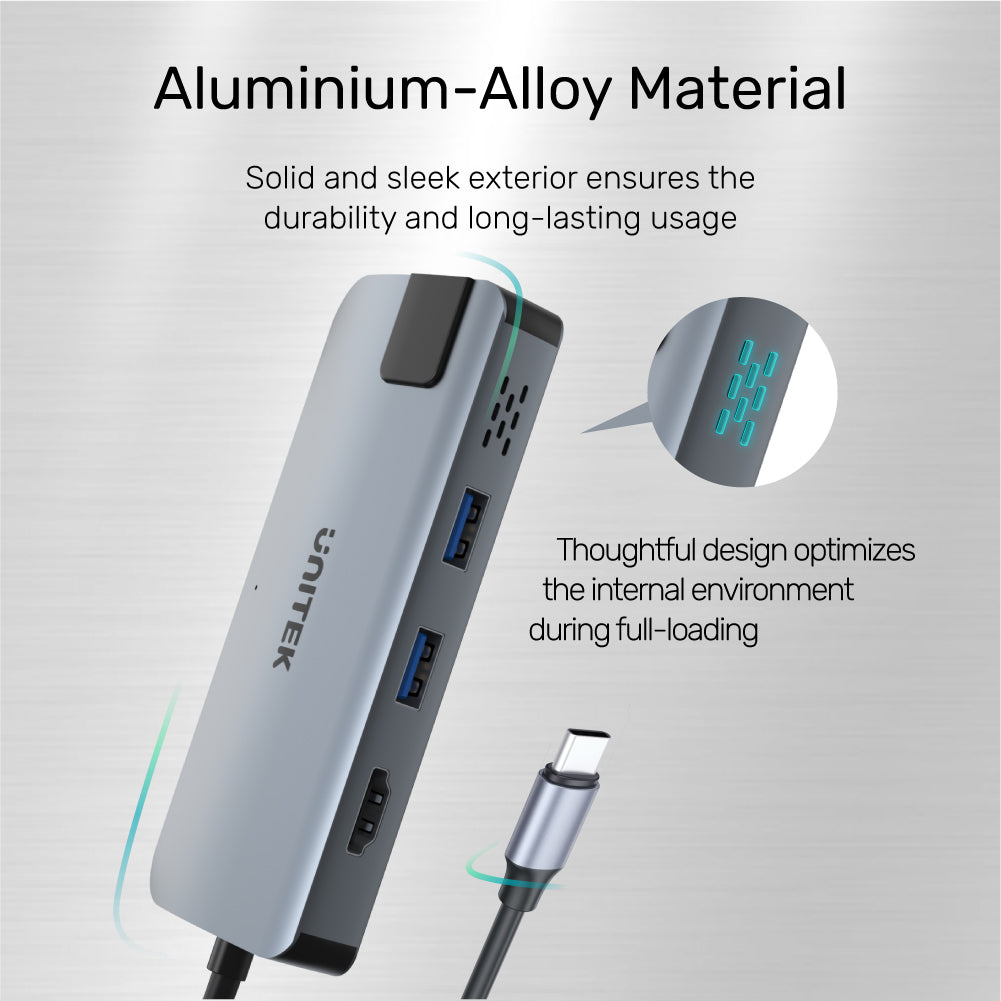
Durable Aluminium-Alloy Build for Long-Lasting Performance
Crafted with a solid aluminium-alloy exterior, the UNITEK uHUB P5+ ensures durability and a sleek look. Its thoughtful design optimizes internal airflow, maintaining performance and stability even during heavy use.
Discover unparalleled connectivity and performance with our USB 3.2 Gen2 Hub, meticulously crafted to support today’s advanced devices and ensure smooth multitasking for your digital lifestyle.
Forceful 100W Charging & High-Speed Connectivity in One Sleek USB-C Hub
Power up every device with the uHUB P5+ 5-in-1 USB-C Ethernet Hub. Enjoy 100W USB-C Power Delivery for fast laptop charging, dual 10Gbps USB 3.2 ports, 4K@60Hz HDMI output, Gigabit Ethernet, and USB 2.0 data sync—all in a durable, plug-and-play aluminium-alloy design.
All-in-One USB-C Hub: 100W PD, 10Gbps, 4K HDMI & Gigabit Ethernet
Experience seamless connectivity with the UNITEK uHUB P5+ 5-in-1 USB-C Hub. Get ultra-fast 10Gbps data transfer, 100W Power Delivery charging, 4K 60Hz HDMI output, Gigabit Ethernet, and dual USB 3.2 ports—all in one compact, advanced solution.
Blazing-Fast Gigabit Ethernet for Seamless Browsing
Enjoy ultra-responsive internet with the UNITEK uHUB P5+ 5-in-1 USB-C Hub, featuring a dedicated Gigabit Ethernet port for stable, high-speed 1000Mbps connectivity—perfect for smooth streaming, fast downloads, and lag-free online work.
Stunning 4K Ultra HD Display with 60Hz HDR Support
Unlock vivid visuals with the UNITEK uHUB P5+ USB-C Hub. Its HDMI 2.0 port delivers true 4K resolution at 60Hz with HDR, ensuring every detail is sharper and every movement ultra-smooth for an immersive viewing experience.
Durable Aluminium-Alloy Build for Long-Lasting Performance
Crafted with a solid aluminium-alloy exterior, the UNITEK uHUB P5+ ensures durability and a sleek look. Its thoughtful design optimizes internal airflow, maintaining performance and stability even during heavy use.
| Works With | Windows 10/11 (32/64bit), Linux kernel 3.x, Mac OS 10.6 or above |
|---|---|
| Host Port Compatibility | USB-C |
| Max Output Resolution | 4K@60Hz |
| HDMI | 1 |
| USB-A | 2 x 10Gbps |
| USB-C | 1 x PD/データ |
| Ethernet RJ45 Jack | 1000MHz |
| Power Supply | 20V5A |
| Power Source | USB-C |
| Dimensions | 115.0mm x 51.0mm x 18.0mm |
| Material | Aluminum Alloy |
| Colour | Space Grey, Black |
- uHUB P5+ 1台
- ユーザーマニュアル x 1
オプションを選択