

SyncStation Marshmallow M.2 USB-C to PCIe/NVMe M.2 SSD オフライン クローン付きデュアル ベイ ドッキング ステーション
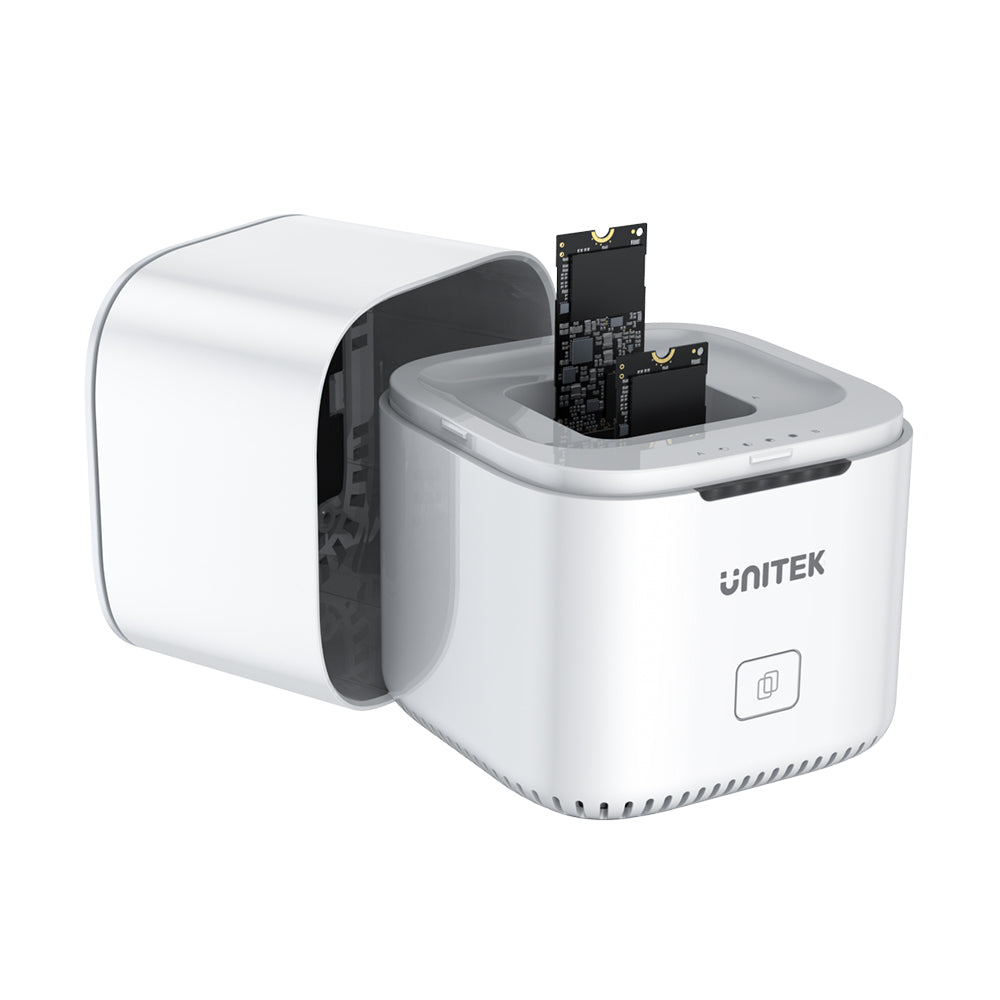
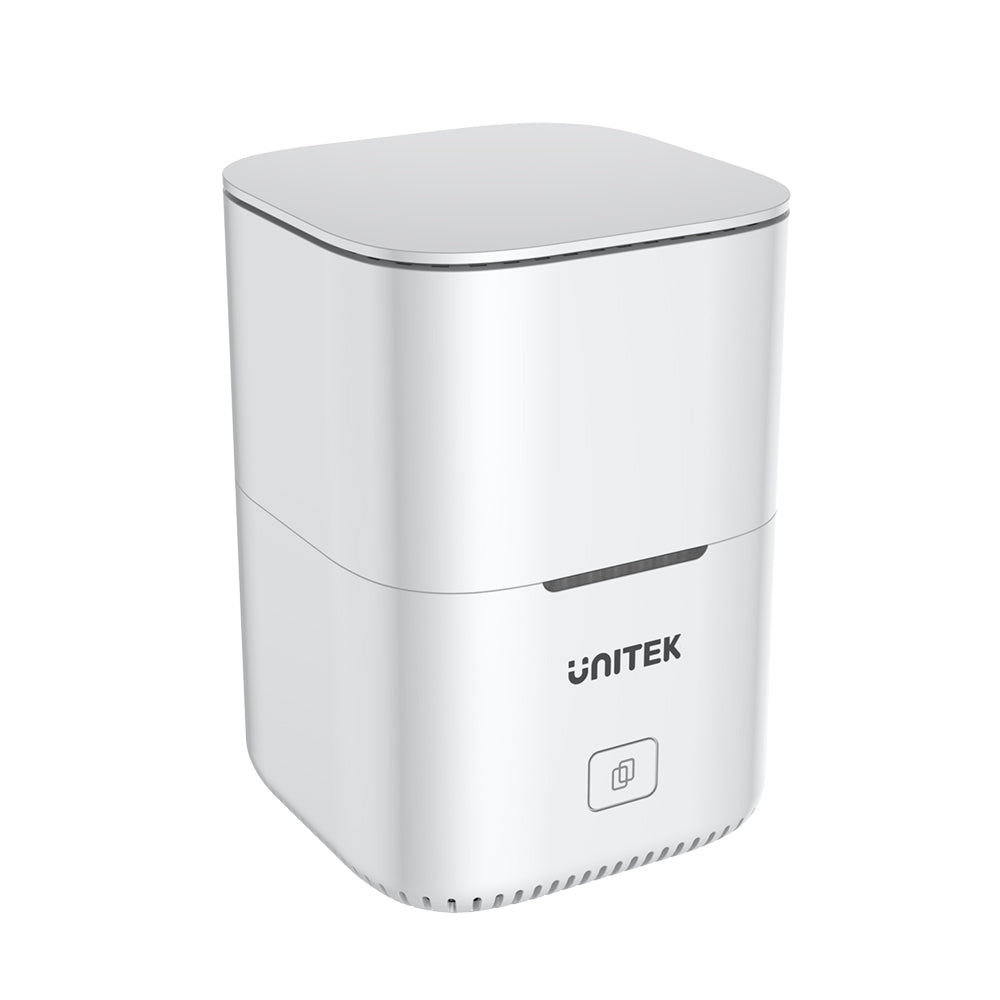
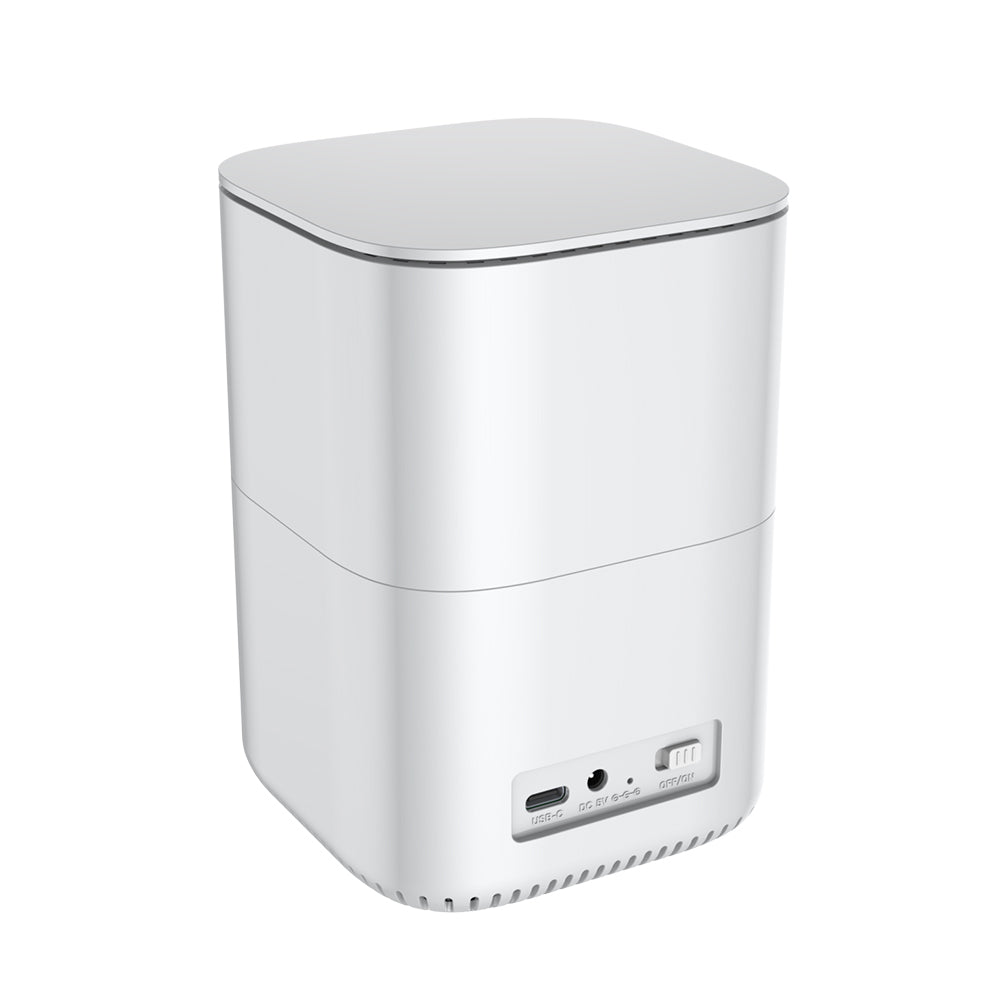
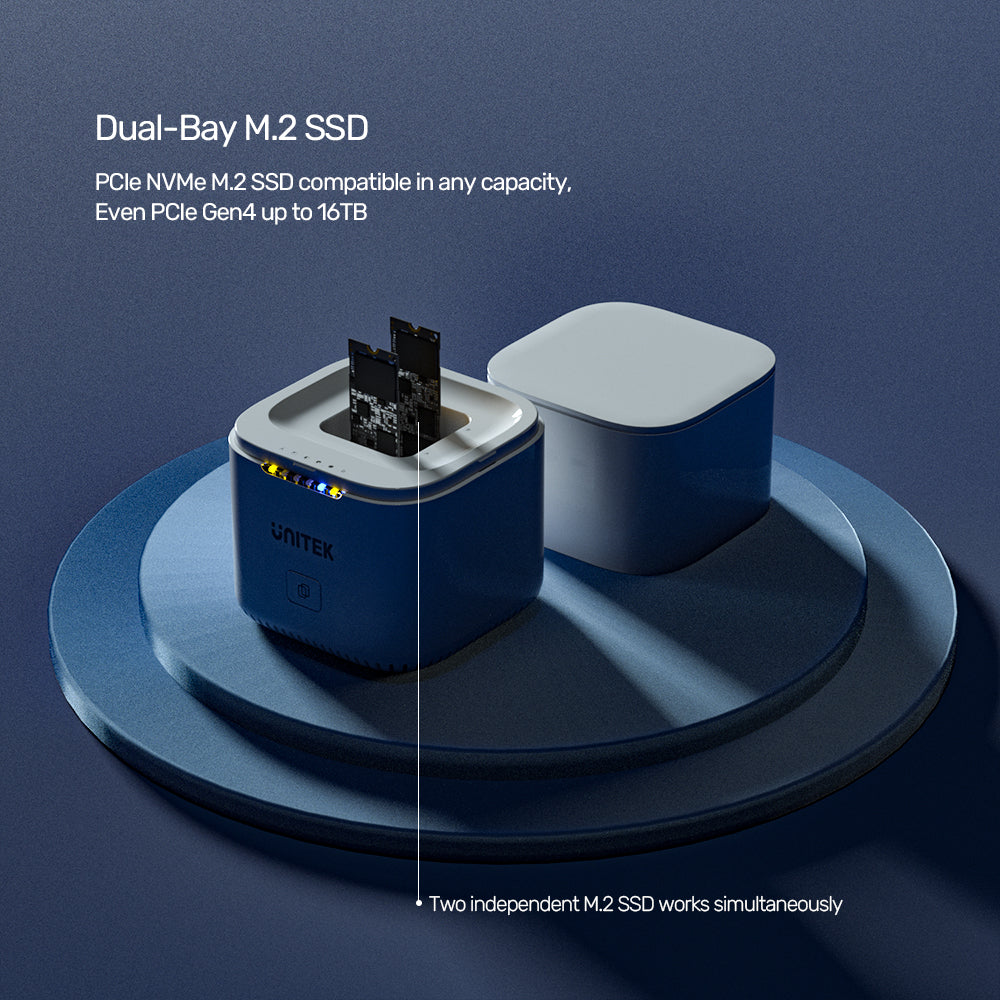
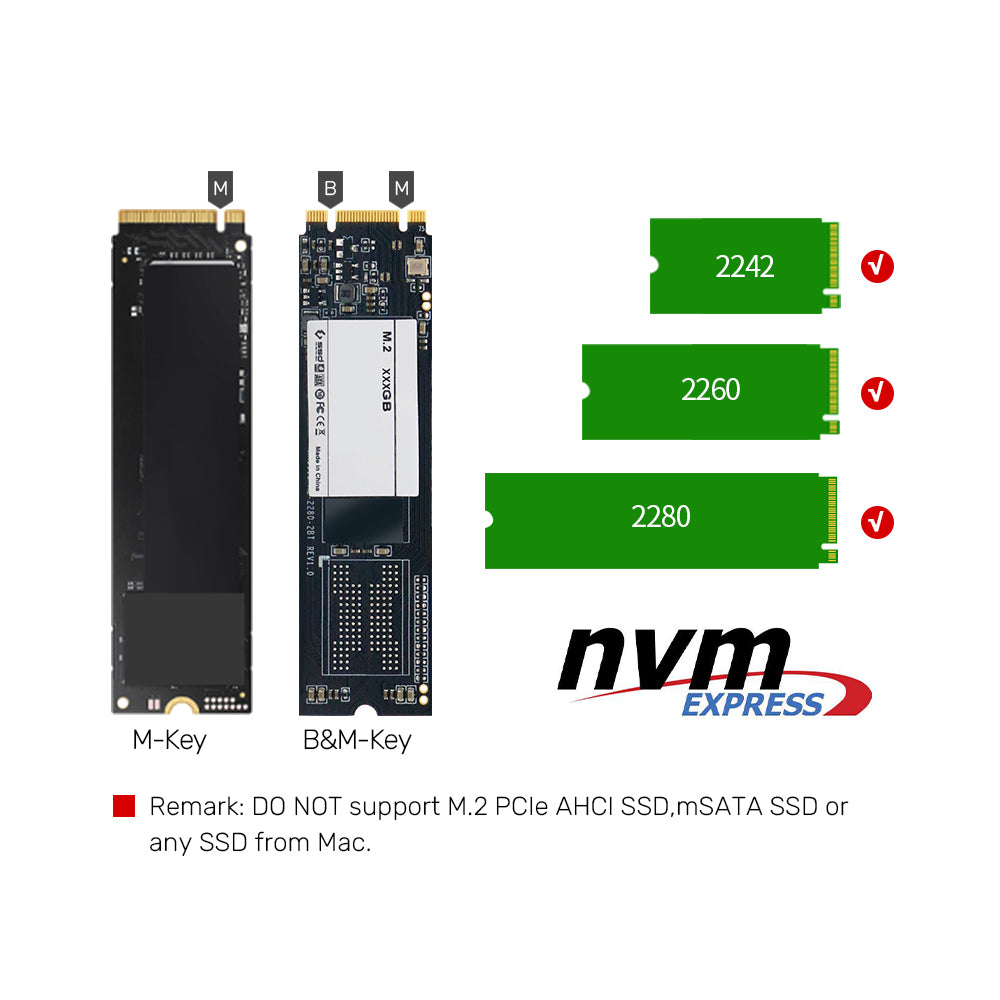
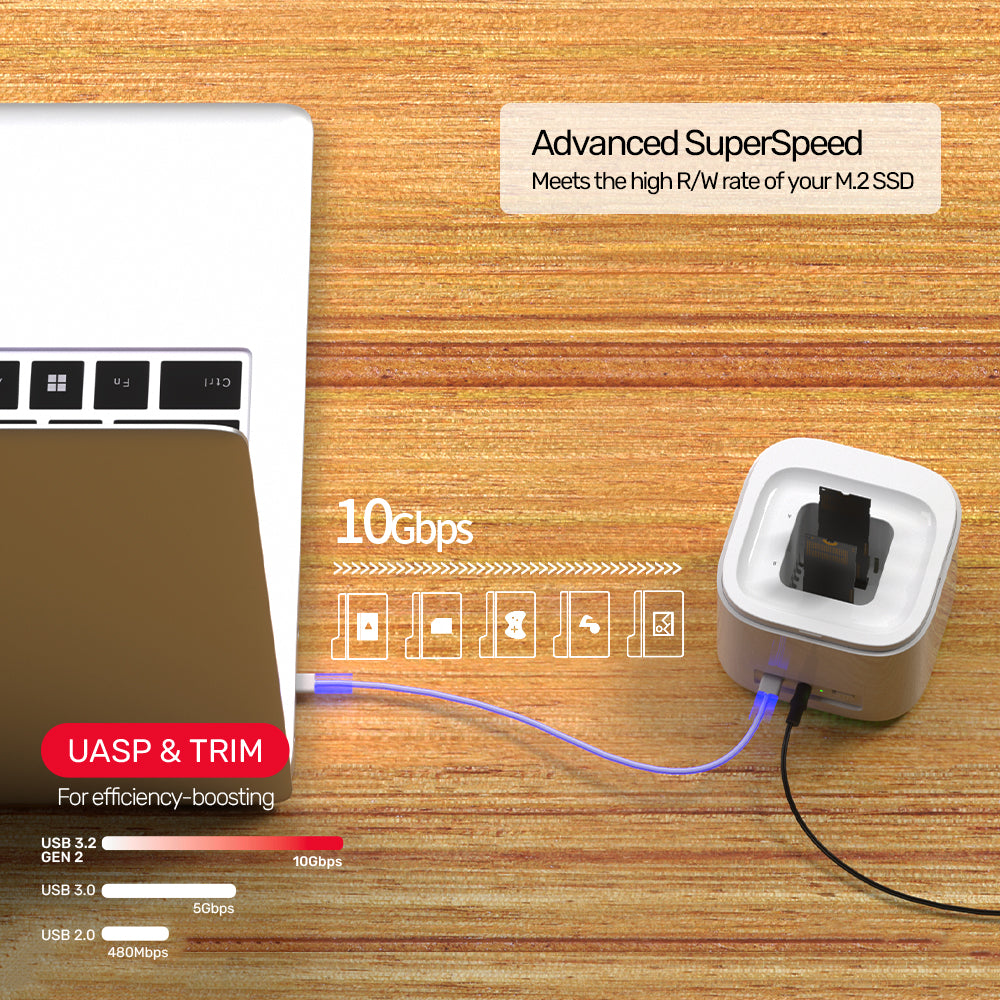
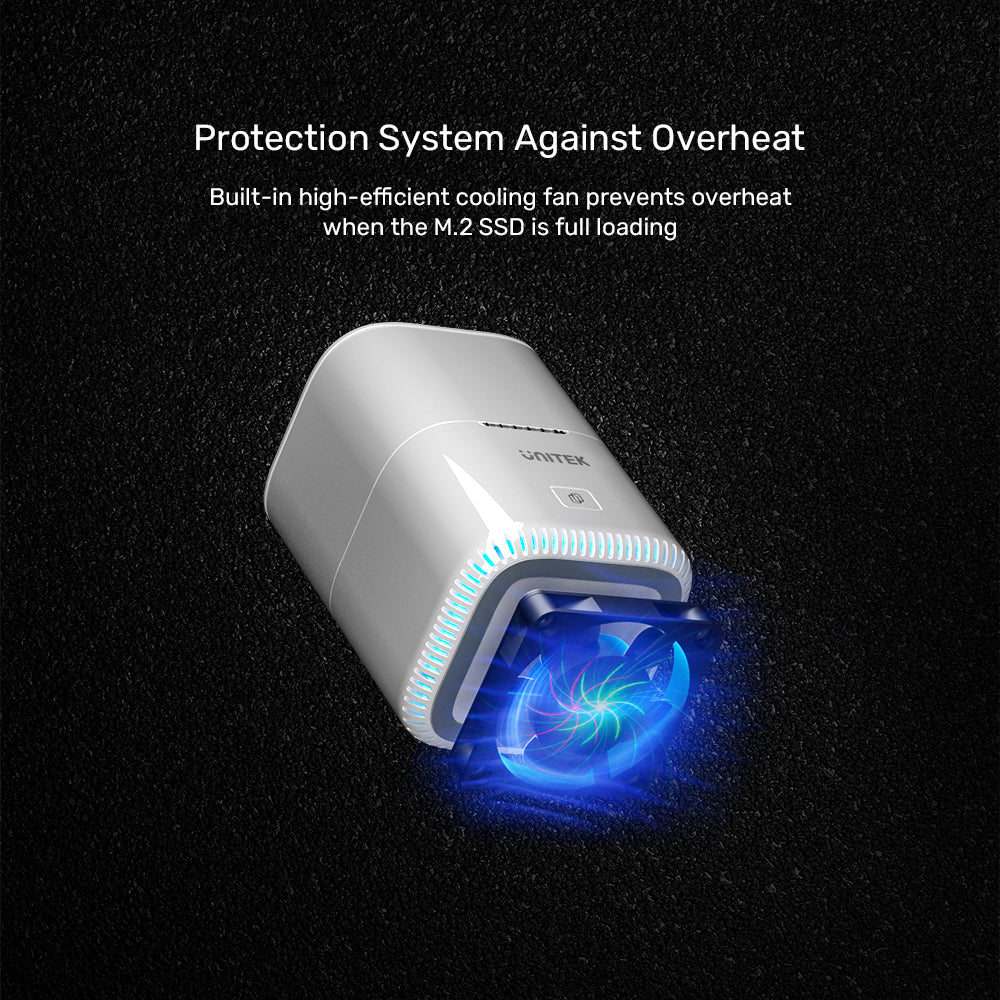
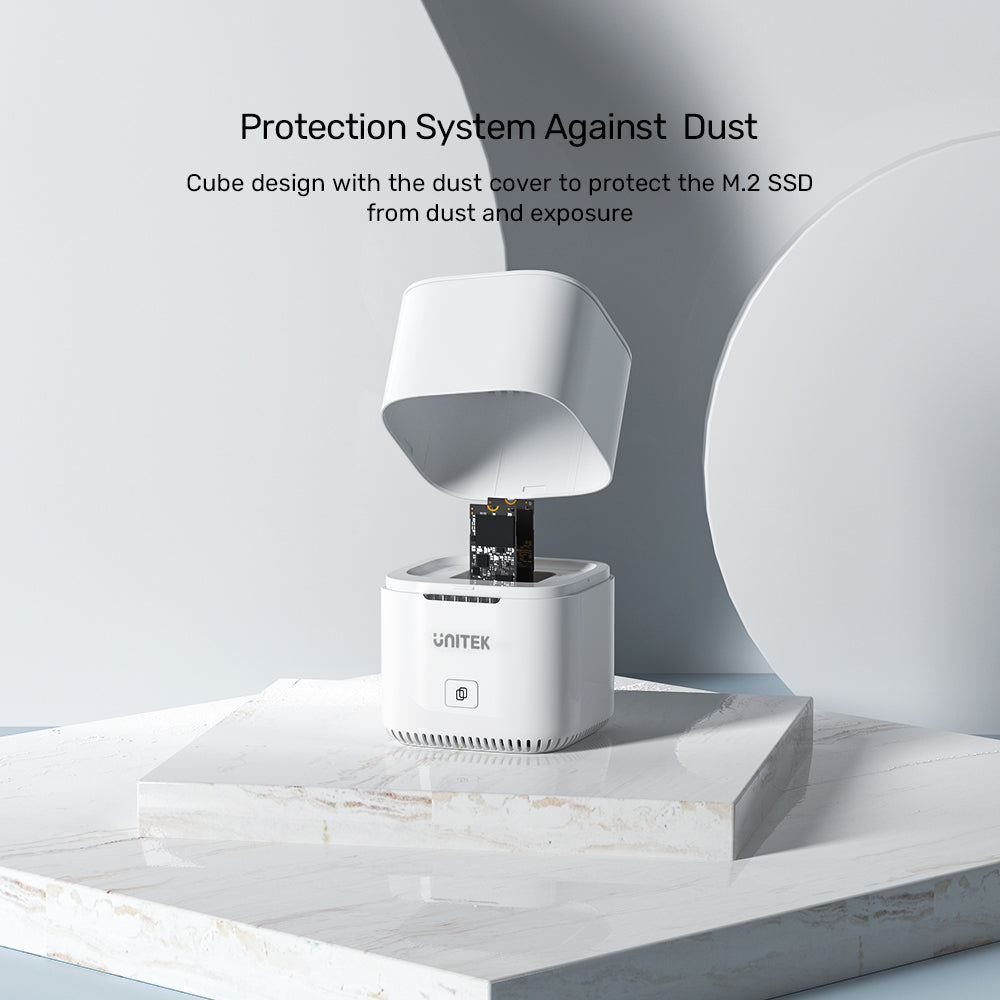
This dual-bay docking station allows simultaneous reading of two M.2 SSDs and features an offline clone function. With a USB-C interface, it supports USB 3.2 Gen 2 for data transfer speeds up to 10Gbps, along with UASP and TRIM for enhanced data efficiency. A built-in cooling fan ensures optimal heat dissipation, while the included dust cover minimizes dust accumulation. The station supports various M.2 sizes (42/60/80mm) and is compatible with PCIe Gen4/Gen3 NVMe SSDs.

24/7 Standby for Reliable Cloud-Like Performance
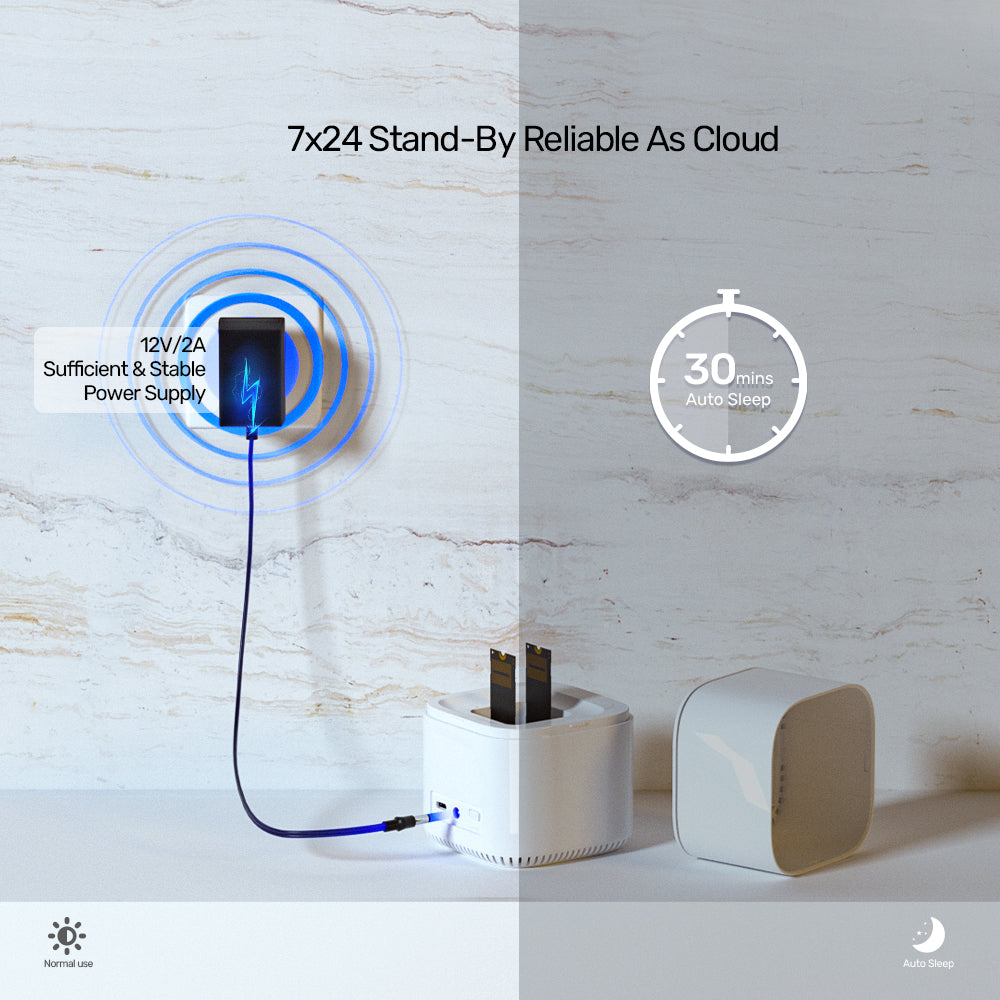
The SyncStation Marshmallow Docking Station offers 24/7 standby capability, ensuring reliable performance akin to cloud storage. With an efficient power supply and an auto-sleep feature that activates after 30 minutes of inactivity, it conserves energy while maintaining stable operation. Enjoy peace of mind knowing your data is always accessible and securely managed.

Versatile and User-Friendly Storage Solution
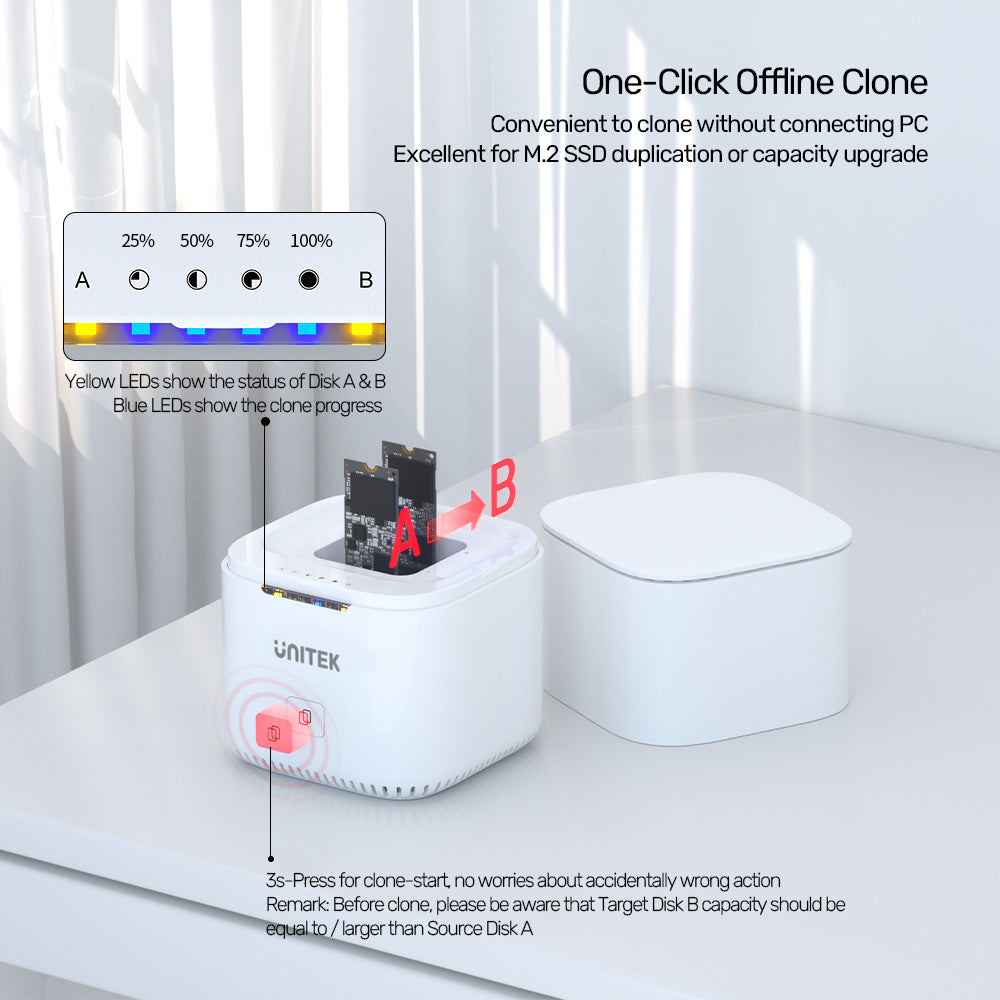
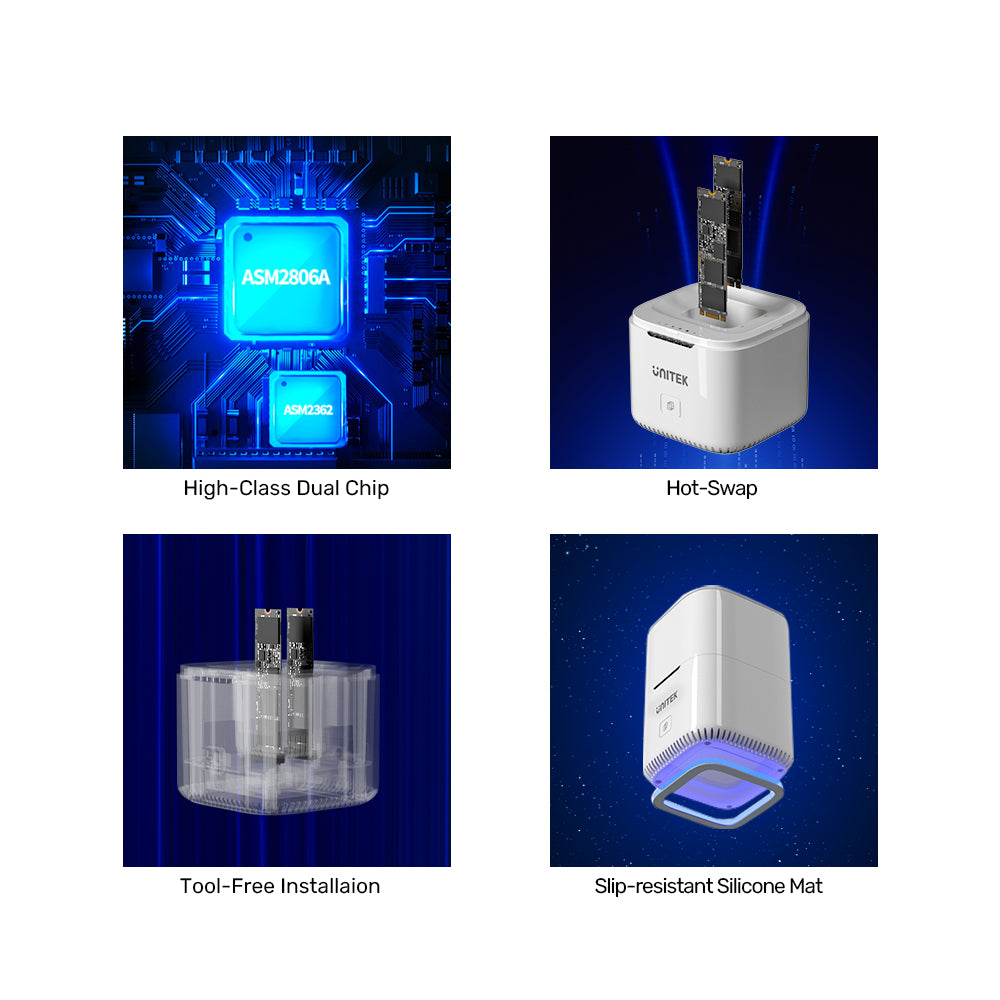
High-class dual chip design, ensuring reliable performance for your M.2 USB-C to PCIe/NVMe SSDs. With hot-swap capability, you can easily interchange drives without shutting down the system.
The tool-free installation makes setup quick and hassle-free, while the slip-resistant silicone mat keeps the docking station stable during use. This combination of features makes it an ideal choice for those seeking a versatile and efficient storage solution with offline cloning capabilities.
This dual-bay docking station allows simultaneous reading of two M.2 SSDs and features an offline clone function. With a USB-C interface, it supports USB 3.2 Gen 2 for data transfer speeds up to 10Gbps, along with UASP and TRIM for enhanced data efficiency. A built-in cooling fan ensures optimal heat dissipation, while the included dust cover minimizes dust accumulation. The station supports various M.2 sizes (42/60/80mm) and is compatible with PCIe Gen4/Gen3 NVMe SSDs.
24/7 Standby for Reliable Cloud-Like Performance
The SyncStation Marshmallow Docking Station offers 24/7 standby capability, ensuring reliable performance akin to cloud storage. With an efficient power supply and an auto-sleep feature that activates after 30 minutes of inactivity, it conserves energy while maintaining stable operation. Enjoy peace of mind knowing your data is always accessible and securely managed.
Versatile and User-Friendly Storage Solution
High-class dual chip design, ensuring reliable performance for your M.2 USB-C to PCIe/NVMe SSDs. With hot-swap capability, you can easily interchange drives without shutting down the system.
The tool-free installation makes setup quick and hassle-free, while the slip-resistant silicone mat keeps the docking station stable during use. This combination of features makes it an ideal choice for those seeking a versatile and efficient storage solution with offline cloning capabilities.
| Operating System | Windows 10/ 11 (32/ 64bit), Linux kernel 3.x, Mac OS 10.6 or above |
|---|---|
| Host Port Compatibility | USB-C |
| Card Slot | 2 x M.2 スロット |
| Host Power (PD) | DC 12V2A |
| USB-C | 1 x 10Gbps(メス) |
| SSD Compatibility | M.2 PCI-e NVMe SSD |
| Data transfer rate | 10Gbps |
| Cable Length | 100万 |
| Dimensions | 93.0mm x 93.0mm x 132.0mm |
| Material | ABS |
| Colour | White |
- SyncStation Marshmallow M.2 x 1
- USB-C - USB-C ケーブル 1m (USB3.2 Gen2) x 1
- 12V2A電源アダプター×1
- ユーザーマニュアル x 1
オプションを選択