

uHUB S7+ 7-in-1 USB-C 이더넷 허브, MST 듀얼 모니터, 100W 전력 공급 및 카드 리더기
Transform your workspace and elevate your productivity with our cutting-edge Multi-Stream Transport (MST) Hub. Designed for the modern professional, this hub allows you to extend your laptop's capabilities by connecting multiple displays for a truly immersive computing experience.

Elevate Your Viewing Experience
Enjoy stunning 4K resolution for all your media and gaming needs. Our versatile adapter ensures seamless connectivity with both HDMI and DisplayPort, delivering higher refresh rates even at lower resolutions for an uninterrupted experience. Immerse yourself in vibrant visuals and smooth performance like never before!

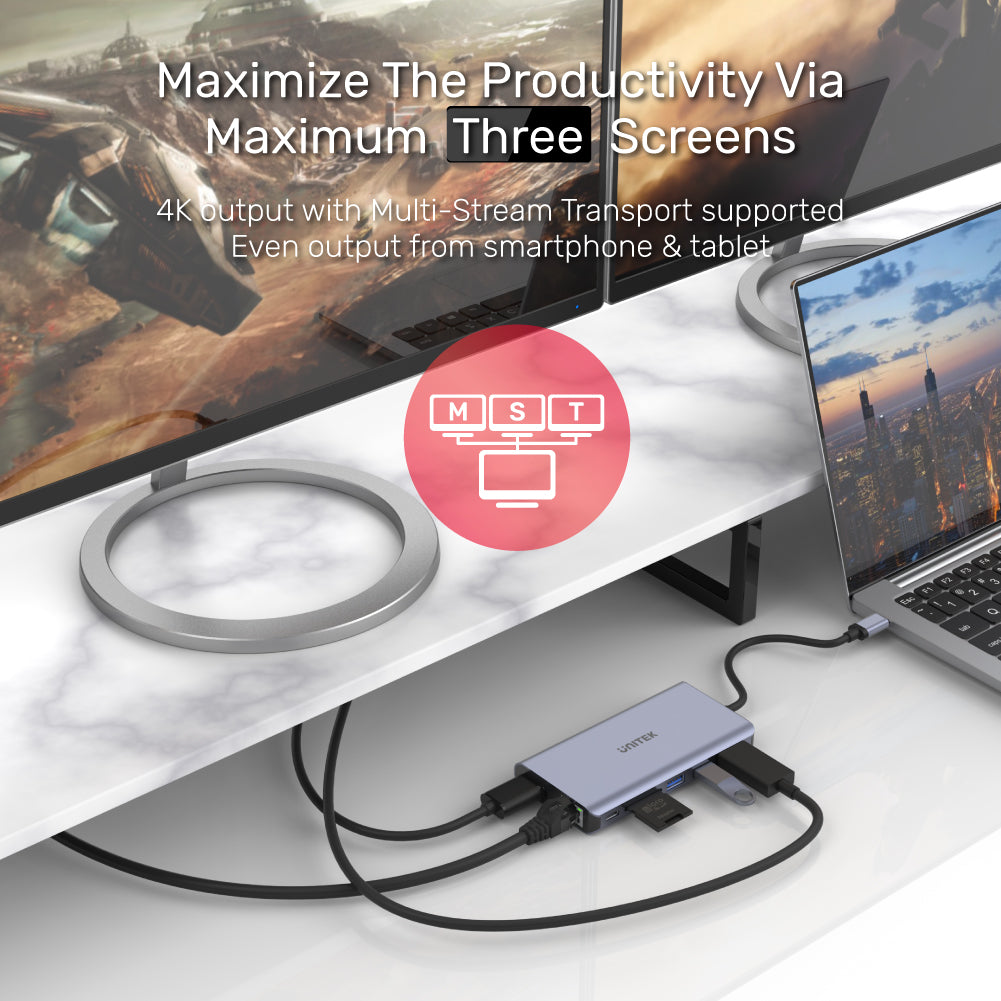
Maximize Your Productivity with Triple Screen Setup
Transform your workspace with 4K output across three displays, leveraging Multi-Stream Transport (MST) technology for effortless multitasking. Whether you're working from a laptop, smartphone, or tablet, our advanced adapter ensures seamless connectivity and high performance, empowering you to tackle multiple tasks simultaneously and enhance your efficiency like never before!

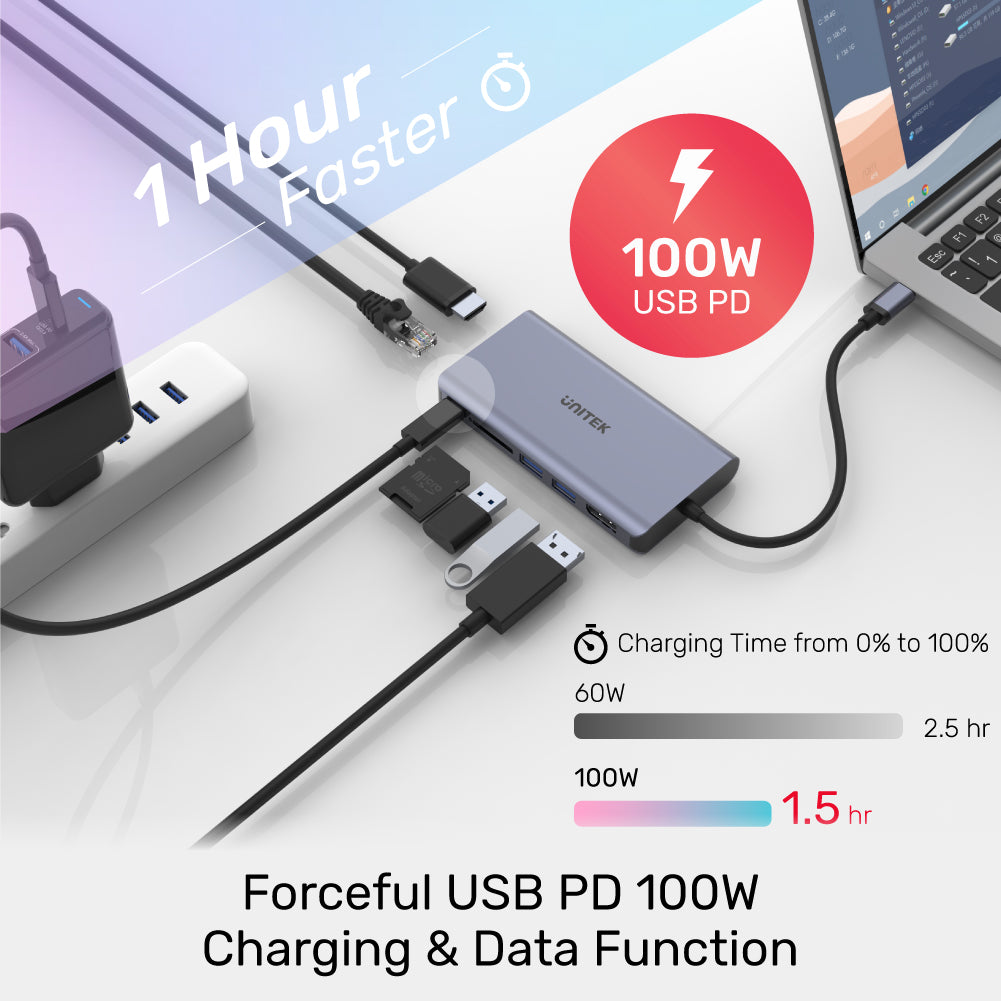
Experience Lightning-Fast Charging
Revolutionize your charging routine with our powerful 100W USB PD technology, capable of charging your device from 0% to 100% in just 1.5 hours—1 hour faster than conventional options! Enjoy not only rapid charging but also seamless data transfer, making this adapter the perfect companion for your high-demand devices. Stay powered up and productive wherever you go!

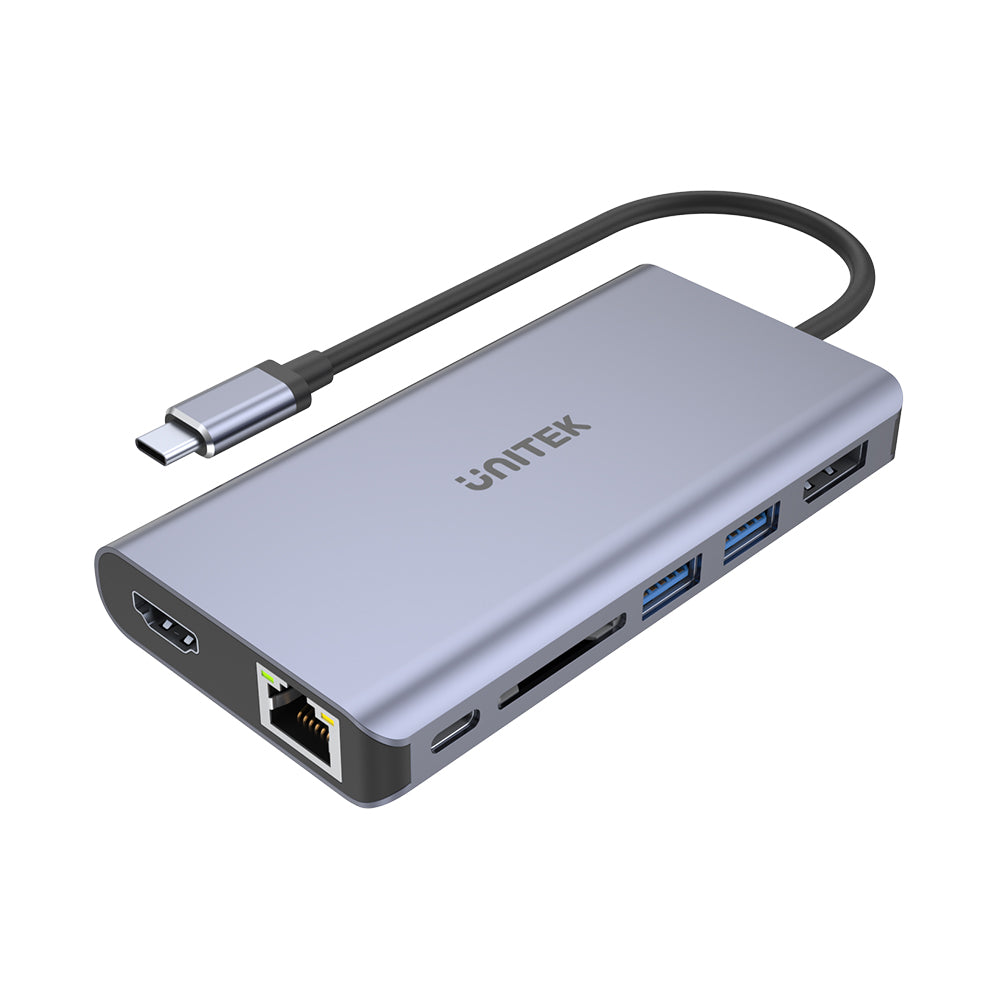
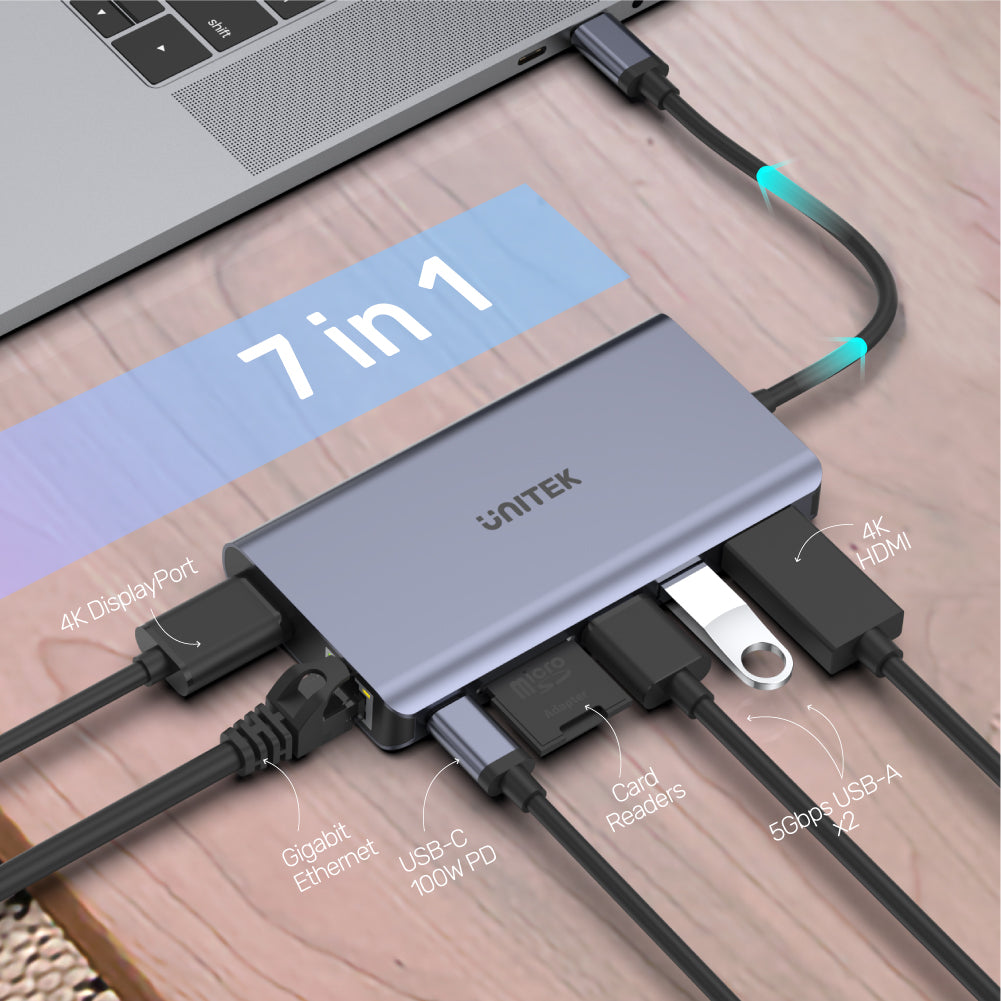
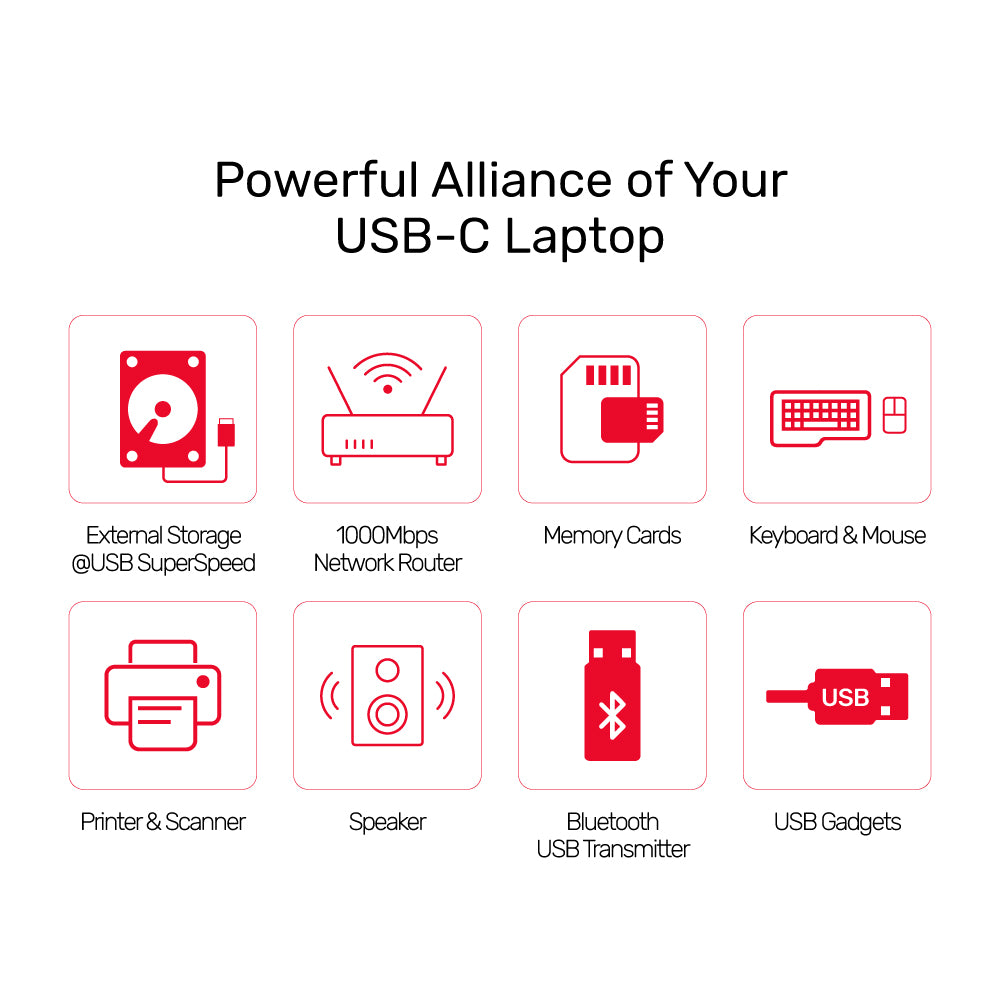
Ultimate Connectivity with 7-in-1 Functionality
Unlock a world of possibilities with our versatile 7-in-1 hub, designed to enhance your productivity. Featuring 4K HDMI, DisplayPort, Gigabit Ethernet, dual USB-A, and 5Gbps USB-C with 100W Power Delivery, this adapter streamlines your setup and provides fast, reliable connections for all your devices. Experience the convenience of comprehensive connectivity in one sleek package, perfect for modern professionals and creative enthusiasts alike!
Transform your workspace and elevate your productivity with our cutting-edge Multi-Stream Transport (MST) Hub. Designed for the modern professional, this hub allows you to extend your laptop's capabilities by connecting multiple displays for a truly immersive computing experience.
Elevate Your Viewing Experience
Enjoy stunning 4K resolution for all your media and gaming needs. Our versatile adapter ensures seamless connectivity with both HDMI and DisplayPort, delivering higher refresh rates even at lower resolutions for an uninterrupted experience. Immerse yourself in vibrant visuals and smooth performance like never before!
Maximize Your Productivity with Triple Screen Setup
Transform your workspace with 4K output across three displays, leveraging Multi-Stream Transport (MST) technology for effortless multitasking. Whether you're working from a laptop, smartphone, or tablet, our advanced adapter ensures seamless connectivity and high performance, empowering you to tackle multiple tasks simultaneously and enhance your efficiency like never before!
Experience Lightning-Fast Charging
Revolutionize your charging routine with our powerful 100W USB PD technology, capable of charging your device from 0% to 100% in just 1.5 hours—1 hour faster than conventional options! Enjoy not only rapid charging but also seamless data transfer, making this adapter the perfect companion for your high-demand devices. Stay powered up and productive wherever you go!
Ultimate Connectivity with 7-in-1 Functionality
Unlock a world of possibilities with our versatile 7-in-1 hub, designed to enhance your productivity. Featuring 4K HDMI, DisplayPort, Gigabit Ethernet, dual USB-A, and 5Gbps USB-C with 100W Power Delivery, this adapter streamlines your setup and provides fast, reliable connections for all your devices. Experience the convenience of comprehensive connectivity in one sleek package, perfect for modern professionals and creative enthusiasts alike!
| Works With | Windows 10/11 (32/64bit), Linux kernel 3.x, Mac OS 10.6 or above |
|---|---|
| Host Port Compatibility | USB-C, USB-A, HDMI, DisplayPort, SD Card, RJ45 Ethernet |
| Host Power (PD) | USB-C PD 100W |
| Max Output Resolution | 4K@30Hz |
| HDMI | 1 x 4K@30Hz |
| DisplayPort | 1 x 4K@30Hz |
| USB-A | 2 x 5Gbps(다운스트림) |
| USB-C | 1 |
| SD card slot | 1 |
| Ethernet RJ45 Jack | 1000Mbps |
| Power Supply | 20V5A |
| Power Source | USB-C |
| Dimensions | 116.5mm x 61.0mm x 16.0mm |
| Material | ABS Housing |
| Colour | Space Grey |
- DisplayPort 및 USB PD 100W를 갖춘 7포트 다기능 uHUB S7+ 1개
- 1 x 사용자 설명서
Choose options