
uHUB N9+ 9-in-1 USB-C イーサネット ハブ、HDMI、100W Power Delivery、デュアル カード リーダー付き
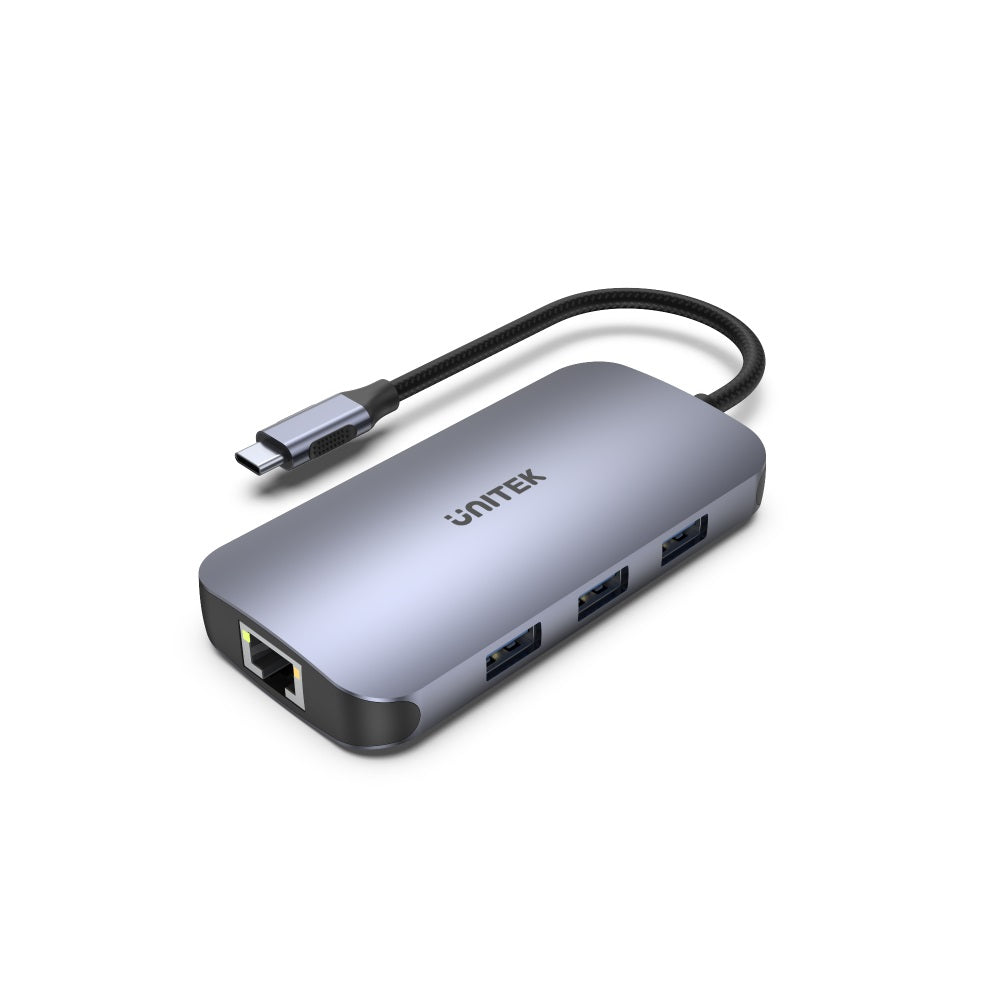
This 9-in-1 USB-C hub combines 4 ports USB (one USB-C and triple USB-A) expansion, an 4K 60Hz ultra HD HDMI 2.0, a Gigabit Ethernet, dual card readers, plus the forceful Power Delivery 100W charging via the USB-C.

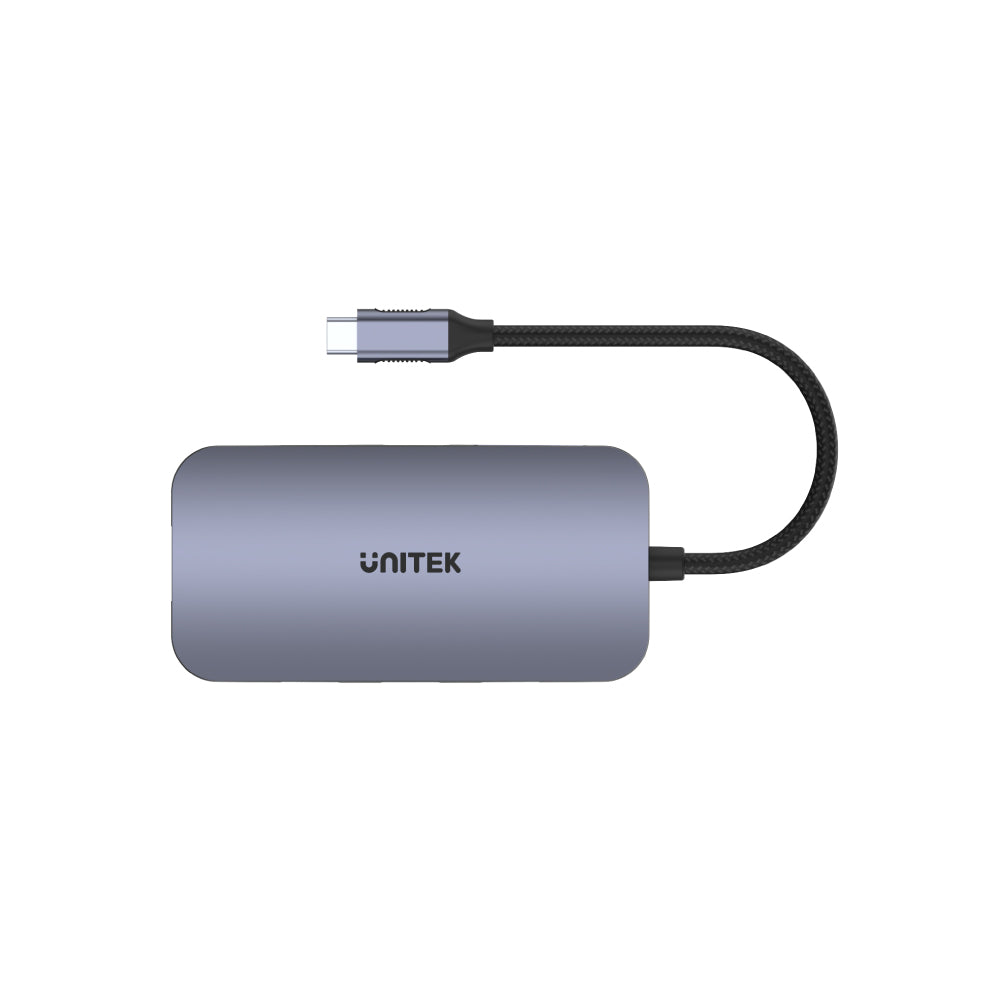
One of the World's Smallest 9-in-1 USB-C Hub
Discover the power of versatility with the UNITEK 9-in-1 USB-C Hub, designed to deliver full-featured video streaming, fast charging, and SuperSpeed data transfer, all in a remarkably compact size. This hub also includes Gigabit Ethernet support, making it perfect for both work and entertainment. Its sleek aluminum-alloy housing and nylon-braided cable ensure durability while maintaining an elegant design. Experience convenience and efficiency without compromising on performance.

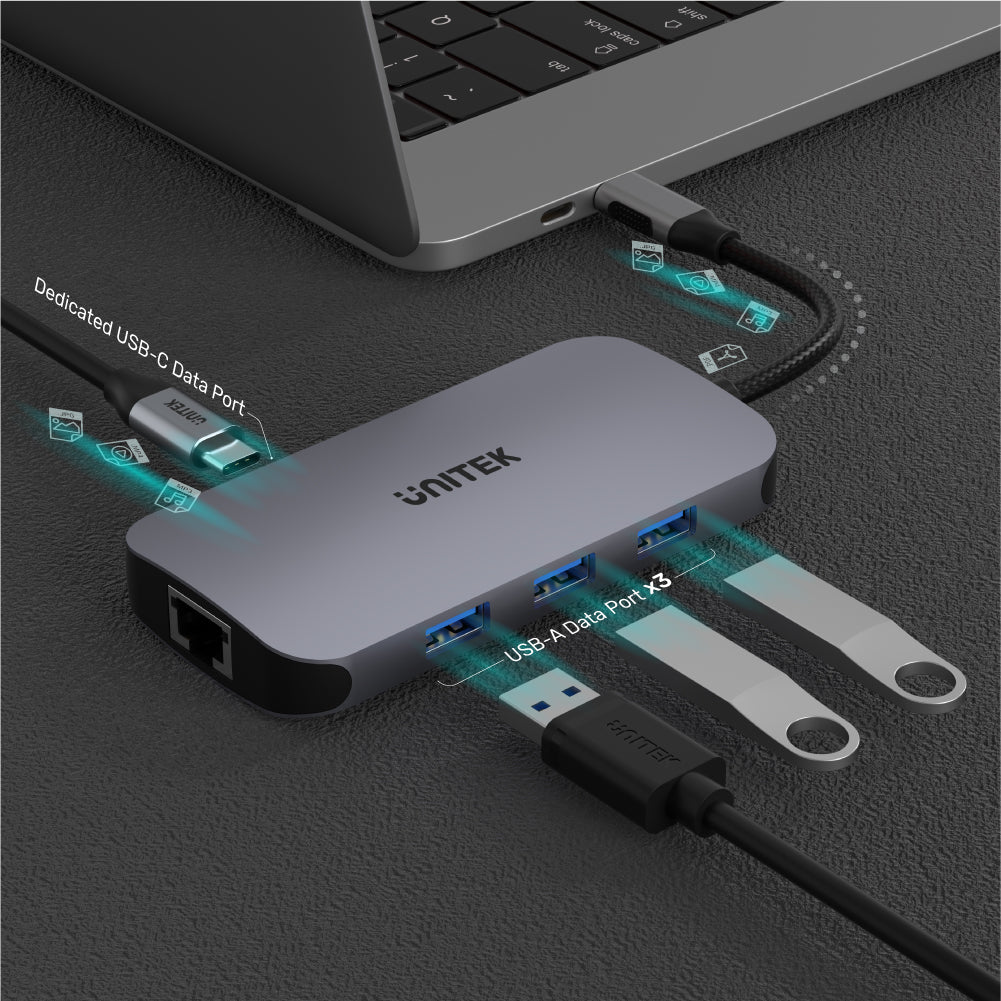
USB-C/A Downstream Compatible
Enhance your connectivity with the UNITEK hub, featuring a dedicated USB-C port alongside three USB-A ports. This design allows you to connect all your USB devices seamlessly through a single USB-C port on your upstream device. Simplify your workspace and maximize your productivity with this versatile hub that caters to all your USB needs.

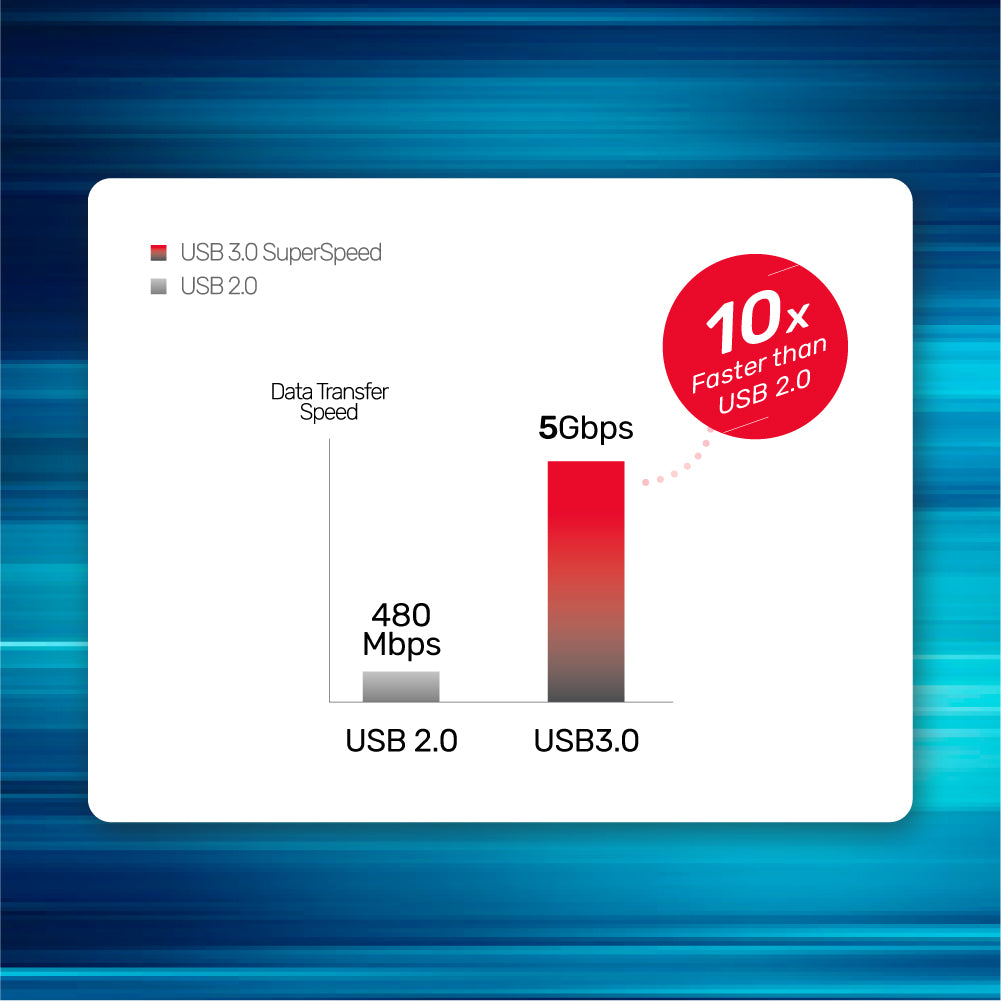
USB 3.0 SuperSpeed
Experience remarkable data transfer speeds with USB 3.0 SuperSpeed, providing up to 5Gbps—10 times faster than USB 2.0. This technology ensures steady and efficient data transfers, making it ideal for professionals and tech enthusiasts alike. With USB 3.0 specifications on both the USB-C and three USB-A ports, you can enjoy rapid connectivity while still maintaining backward compatibility with USB 2.0 and 1.1. Upgrade your data transfer experience with this superior technology!

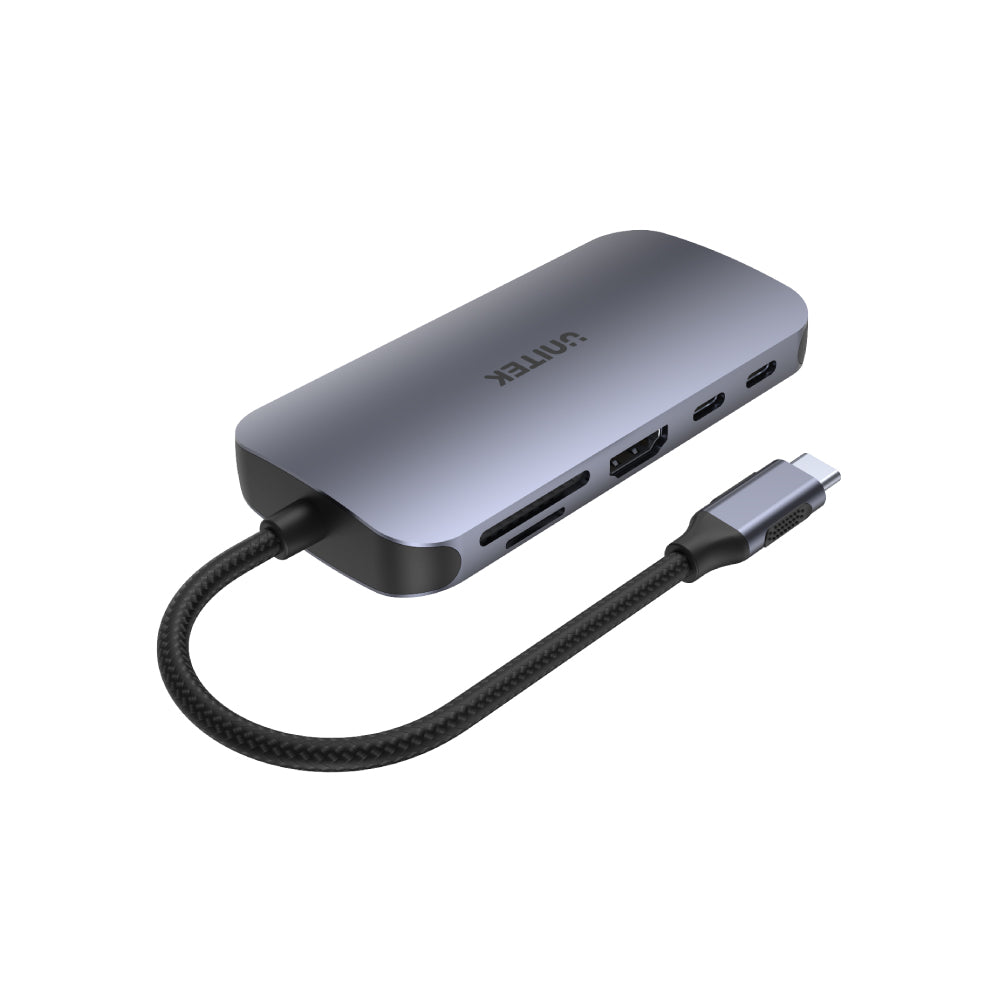
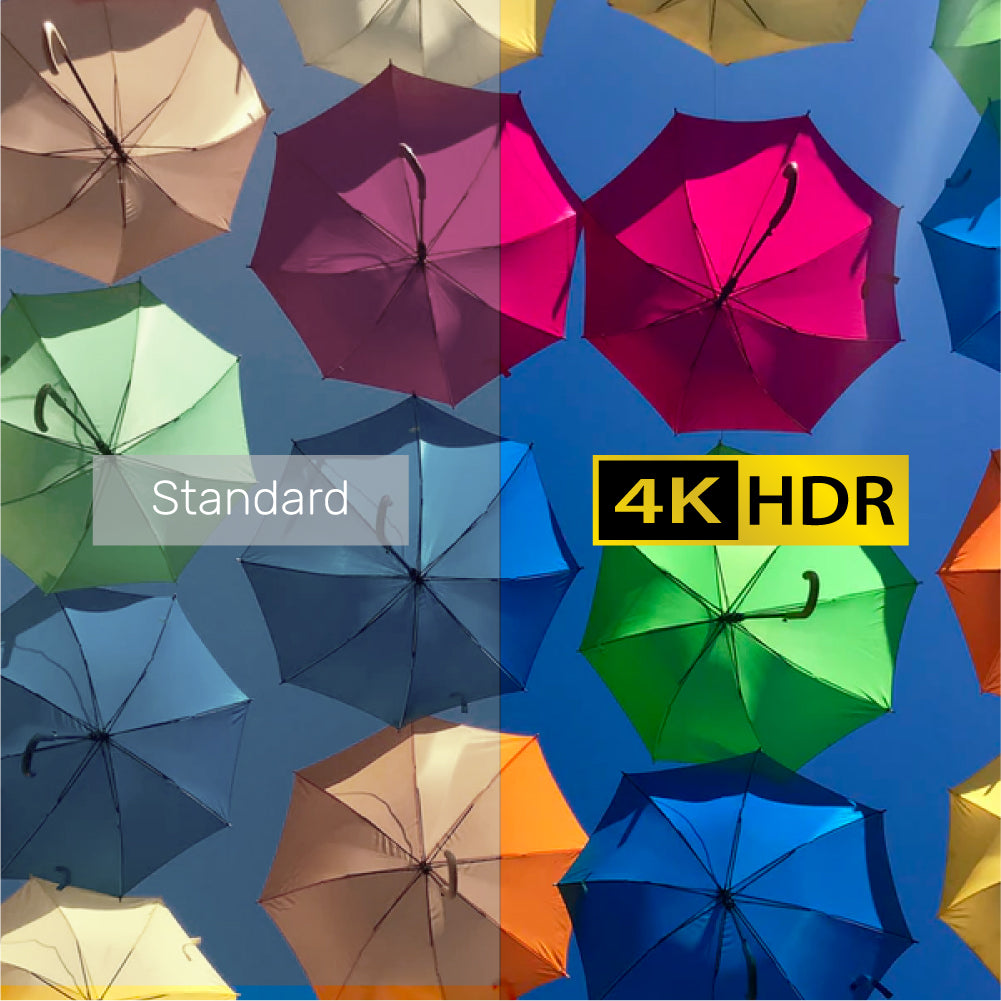
Vivid 4K
Experience stunning visuals with HDMI 2.0, supporting up to 4K@60Hz and HDR for sharper and more vibrant images. Enjoy every movement of Ultra HD video like never before. Please note that actual video output is dependent on the specifications of your upstream device, cable, and display. This hub supports HDMI up to 4K Ultra HD @60Hz with HDCP 2.2, ensuring compatibility with a wide range of devices while enhancing your viewing experience.

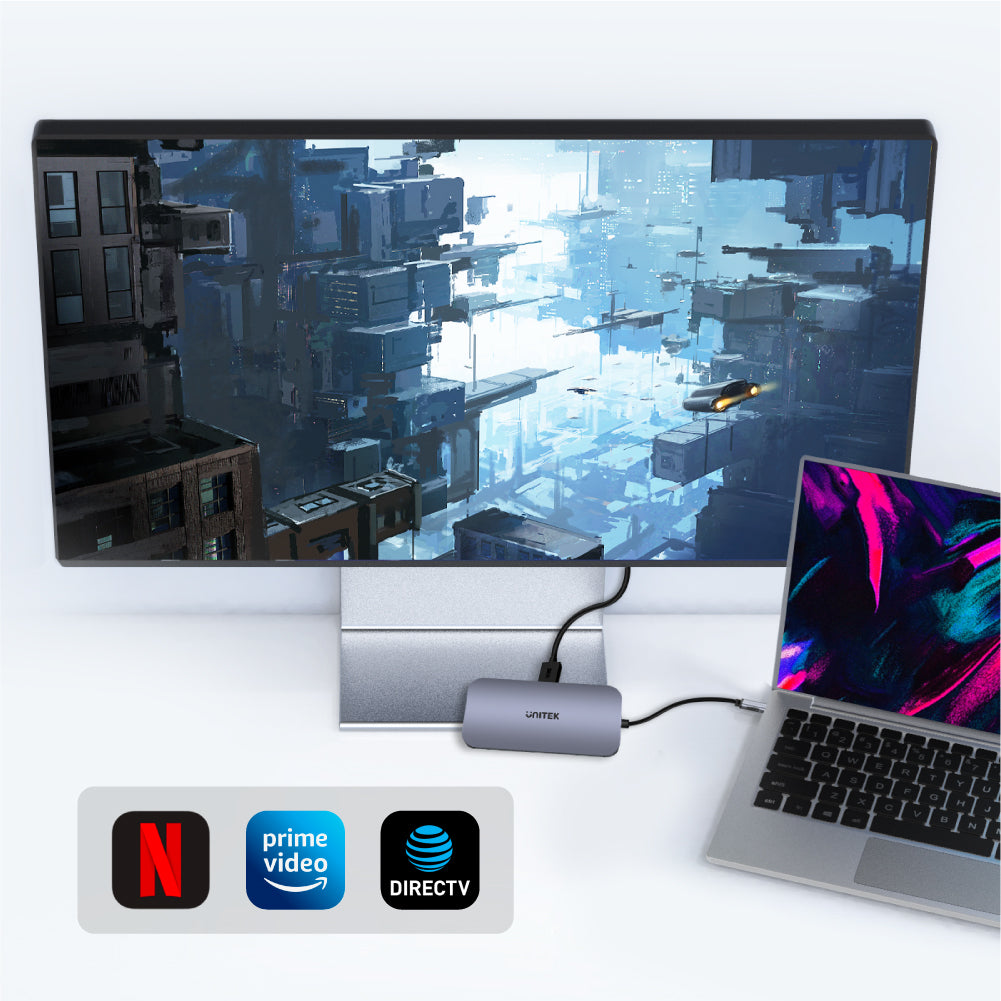
Ultra HD Paid Content Streaming Supported
Enjoy high-definition streaming from services like Netflix and Amazon Prime Video with HDMI support for HDCP 2.2. This ensures compliance with requirements for Ultra HD content, delivering an exceptional viewing experience. Whether you're gaming or watching movies, this hub is designed to enhance your entertainment with the best quality available.

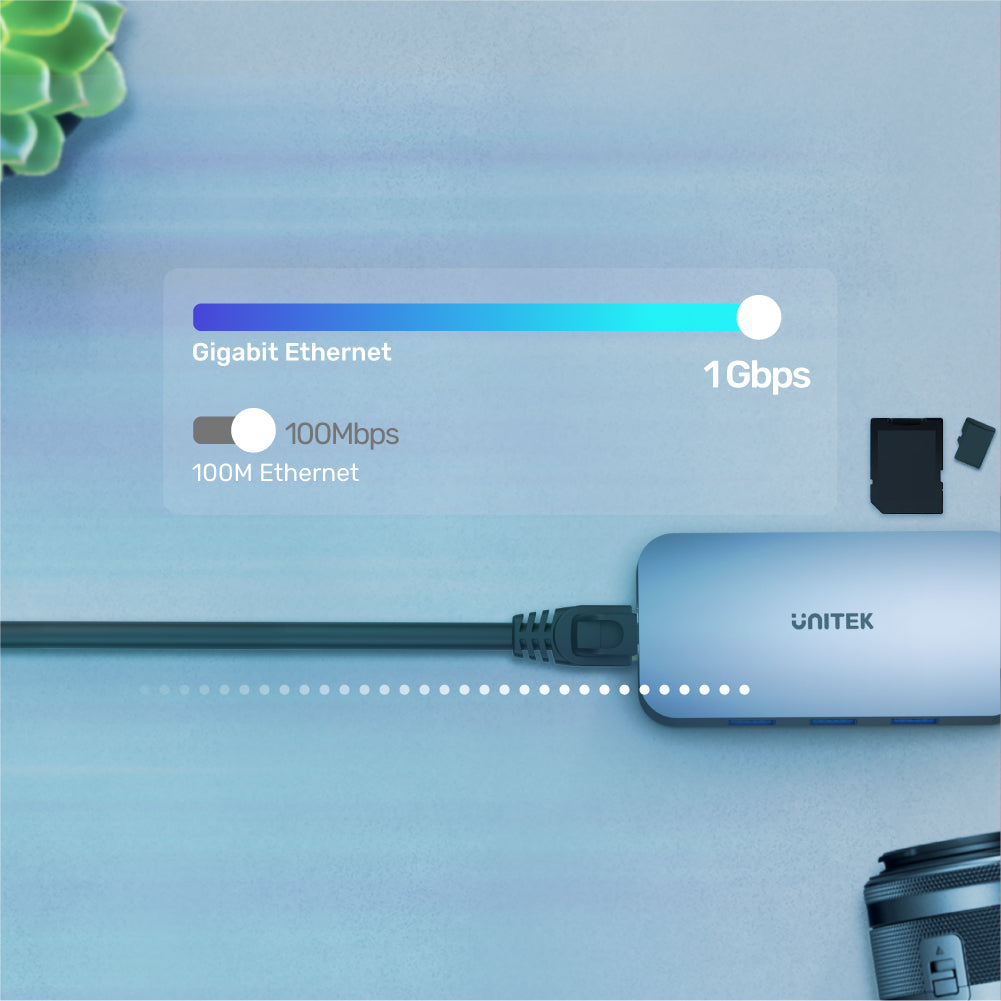
Gigabit Ethernet
Experience stable and reliable internet surfing with a wired Gigabit Ethernet connection, offering speeds of up to 1Gbps. Fully compliant with the IEEE 802.3 standard, this connection supports 10/100/1000 Mbps, along with IPv4/IPv6 compatibility. Features like COE, Wake-on-LAN, and automatic flip and flow control ensure you have a fast and stable internet experience, perfect for streaming, gaming, and browsing!

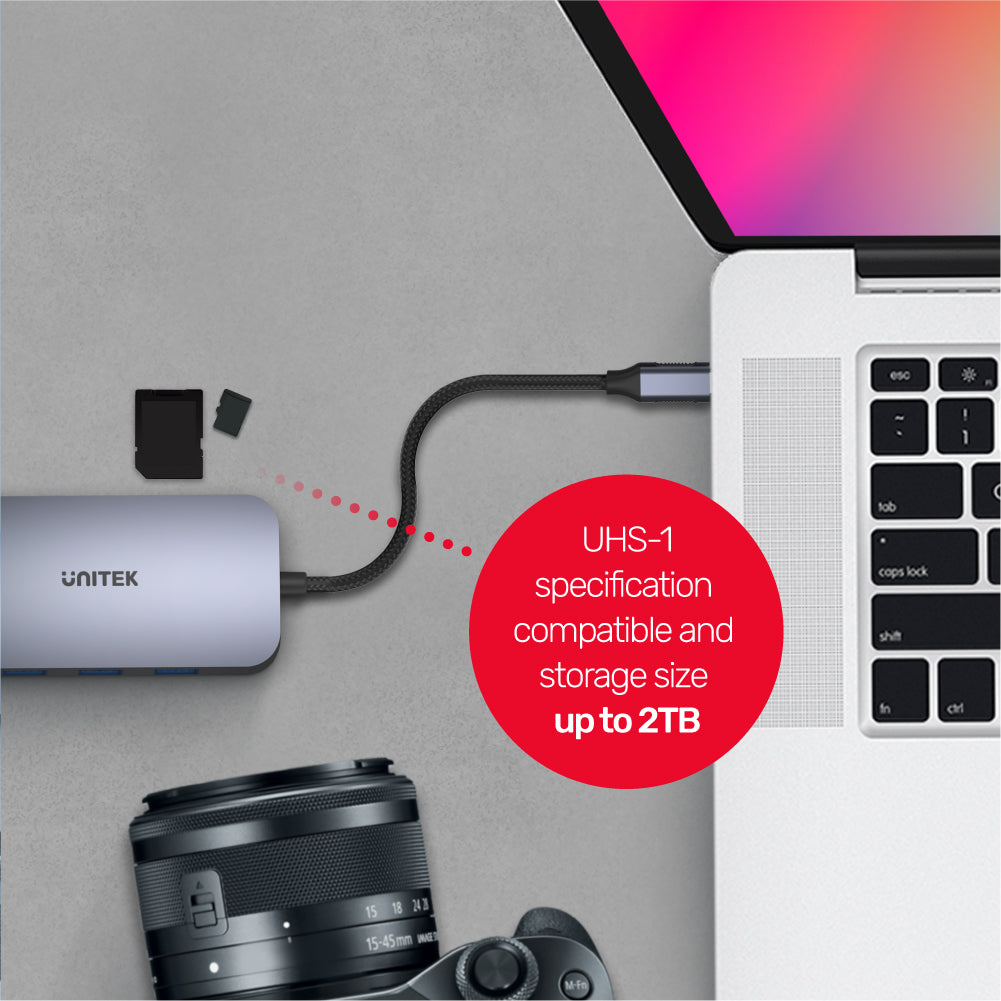
Memory Card Compatibility
Effortlessly manage your files with dual independent card slots that support various memory card dimensions simultaneously. This hub accommodates both 24mm and 11mm memory cards, conforming to the SDHC / SDXC specifications with a massive capacity of up to 2TB. Perfect for photographers and videographers, it ensures seamless data transfer and accessibility. Enjoy the convenience and functionality of UHS-1 specification, making it easier than ever to work with your digital content!

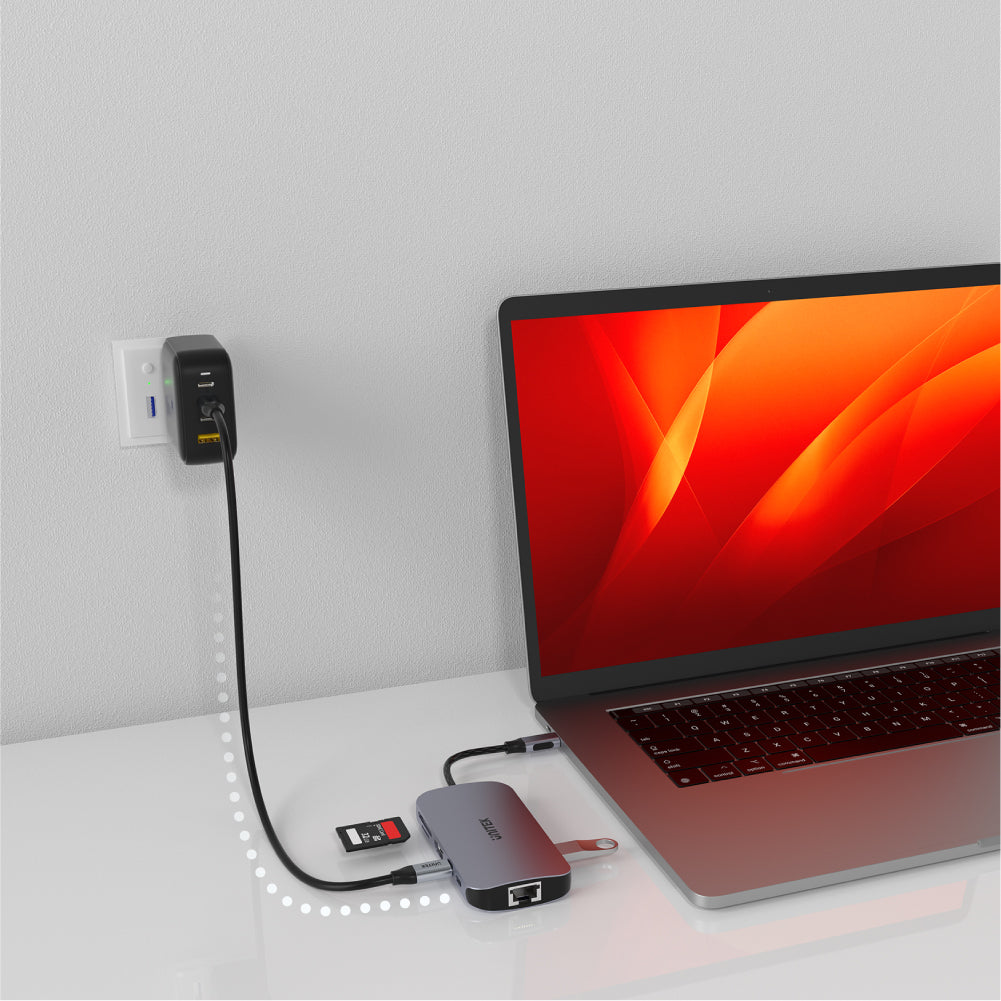
Forceful Charging
Harness the power of USB Power Delivery with up to 100W to efficiently charge your upstream devices. Experience quick and reliable charging that meets the maximum power demands of your devices. Please connect with a 100W Power Delivery charger for optimal performance. Note that actual power output may vary depending on the number of connected devices, ensuring a tailored charging solution for your needs. Keep your devices powered and ready to go!

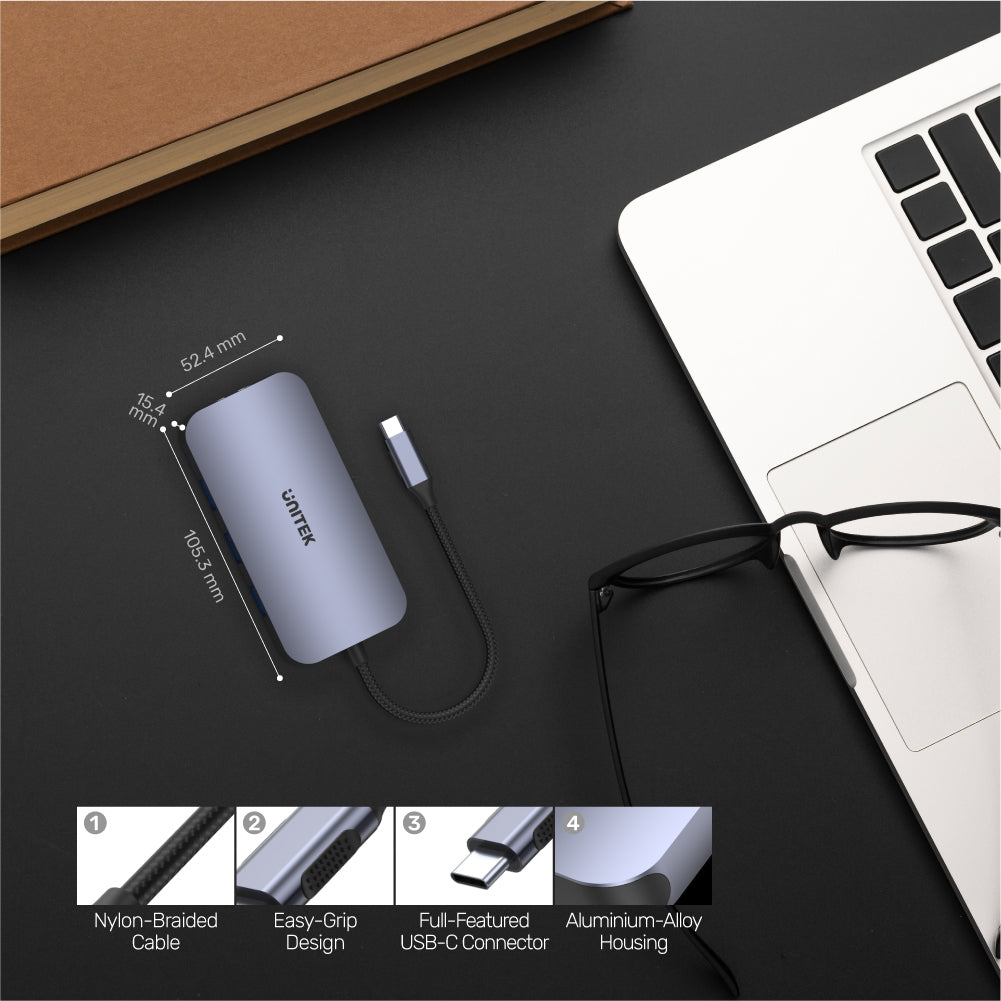
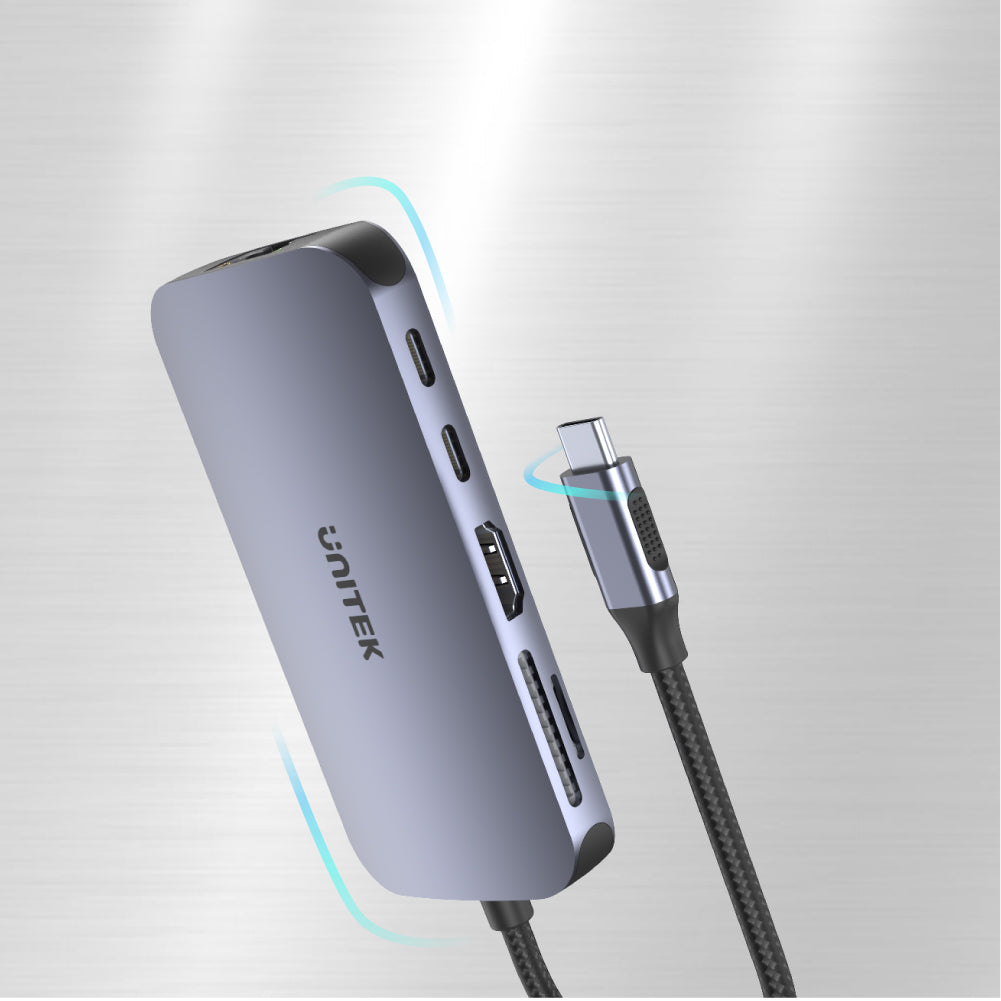
Aluminium-Alloy Craftsmanship
Experience the benefits of a metal shell design that enhances thermal conduction during full-load operations of the uHUB N9+. This durable construction ensures efficiency and longevity while providing a sleek look. Enjoy plug-and-play convenience with hot-swap support, allowing you to connect and disconnect devices effortlessly without shutting down the hub.
This 9-in-1 USB-C hub combines 4 ports USB (one USB-C and triple USB-A) expansion, an 4K 60Hz ultra HD HDMI 2.0, a Gigabit Ethernet, dual card readers, plus the forceful Power Delivery 100W charging via the USB-C.
One of the World's Smallest 9-in-1 USB-C Hub
Discover the power of versatility with the UNITEK 9-in-1 USB-C Hub, designed to deliver full-featured video streaming, fast charging, and SuperSpeed data transfer, all in a remarkably compact size. This hub also includes Gigabit Ethernet support, making it perfect for both work and entertainment. Its sleek aluminum-alloy housing and nylon-braided cable ensure durability while maintaining an elegant design. Experience convenience and efficiency without compromising on performance.
USB-C/A Downstream Compatible
Enhance your connectivity with the UNITEK hub, featuring a dedicated USB-C port alongside three USB-A ports. This design allows you to connect all your USB devices seamlessly through a single USB-C port on your upstream device. Simplify your workspace and maximize your productivity with this versatile hub that caters to all your USB needs.
USB 3.0 SuperSpeed
Experience remarkable data transfer speeds with USB 3.0 SuperSpeed, providing up to 5Gbps—10 times faster than USB 2.0. This technology ensures steady and efficient data transfers, making it ideal for professionals and tech enthusiasts alike. With USB 3.0 specifications on both the USB-C and three USB-A ports, you can enjoy rapid connectivity while still maintaining backward compatibility with USB 2.0 and 1.1. Upgrade your data transfer experience with this superior technology!
Vivid 4K
Experience stunning visuals with HDMI 2.0, supporting up to 4K@60Hz and HDR for sharper and more vibrant images. Enjoy every movement of Ultra HD video like never before. Please note that actual video output is dependent on the specifications of your upstream device, cable, and display. This hub supports HDMI up to 4K Ultra HD @60Hz with HDCP 2.2, ensuring compatibility with a wide range of devices while enhancing your viewing experience.
Ultra HD Paid Content Streaming Supported
Enjoy high-definition streaming from services like Netflix and Amazon Prime Video with HDMI support for HDCP 2.2. This ensures compliance with requirements for Ultra HD content, delivering an exceptional viewing experience. Whether you're gaming or watching movies, this hub is designed to enhance your entertainment with the best quality available.
Gigabit Ethernet
Experience stable and reliable internet surfing with a wired Gigabit Ethernet connection, offering speeds of up to 1Gbps. Fully compliant with the IEEE 802.3 standard, this connection supports 10/100/1000 Mbps, along with IPv4/IPv6 compatibility. Features like COE, Wake-on-LAN, and automatic flip and flow control ensure you have a fast and stable internet experience, perfect for streaming, gaming, and browsing!
Memory Card Compatibility
Effortlessly manage your files with dual independent card slots that support various memory card dimensions simultaneously. This hub accommodates both 24mm and 11mm memory cards, conforming to the SDHC / SDXC specifications with a massive capacity of up to 2TB. Perfect for photographers and videographers, it ensures seamless data transfer and accessibility. Enjoy the convenience and functionality of UHS-1 specification, making it easier than ever to work with your digital content!
Forceful Charging
Harness the power of USB Power Delivery with up to 100W to efficiently charge your upstream devices. Experience quick and reliable charging that meets the maximum power demands of your devices. Please connect with a 100W Power Delivery charger for optimal performance. Note that actual power output may vary depending on the number of connected devices, ensuring a tailored charging solution for your needs. Keep your devices powered and ready to go!
Aluminium-Alloy Craftsmanship
Experience the benefits of a metal shell design that enhances thermal conduction during full-load operations of the uHUB N9+. This durable construction ensures efficiency and longevity while providing a sleek look. Enjoy plug-and-play convenience with hot-swap support, allowing you to connect and disconnect devices effortlessly without shutting down the hub.
| Works With | Windows 7/8/10/11 (32/64bit), Linux kernel 3.x, Mac OS 10.6 or above |
|---|---|
| Host Port Compatibility | USB-C |
| Max Output Resolution | 4K@30Hz |
| HDMI | 1 |
| USB-A | 3 x 5Gbps |
| USB-C | 1 x 5Gbps、1 x PD 100W |
| SD card slot | 1 |
| Micro SD card slot | 1 |
| Ethernet RJ45 Jack | 1000MHz |
| Cable Length | 16cm |
| Power Supply | 20V5A |
| Power Source | USB-C |
| Dimensions | 105.3mm x 52.4mm x 15.4mm |
| Material | Aluminum Alloy |
| Colour | Space Grey |
- uHUB N9+ 1個
- ユーザーマニュアル x 1
オプションを選択