
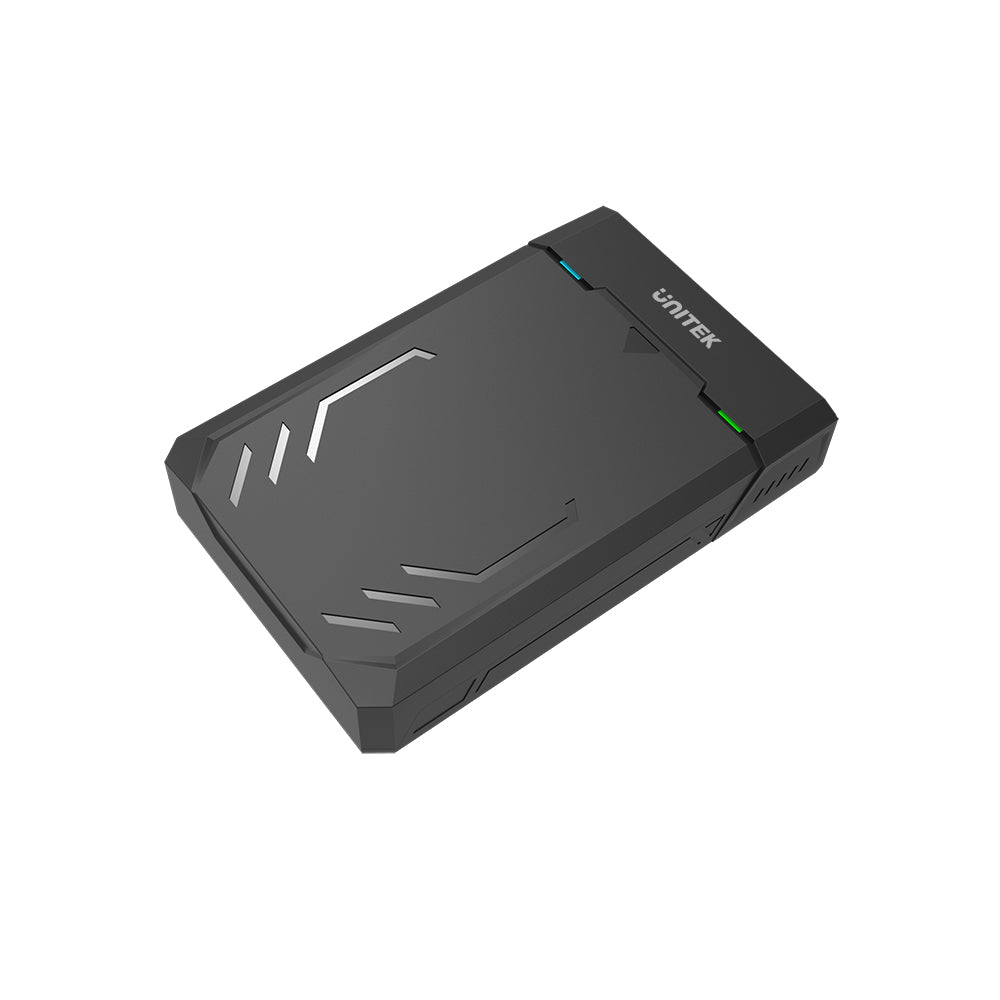
DiskGuard Raiden SATA III 2.5"/3.5" HDD/SSD ハードディスク エンクロージャ
The DiskGuard Raiden SATA III 2.5"/3.5" HDD/SSD Hard Disk Enclosure is designed with gamers in mind, featuring an e-sports style that combines functionality and aesthetic appeal. This versatile enclosure supports both 2.5" and 3.5" SATA drives, making it an excellent choice for expanding your storage options.

DiskGuard Raiden 2.5"/3.5" SATA III HDD/SSD Enclosure—Game-Ready, SuperSpeed
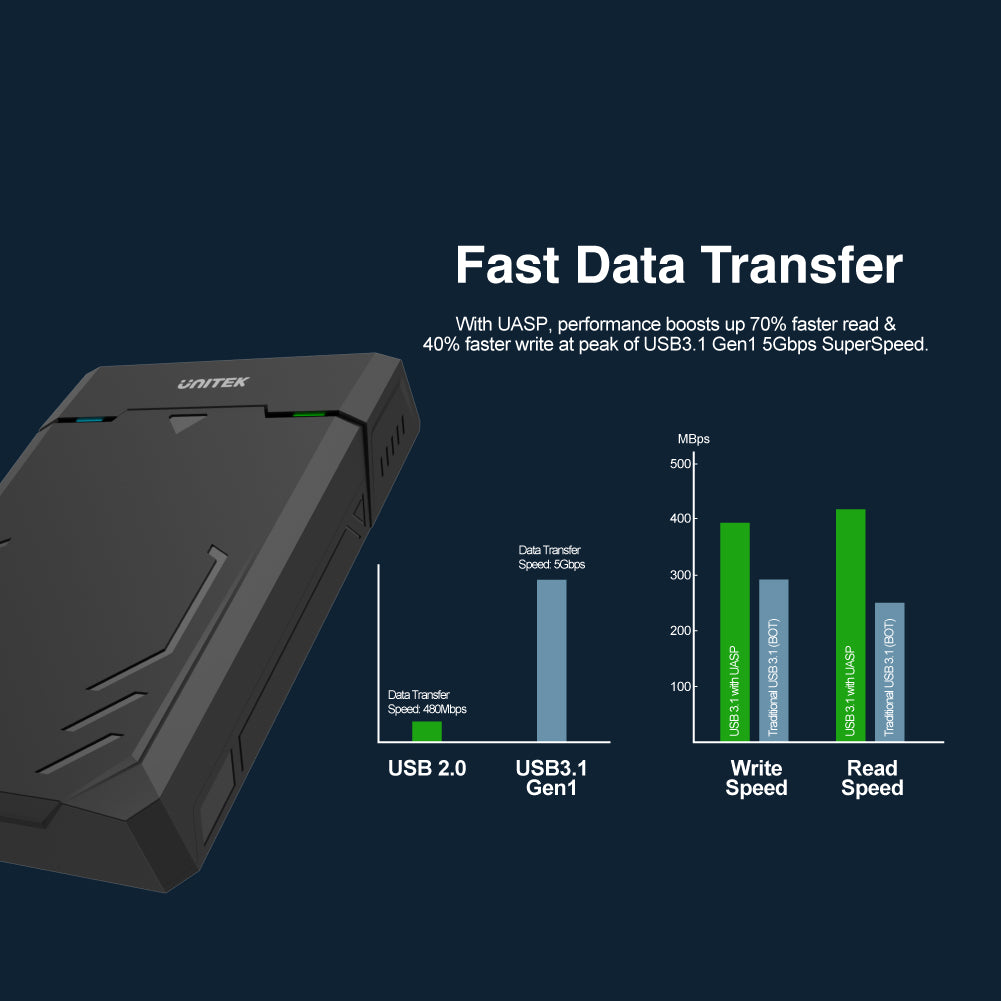
Tailor-made for gamers, this e-sports style enclosure supports all 2.5" and 3.5" SATA HDD/SSD drives. Enjoy USB 3.0 SuperSpeed transfers up to 5Gbps, with UASP for up to 70% faster reads and 40% faster writes. LED status, sleep mode, and plug-and-play convenience make it the perfect choice for fast, reliable storage expansion.

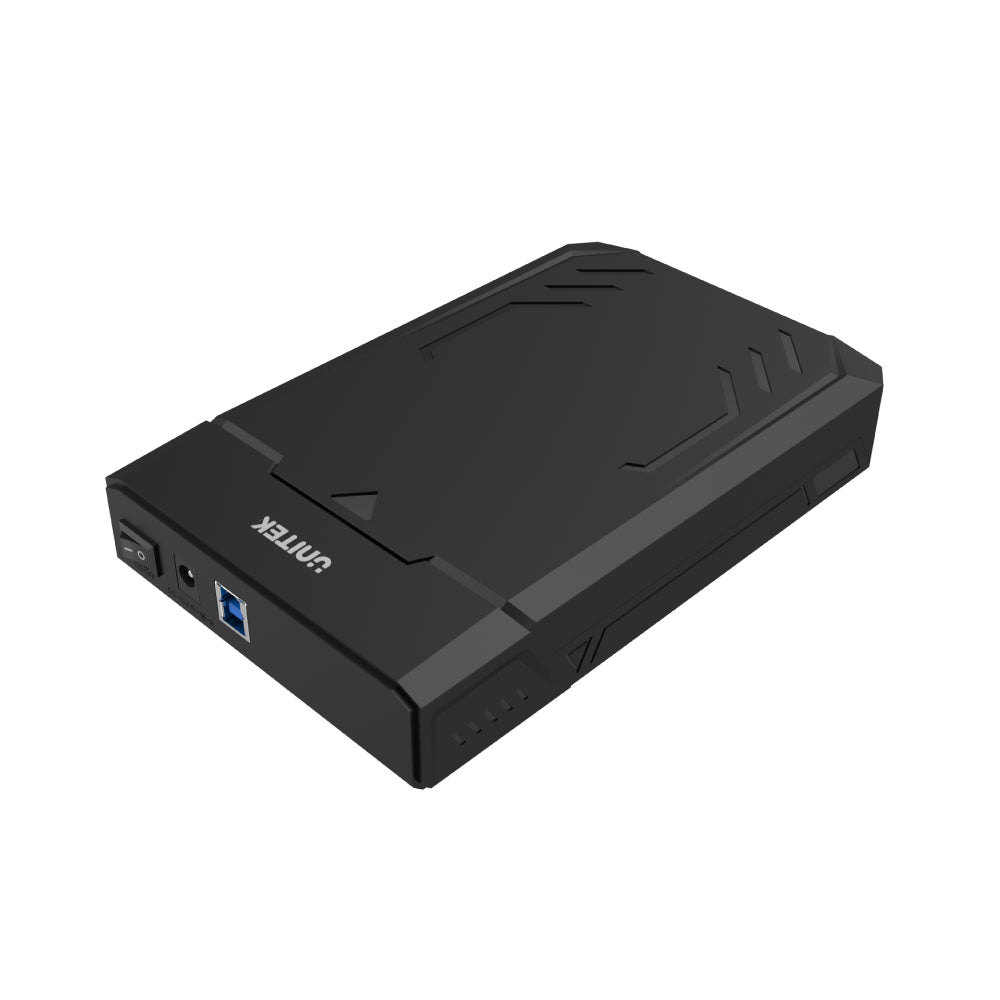
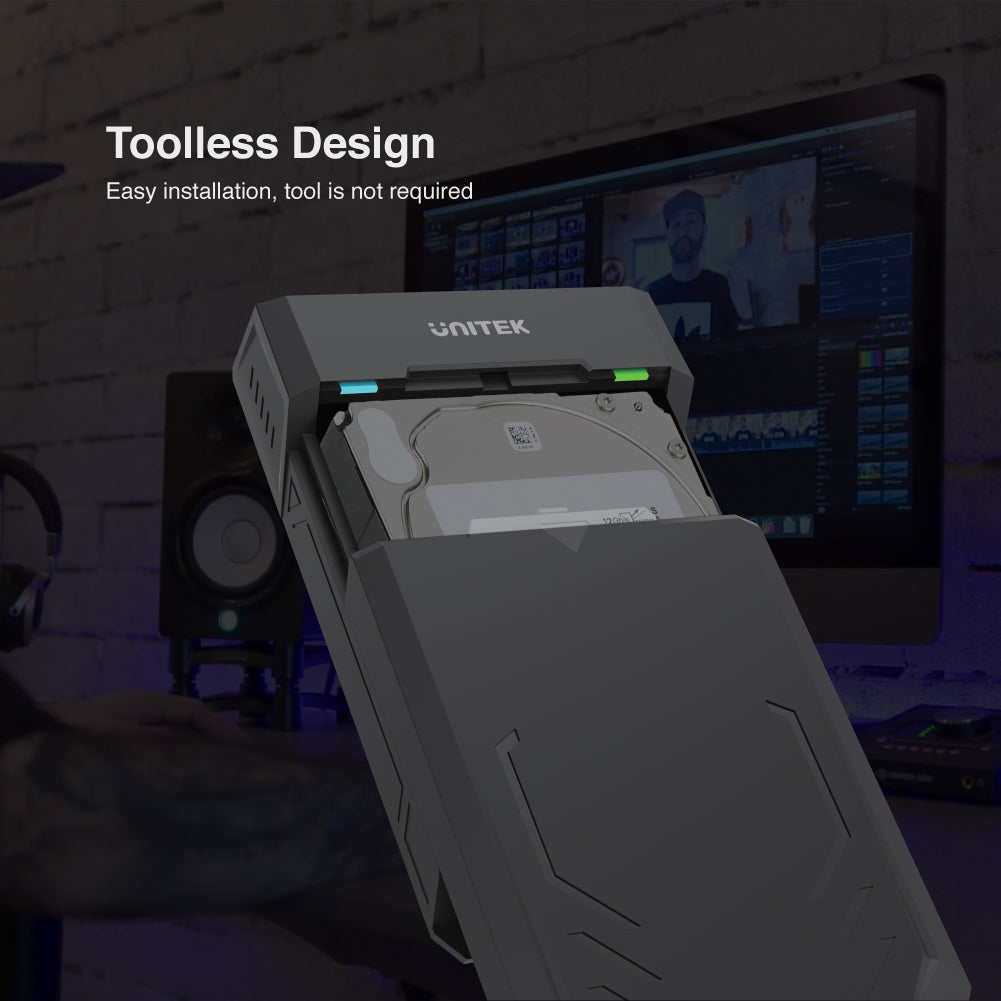
Tool-Free Installation for Effortless Drive Upgrades
UNITEK DiskGuard Raiden enclosure features a toolless design, allowing quick and easy installation of 2.5" or 3.5" SATA HDD/SSD—no tools required. Perfect for fast drive swaps and seamless storage expansion.

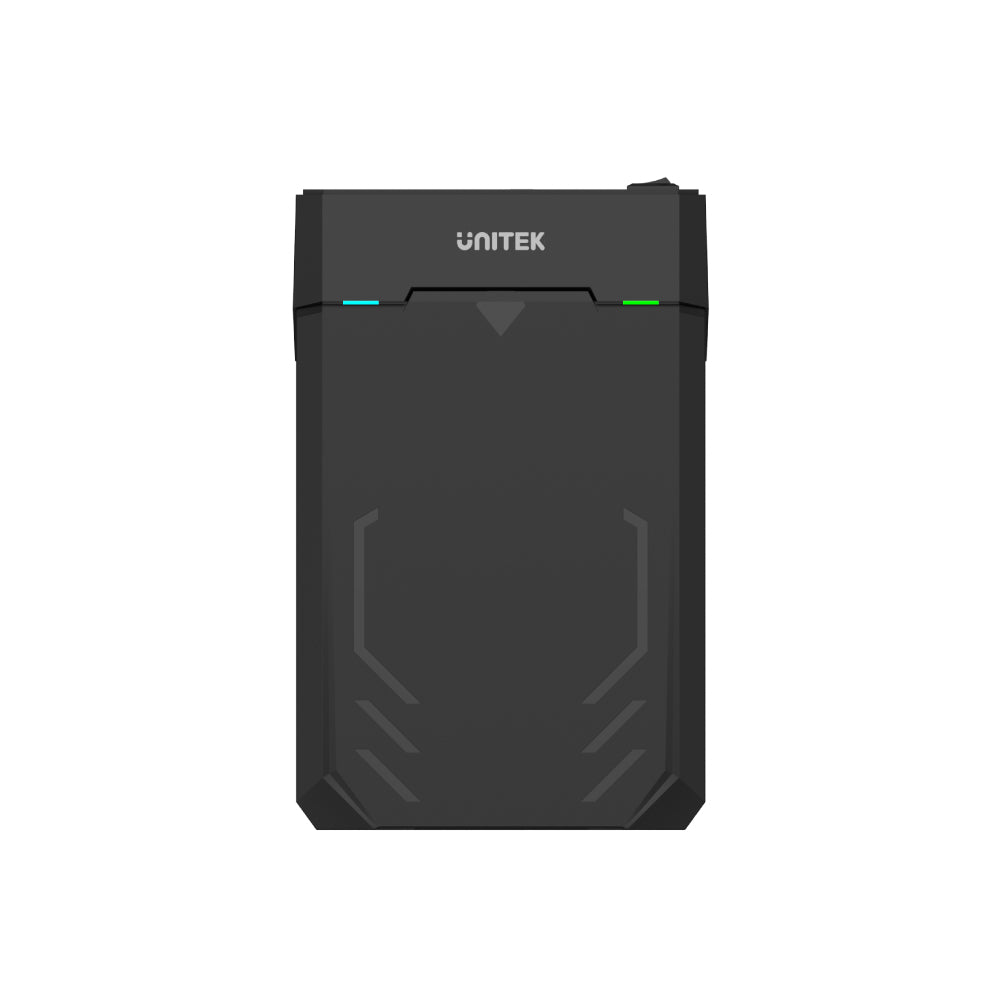
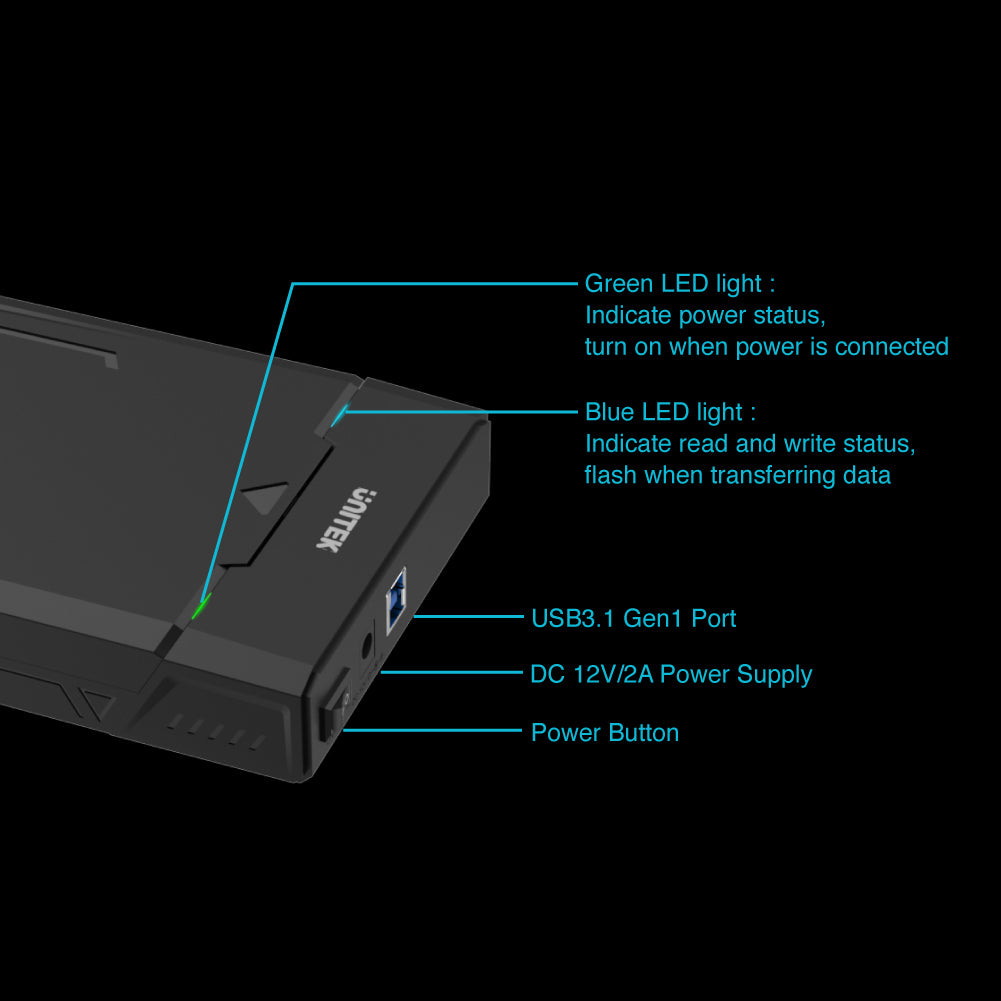
Dual LED Indicators for Power and Data Status
This enclosure features a green LED for power status and a blue LED that flashes during data transfers. Equipped with USB 3.1 Gen1, DC 12V/2A power supply, and a dedicated power button, it ensures clear status monitoring and reliable operation—ideal for easy, high-speed storage expansion.
The DiskGuard Raiden SATA III 2.5"/3.5" HDD/SSD Hard Disk Enclosure is designed with gamers in mind, featuring an e-sports style that combines functionality and aesthetic appeal. This versatile enclosure supports both 2.5" and 3.5" SATA drives, making it an excellent choice for expanding your storage options.
DiskGuard Raiden 2.5"/3.5" SATA III HDD/SSD Enclosure—Game-Ready, SuperSpeed
Tailor-made for gamers, this e-sports style enclosure supports all 2.5" and 3.5" SATA HDD/SSD drives. Enjoy USB 3.0 SuperSpeed transfers up to 5Gbps, with UASP for up to 70% faster reads and 40% faster writes. LED status, sleep mode, and plug-and-play convenience make it the perfect choice for fast, reliable storage expansion.
Tool-Free Installation for Effortless Drive Upgrades
UNITEK DiskGuard Raiden enclosure features a toolless design, allowing quick and easy installation of 2.5" or 3.5" SATA HDD/SSD—no tools required. Perfect for fast drive swaps and seamless storage expansion.
Dual LED Indicators for Power and Data Status
This enclosure features a green LED for power status and a blue LED that flashes during data transfers. Equipped with USB 3.1 Gen1, DC 12V/2A power supply, and a dedicated power button, it ensures clear status monitoring and reliable operation—ideal for easy, high-speed storage expansion.
| Operating System | Windows 10/ 11 (32/ 64bit), Linux kernel 3.x, Mac OS 10.6 or above |
|---|---|
| Host Port Compatibility | USB-B |
| Connector Type | SATAコネクタ x 1 |
| Card Slot | SATAスロット×1 |
| Host Power (PD) | DC 12V2A |
| SSD Compatibility | SATA SSD |
| Data transfer rate | 5Gbps |
| Cable Length | 100万 |
| Dimensions | 183.0mm x 119.0mm x 35.0mm |
| Material | ABS |
| Colour | Black |
- ディスクガード ライデン x 1
- USB-Aオス - USB-Bオスデータケーブル1本
- 12V2A電源アダプター×1
- ユーザーマニュアル x 1
オプションを選択