

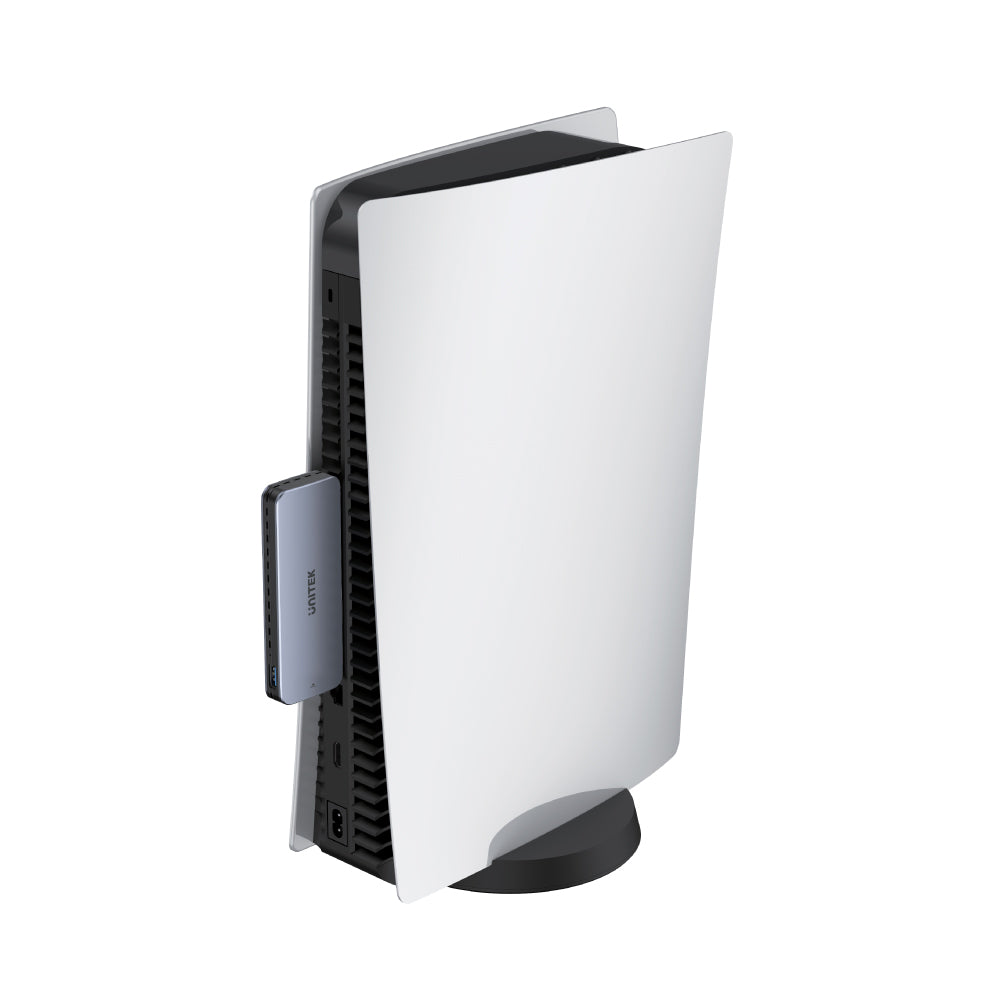
SolidForce PCIe/NVMe M.2 SSD 10Gbps Enclosure for PS5
Designed for PS5 storage expansion, this aluminum enclosure allows you to copy and play PS4 games directly on your PS5. Its console-mounted design ensures a secure connection.

PS5-Mounted M.2 SSD Enclosure
The SolidForce PCIe/NVMe M.2 SSD enclosure is designed specifically for PS5, allowing you to download and copy games and media apps directly onto your console. Its PS5-mounted design ensures a solid connection, eliminating cable clutter and providing a clean, organized setup. This enclosure not only enhances your gaming experience but also maximizes storage efficiency for seamless gameplay.

M.2 SSD Requirements
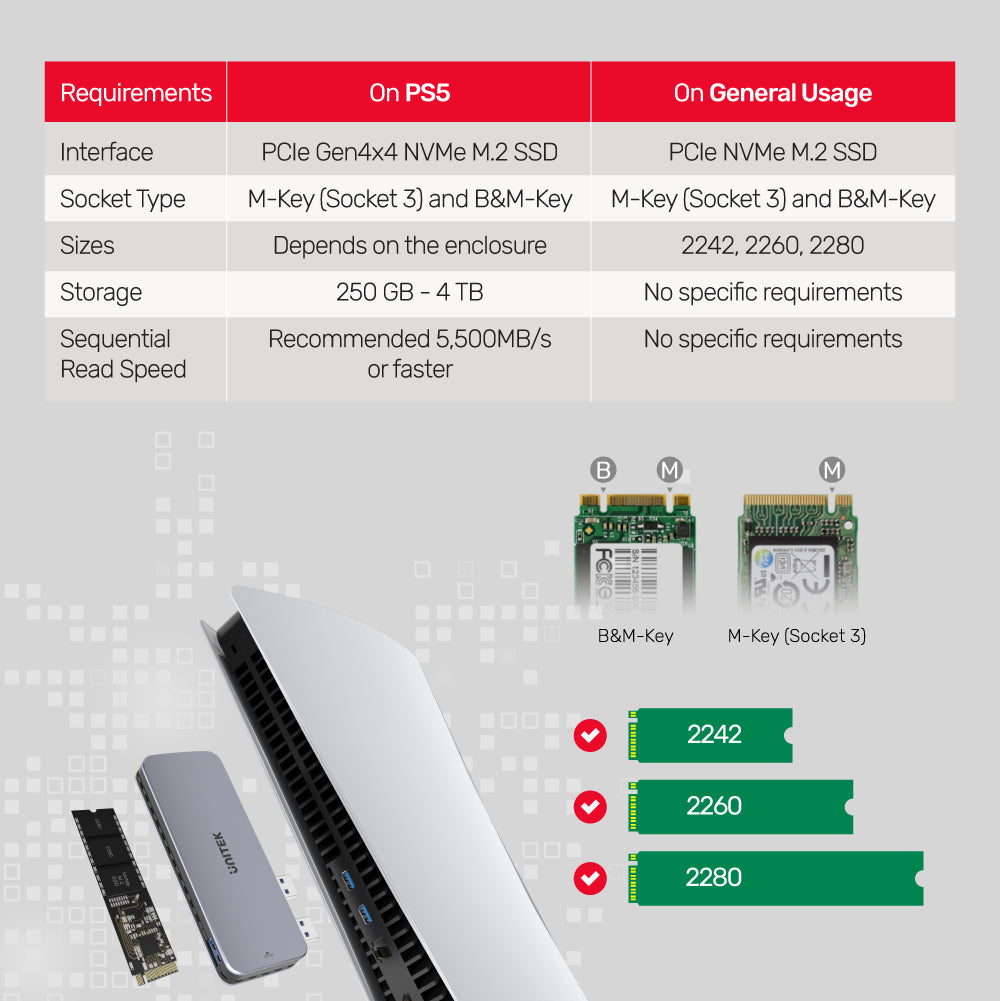
Supporting PS5 storage expansion with PCIe Gen4x4 NVMe M.2 SSDs (M-Key and B&M-Key), accommodating sizes 2242, 2260, and 2280, and capacities from 250GB to 4TB. Offering 10Gbps USB 3.2 Gen2 data transfer and a tool-free, console-mounted design, it ensures quick installation and efficient heat dissipation for seamless PS4 game copying and PS5 gameplay.

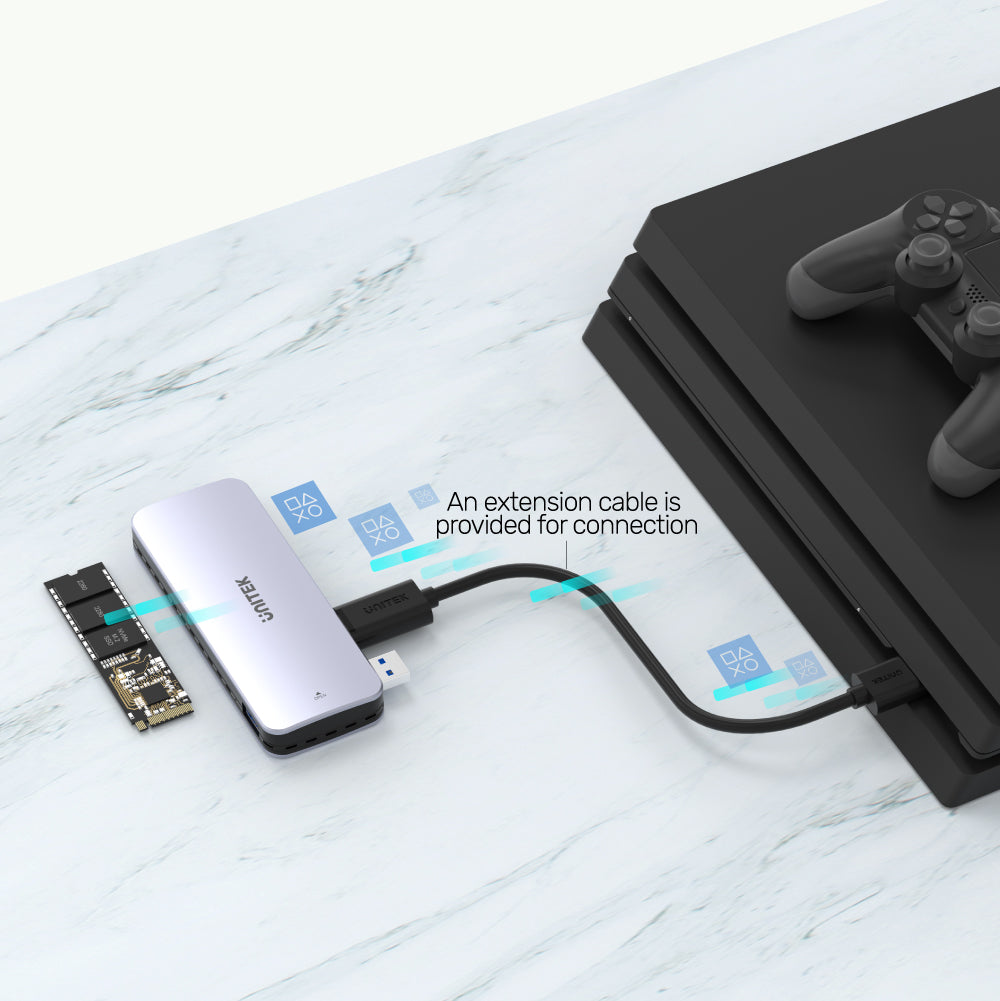
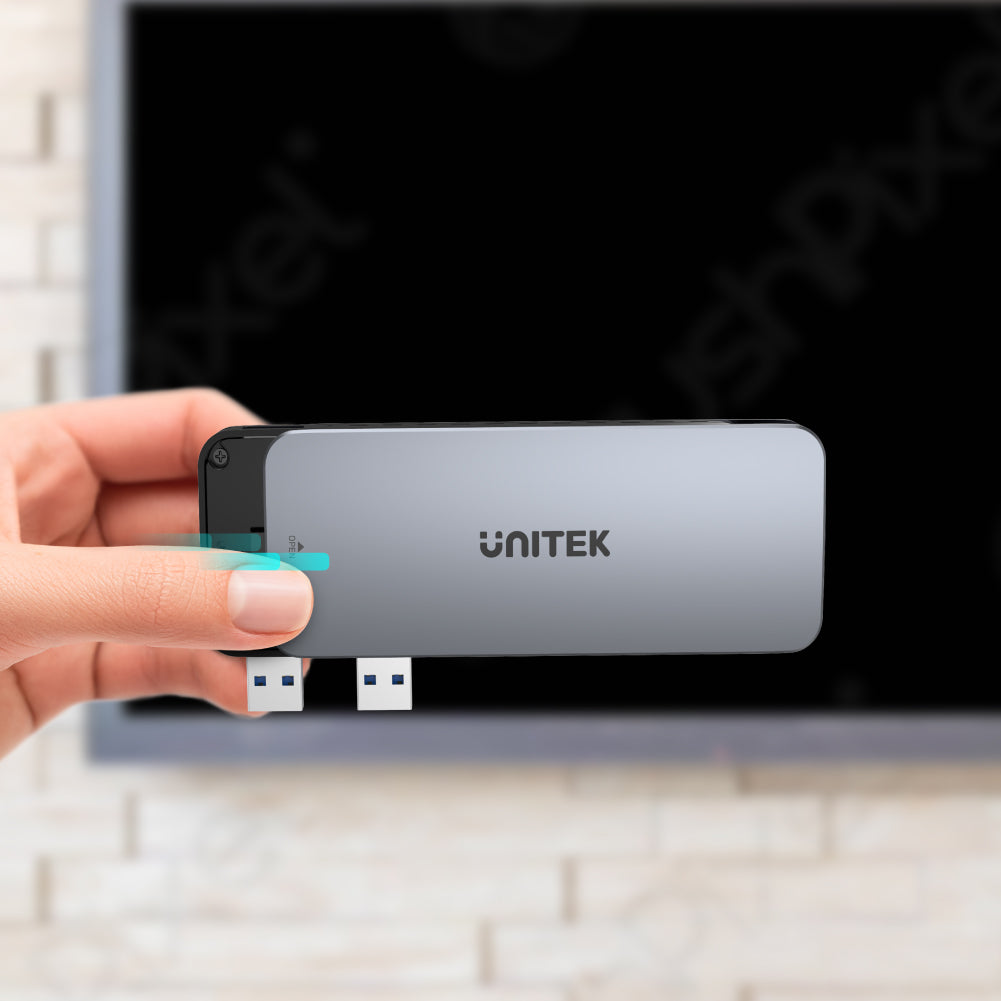
Connection On Laptops
Not just for gaming consoles but also for laptops. A supported extension cable is provided for connecting to laptops. Perfect for gamers, tech nerds and 4K media designers.

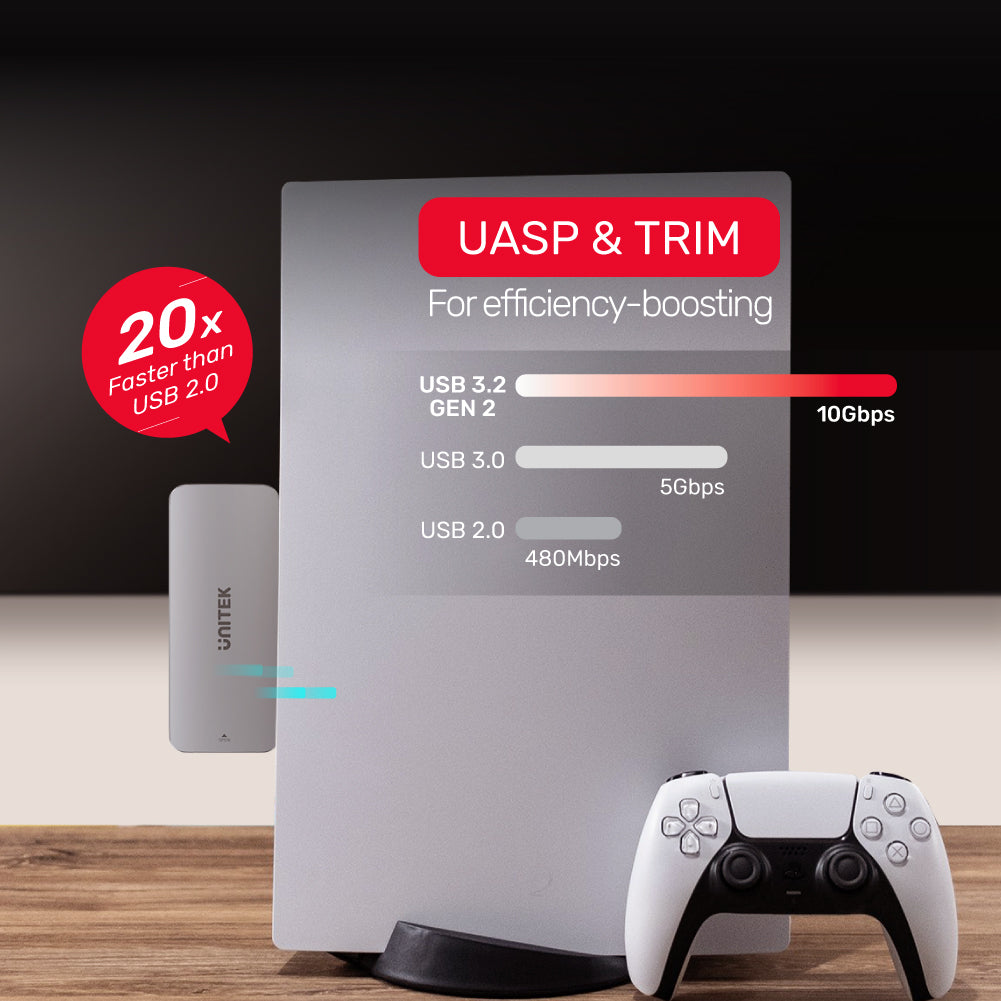
Advanced SuperSpeed
USB3.2 Gen2 10Gbps SuperSpeed meets the high R/W rate of your M.2 SSD for steady and efficient data transfer. Also, this product supports UASP & TRIM for efficiency-boosting.

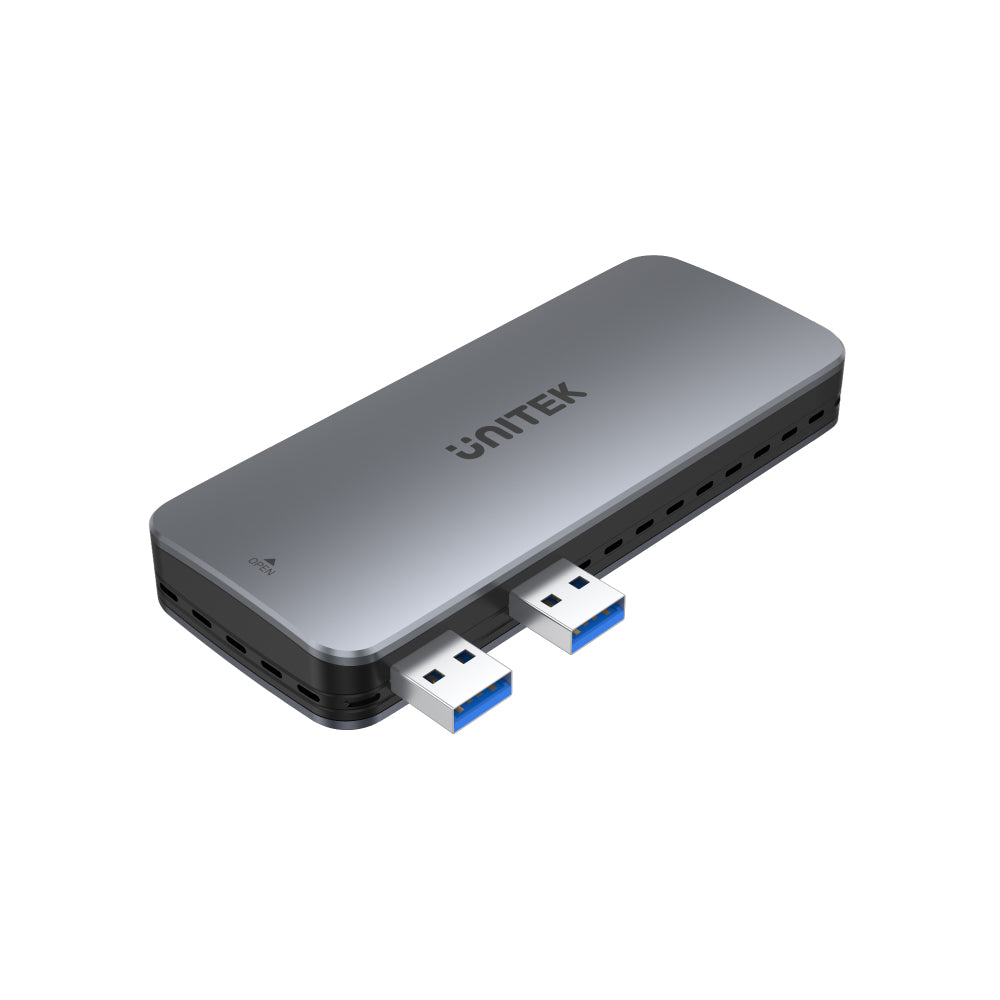
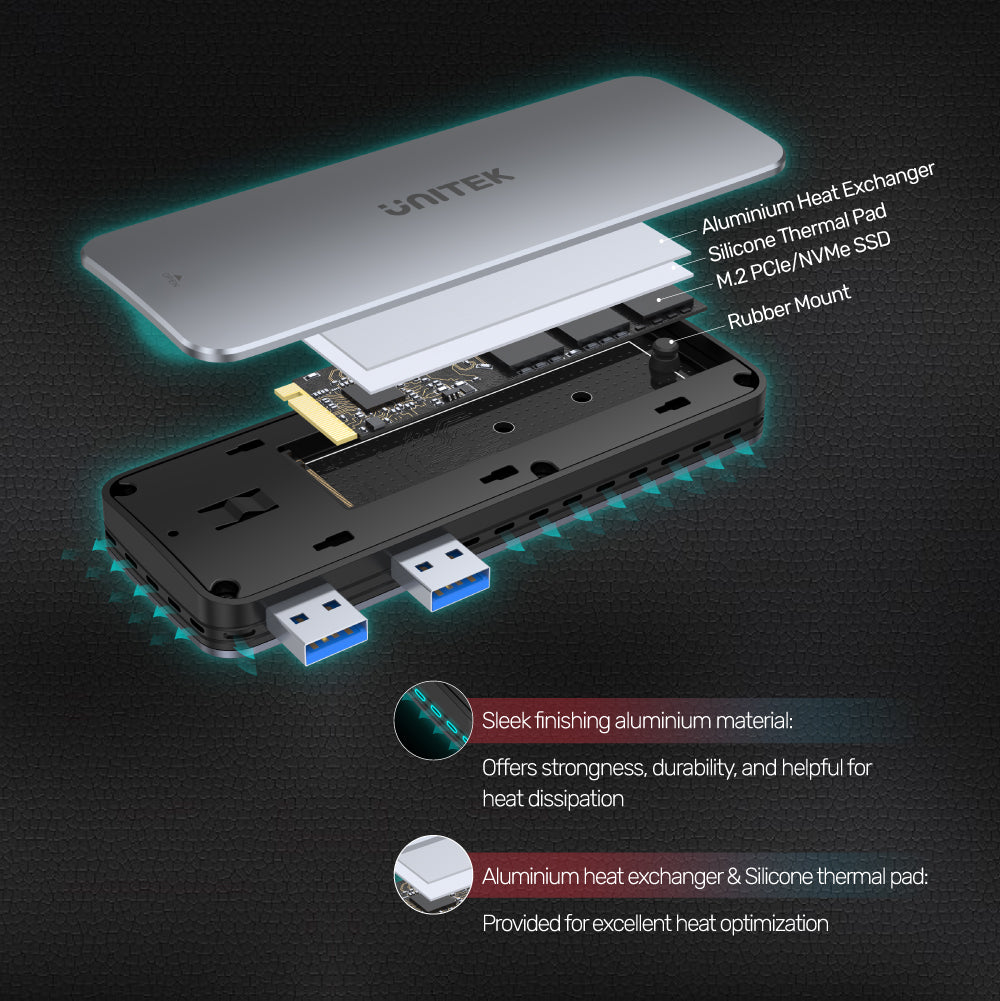
Premium Build and Easy Installation
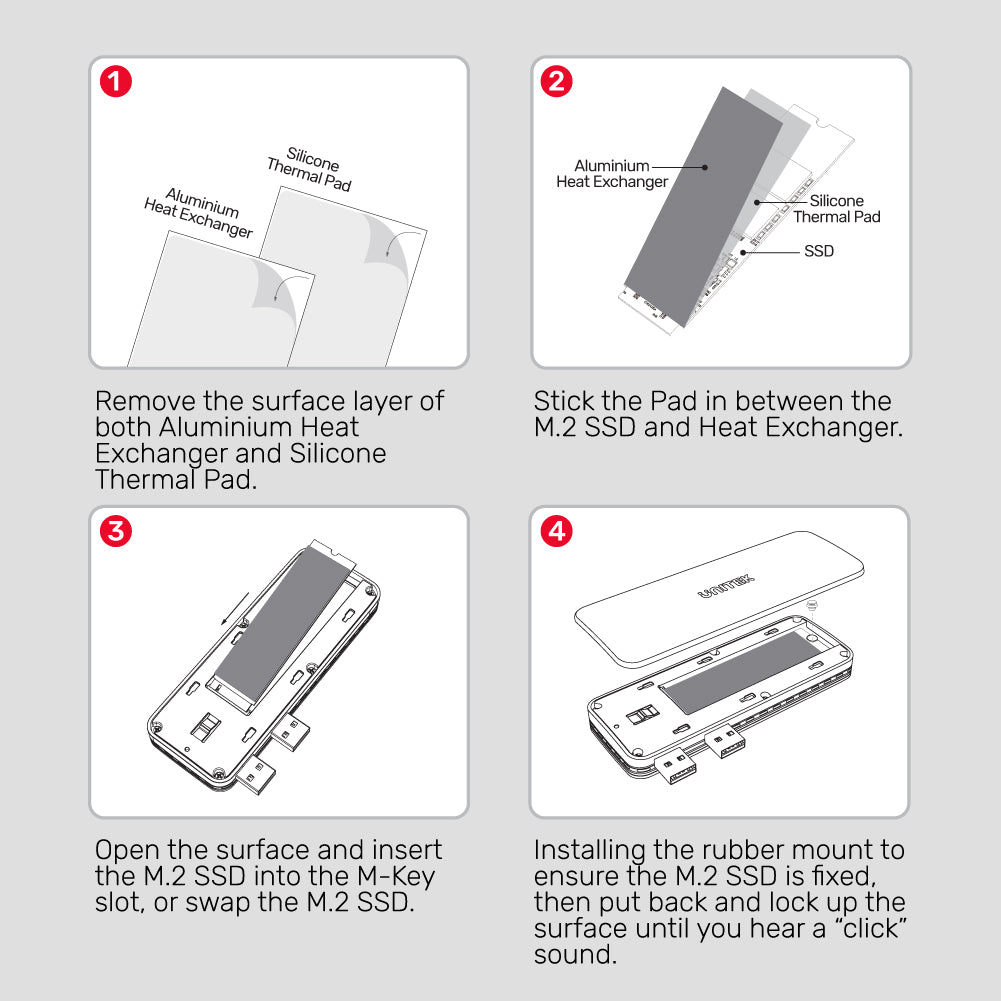
Sleek aluminum finish that combines strength and durability, while also aiding in heat dissipation. Its aluminum heat exchanger and silicone thermal pad provide excellent heat optimization, ensuring your SSD operates efficiently.
The tool-free design of the aluminum-alloy surface allows for quick installation of M.2 SSDs while further facilitating heat dissipation. Note: This enclosure is not compatible with M.2 SATA drives.

Hassle-Free Setup
Thoughtful tool-free design, requiring no mounting screws for installation. Simply insert your PCIe Gen4x4 NVMe M.2 SSD (2242/2260/2280, 250GB-4TB) into the enclosure, and it’s ready for PS5 storage expansion or PS4 game copying, ensuring a quick and seamless setup process.
Designed for PS5 storage expansion, this aluminum enclosure allows you to copy and play PS4 games directly on your PS5. Its console-mounted design ensures a secure connection.
PS5-Mounted M.2 SSD Enclosure
The SolidForce PCIe/NVMe M.2 SSD enclosure is designed specifically for PS5, allowing you to download and copy games and media apps directly onto your console. Its PS5-mounted design ensures a solid connection, eliminating cable clutter and providing a clean, organized setup. This enclosure not only enhances your gaming experience but also maximizes storage efficiency for seamless gameplay.
M.2 SSD Requirements
Supporting PS5 storage expansion with PCIe Gen4x4 NVMe M.2 SSDs (M-Key and B&M-Key), accommodating sizes 2242, 2260, and 2280, and capacities from 250GB to 4TB. Offering 10Gbps USB 3.2 Gen2 data transfer and a tool-free, console-mounted design, it ensures quick installation and efficient heat dissipation for seamless PS4 game copying and PS5 gameplay.
Connection On Laptops
Not just for gaming consoles but also for laptops. A supported extension cable is provided for connecting to laptops. Perfect for gamers, tech nerds and 4K media designers.
Advanced SuperSpeed
USB3.2 Gen2 10Gbps SuperSpeed meets the high R/W rate of your M.2 SSD for steady and efficient data transfer. Also, this product supports UASP & TRIM for efficiency-boosting.
Premium Build and Easy Installation
Sleek aluminum finish that combines strength and durability, while also aiding in heat dissipation. Its aluminum heat exchanger and silicone thermal pad provide excellent heat optimization, ensuring your SSD operates efficiently.
The tool-free design of the aluminum-alloy surface allows for quick installation of M.2 SSDs while further facilitating heat dissipation. Note: This enclosure is not compatible with M.2 SATA drives.
Hassle-Free Setup
Thoughtful tool-free design, requiring no mounting screws for installation. Simply insert your PCIe Gen4x4 NVMe M.2 SSD (2242/2260/2280, 250GB-4TB) into the enclosure, and it’s ready for PS5 storage expansion or PS4 game copying, ensuring a quick and seamless setup process.
| Operating System | Windows 10/ 11 (32/ 64bit), Linux kernel 3.x, Mac OS 10.6 or above, PS5, PS4, PS3 |
|---|---|
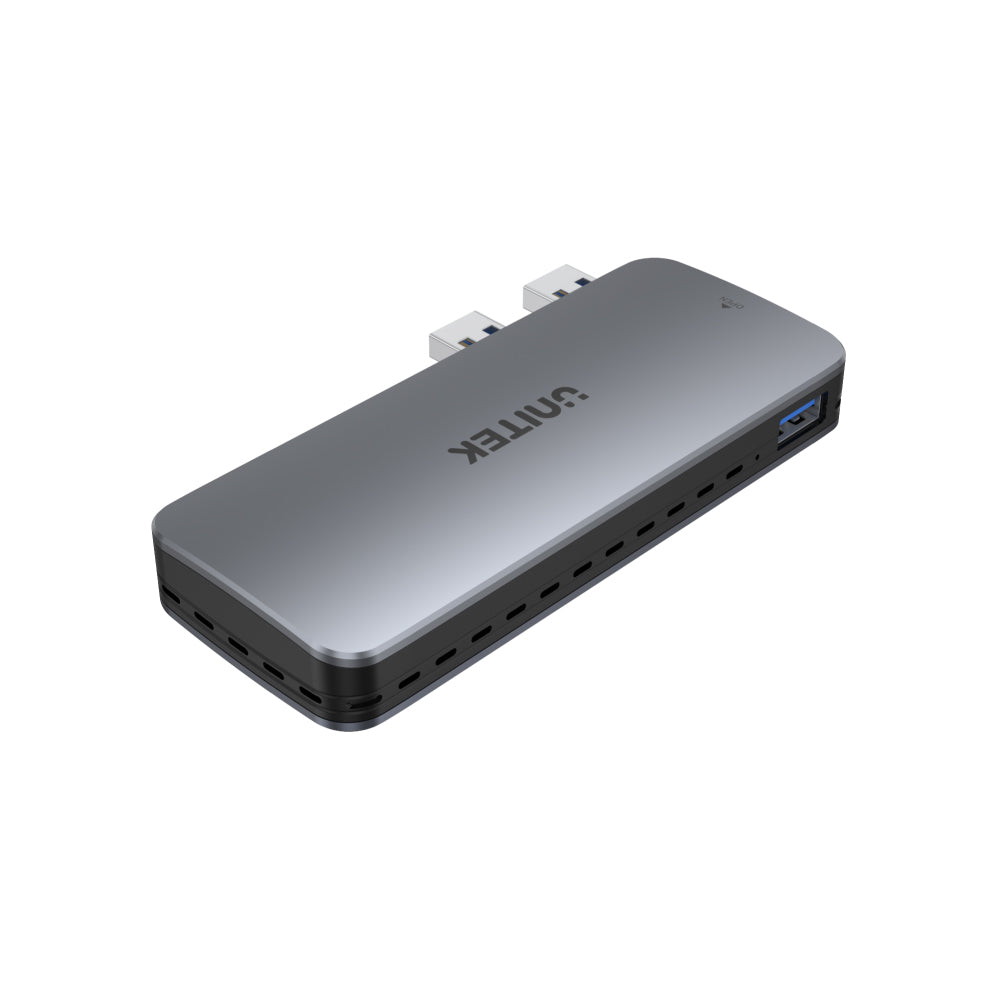
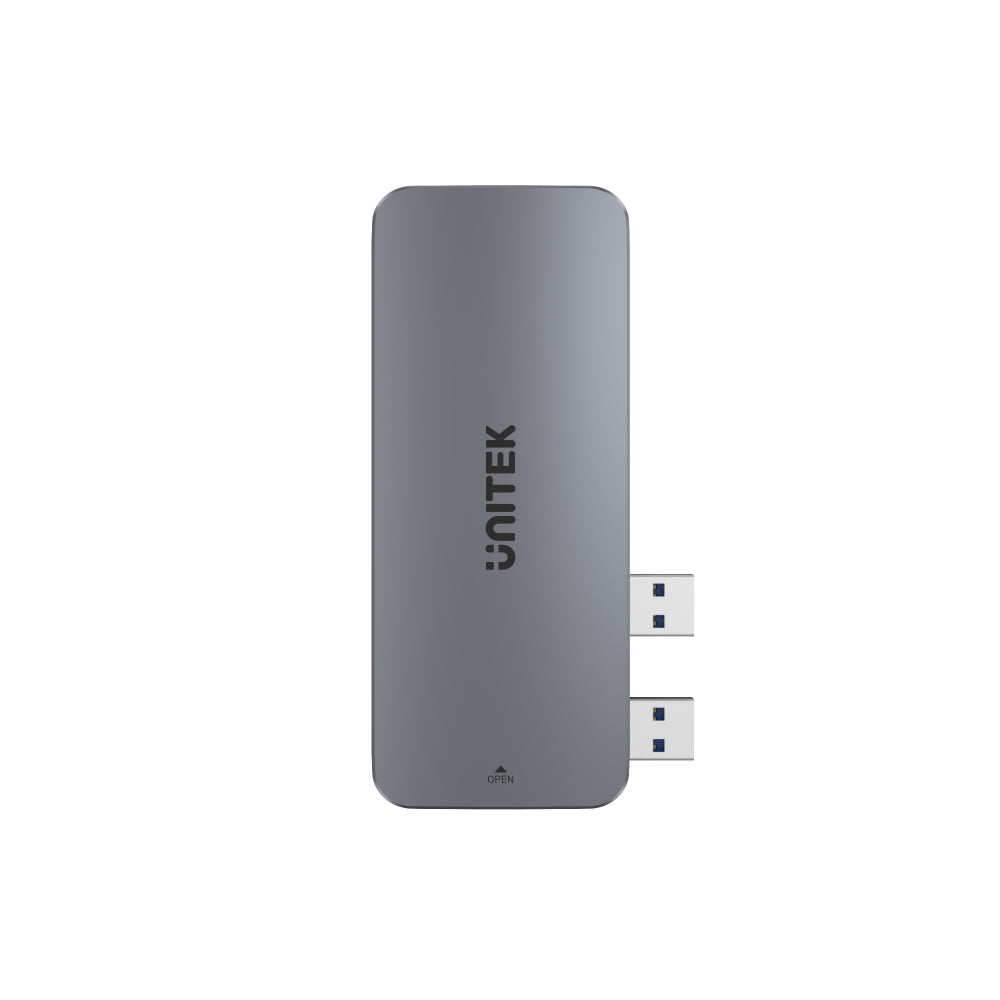
| Host Port Compatibility | USB-C |
| Card Slot | 1 x M.2 Slot |
| USB-C | 3 x 10Gbps , 3 x USB-A (2 x male, 1 x female) |
| SSD Compatibility | M.2 PCI-e NVMe SSD |
| Data transfer rate | 10Gbps |
| Cable Length | 30cm |
| Dimensions | 45.0mm x 120.0mm x 15.5mm |
| Material | Aluminum Alloy |
| Colour | Space Grey |
- 1 x SolidForce For PS5 PCIe/NVMe Enclosure
- 1 x 10Gbps USB Extension Cable
- 1 x Rubber Mount
- 1 x Aluminium Heat Exchanger
- 1 x Silicone Thermal Pad
- 1 x User Manual
Optionen wählen