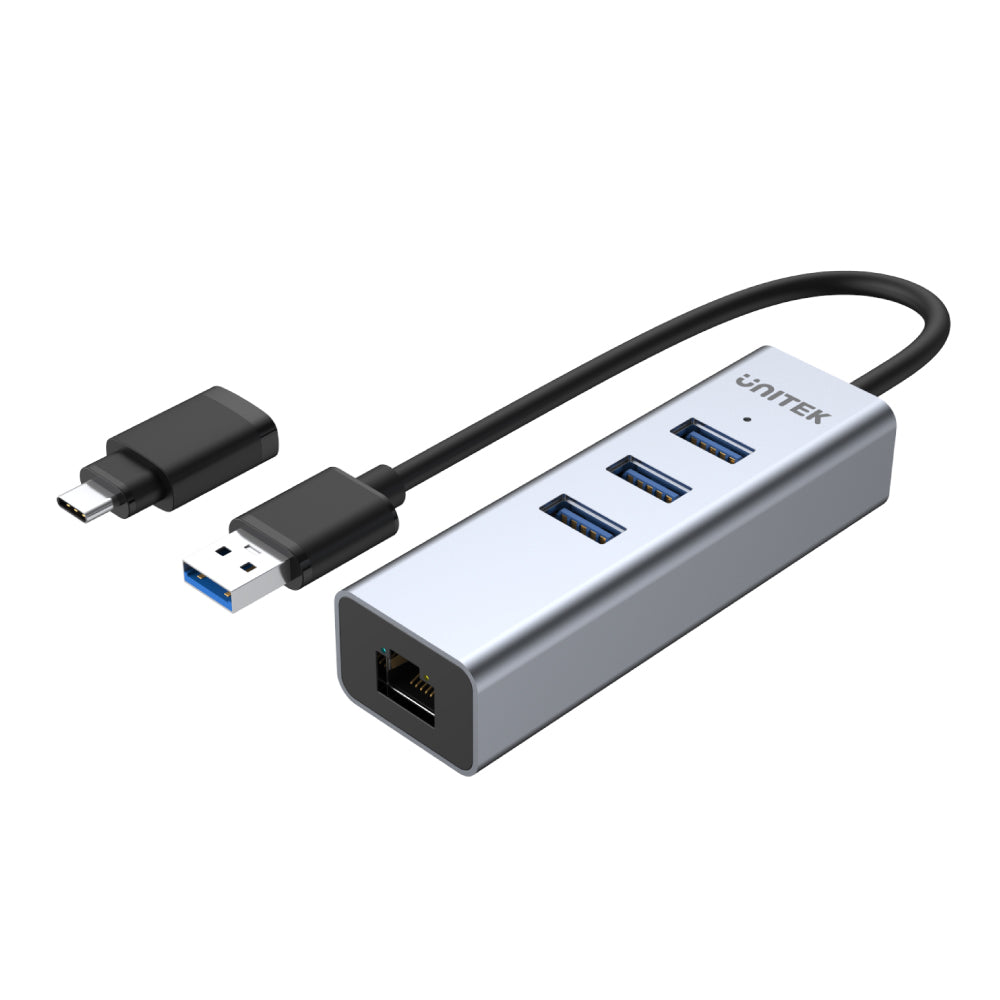
USB-C 어댑터가 있는 4-in-1 USB 3.0 이더넷 허브
제품 개요:
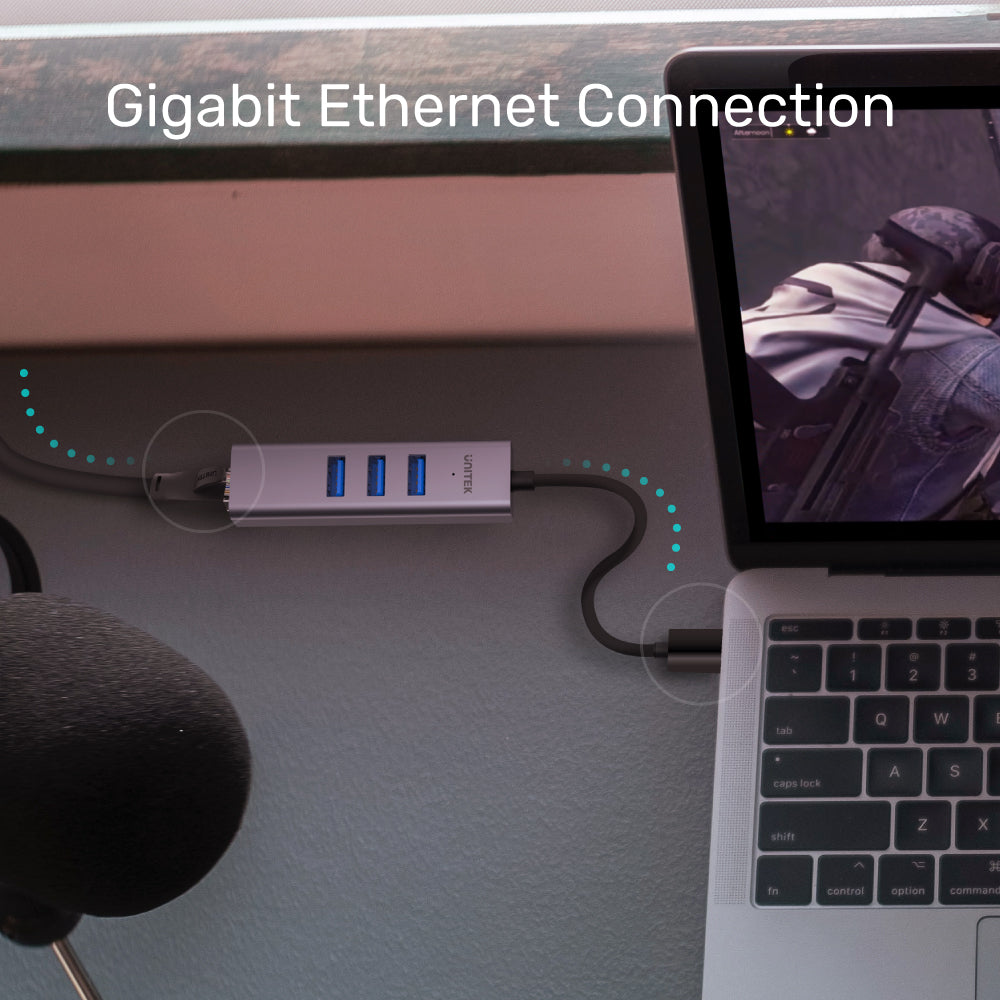
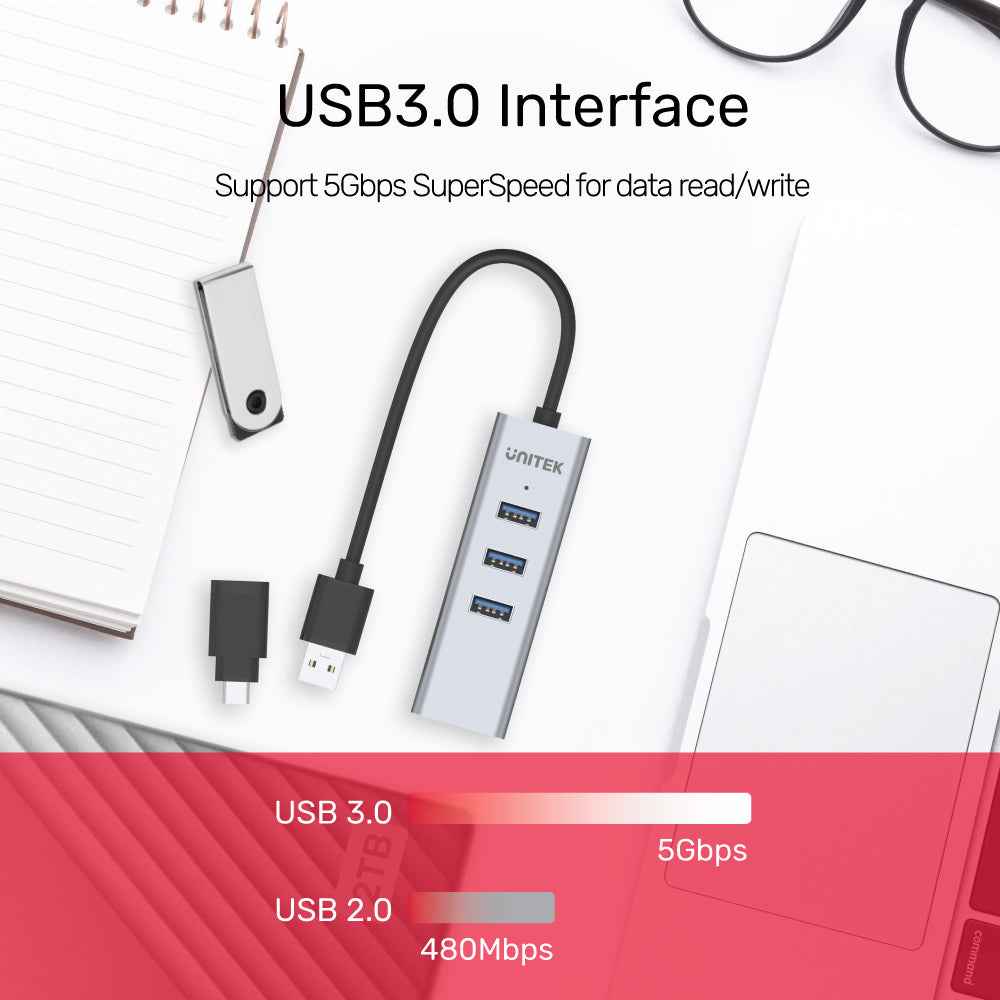
- USB3.0을 통한 기가비트 이더넷
- USB3.0 5Gbps SuperSpeed로 3포트 USB 확장
- 내구성이 뛰어난 알루미늄 합금 하우징
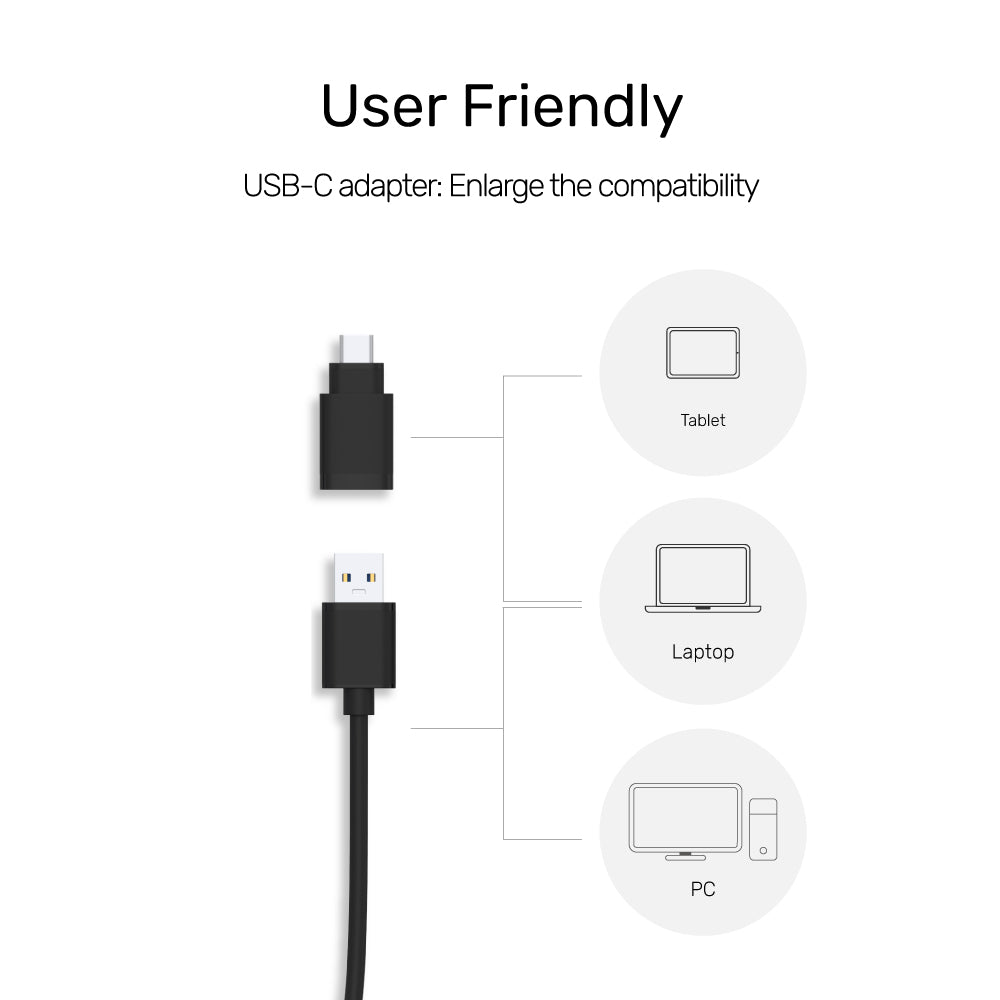
- USB-C M에서 USB-A F 어댑터로
이 USB 허브는 USB3.0 5Gbps 및 10/100/1000Mbps 이더넷을 완벽하게 지원하여 인터넷 및 USB 데이터 전송에서 빠르고 사용자 친화적인 서핑 경험을 제공합니다. USB-C 어댑터를 사용하면 모든 노트북과 컴퓨터에서 허브를 사용할 수 있습니다.
인증


제품 특징:
- 알루미늄 케이스 - 세련되고 우아합니다.
- USB3.0과 기가비트 이더넷의 완벽한 조합.
- USB3.0 SuperSpeed 데이터 전송(5GBPS).
- 기가비트 이더넷은 빠르고 안정적인 인터넷 연결을 제공합니다.
- 새로운 Apple MacBook 및 Google Chromebook Pixel을 위한 대체 솔루션인 USB Type-C 어댑터와 함께 제공됩니다.
- IPv4/IPv6 네트워크, 전이중, 자동 플립 및 흐름 제어를 지원합니다.
- 전원 관리, 원격 깨우기 기능 및 기가비트 네트워크 전원 자동 조정을 지원합니다.
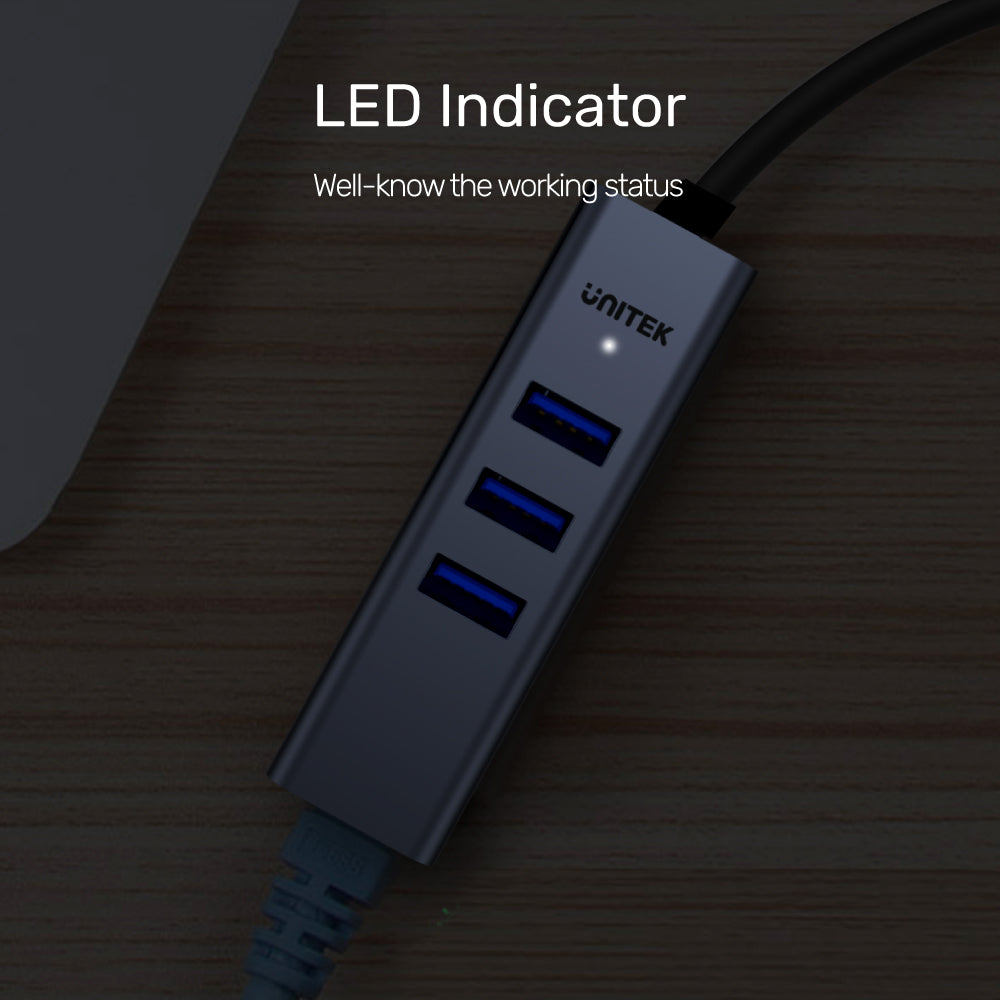
- LED 표시등 - 이더넷 연결 상태를 나타냅니다.
- 치수: 30mm x 21mm x 96mm
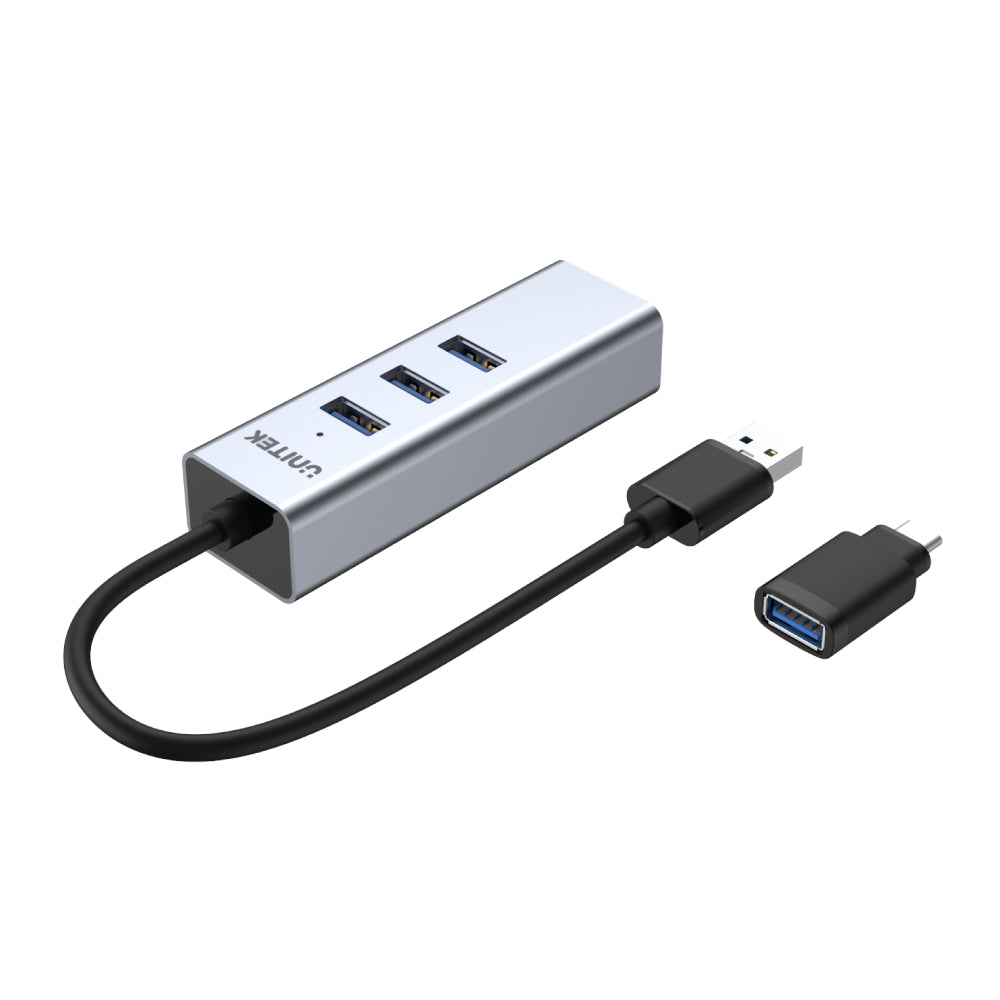
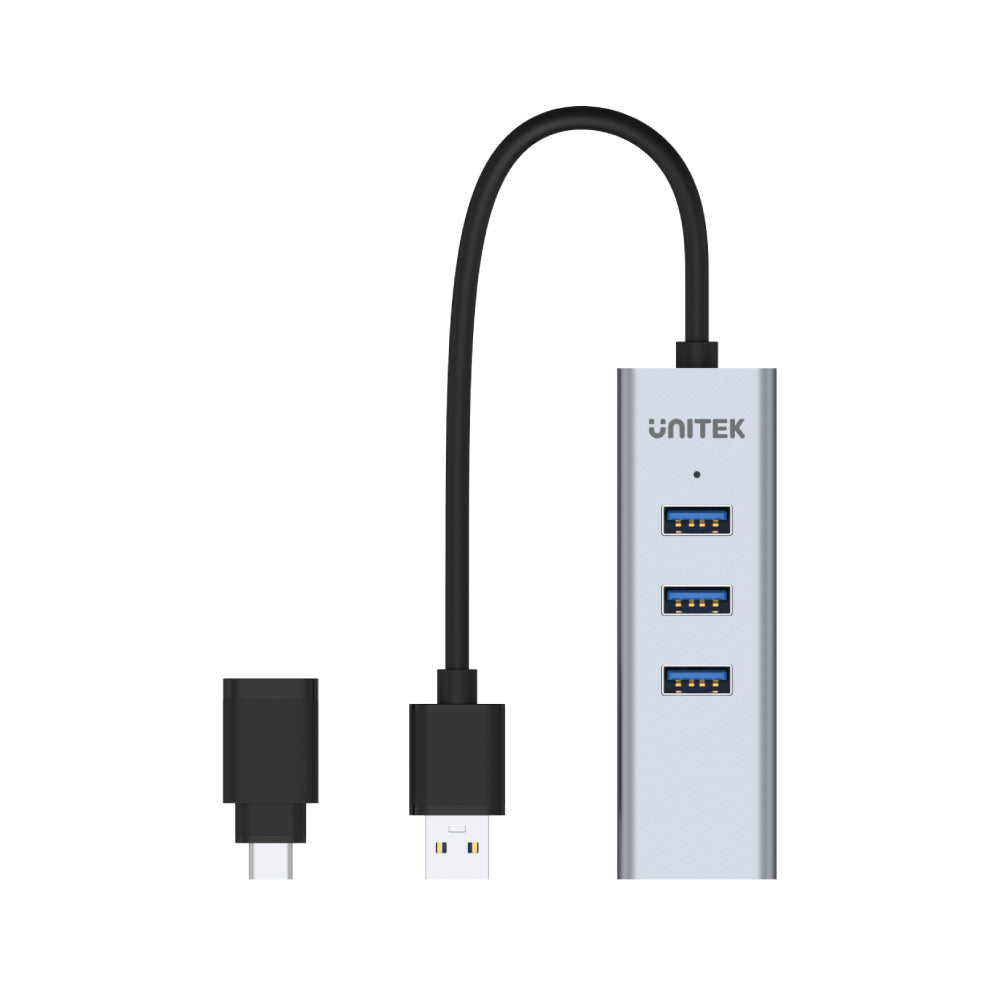
- 업스트림: USB-A 수
- 다운스트림:
- 3 x USB-A 암
- 1 x RJ45 암
- 케이블 길이: 30cm
- 색상: 실버
1 x USB3.0 3포트 + 기가비트 이더넷 알루미늄 허브
1 x USB Type-C 어댑터
Shipping cost will be calculated during checkout. International duties & taxes may apply and are not calculated at checkout.
Shipping & Delivery
For shipping quotes, "Checkout" the item you want to buy, enter your shipping details and the shipping rates will automatically generate based on the item's weight and the delivery location.
If the shipping rates do not generate, please contact us.
Normal Shipping Times: 3-14 business days
The final shipping days are according to your local because of COVID-19 guidelines.
Delays:
Unitek is not responsible for delays in shipping caused by extraneous factors (such as incorrect addresses, weather, inspections, labor disputes, and/or transportation problems). We cannot be responsible for lost or damaged packages.
Duties & Taxes:
Orders shipped outside of the United States may be subject to import taxes, customs duties, fees, and/or VAT (Value Added Taxes) levied by the destination country. You are responsible for paying any taxes, duties, customs fees, and/or VAT charged by your government, as UNITEK has no control over these charges and cannot predict what they may be. Please contact the local customs office in the relevant jurisdiction for additional information on customs policies or duties. International orders will not be refunded for failure to pay import duties, taxes or fees.
Global Shipping Notes:
For customers in Korea, please fill in your Korean Name (not in English) which must correspond to the Personal Custom Code;
For customers in Taiwan, please fill in the ID number;
For customers in South Africa, please fill in the ID number;
For customers in Chile, please fill in RUT.
For any other questions or inquiries, please contact us.
Please download the latest driver of this product. Reinstall the driver again (https://www.unitek-products.com/pages/drivers-hub) and if it still doesn't work, contact us via support@unitek-products.com
Go through the following:
1. Press the Windows Key plus R, type "devmgmt.msc", and press Enter.
2. In Device Manager, under the appropriate heading, confirm that your expansion card is listed and that there isn't an exclamation mark next to it. For example, a USB controller card would be under Universal Serial Bus controllers.
3. Your USB device is listed according to the name of the chipset or the dedicated name.
Go through the following:
1. Click the Apple icon.
2. Click About This Mac.
3. Click More Info or System Report.
4. Under the appropriate heading, please check that your USB device is listed (according to the name of the chipset or the dedicated name) and that there isn't an error. For example, a network card would be under Ethernet Cards.
5. You may have to refresh the System Information page after you plug in your device. To do so, press Command + R with the System Information page open.
It is best to set a specific speed at half or full duplex in your settings, while the device that the adapter is connected to (whether it is a router, switch, or computer) must also be able to perform at the same speed.
Note: You must log in as the local administrator before you continue.
To do so, go through the following:
1. Press Windows Key plus R.
2. Type "devmgmt.msc".
3. Click OK.
4. Open the Networking adapters section.
5. Right-click the network adapter that you want to change and select 6. Properties.
7. Click the Advanced tab.
8. Scroll down to Speed & Duplex. By default, it is set to Auto-Negotiate. Select any of the speeds that you see in the list.
9. Click OK and restart your computer.
Go through the following:
Windows 10
1. Press the Windows Key plus X.
2. Click Network Connections.
3. Right-click the connection that you want to change and click Properties.
Note: The IP address for a wired connection is called Local Area Connection or Ethernet. The IP address for a wireless connection is called Wireless Network Connection or Wireless.
4. Left-click Internet Protocol Version (TCP/IPv4) and click Properties.
5. Select the Use the following IP address option.
6. Enter your desired IP address and click in the Subnet Mask area, which should auto-complete.
7. Click OK twice to apply the settings.
Note: If you are changing your IP address to access a specific device, minimize the Network Connections window. Please be reminded, in step 7, select Obtain an IP address automatically to access the Internet again.
Windows 8
1. Press the Windows Key plus X.
2. Click Control Panel.
3. Click Network and Sharing Center.
4. Click Change adapter settings on the left.
5. Right-click the connection you want to change and choose Properties.
Note: If you are changing the IP address on a physical connection, it will be called “Local Area Connection” or “Ethernet”. If you are changing the IP address on a wireless connection, it will be called “Wireless Network Connection” or “Wireless”.
6. Left-click “Internet Protocol Version (TCP/IPv4)” to select, then click Properties.
7. Select the radio button "Use the following IP address".
8. Enter your desired IP address and click into the Subnet Mask area, which should auto-fill appropriately.
9. Click OK twice to apply the settings.
Note: If you are changing your IP address to access a specific device, minimize the Network Connections window. Please be reminded, in step 7, select Obtain an IP address automatically to access the Internet again.
Windows 7
1. Click Start, then select Control Panel.
2. Click Network and Internet.
3. Click Network and Sharing Center.
4. Click Change adapter settings on the left.
5. Right-click the connection you want to change and choose Properties.
Note: If you are changing the IP address on a physical connection, it will be called “Local Area Connection”. If you are changing the IP address on a wireless connection, it will be called “Wireless Network Connection”.
6. Left-click “Internet Protocol Version 4 (TCP/IPv4)” to select it, then click Properties.
7. Select the radio button "Use the following IP address".
8. Enter your desired IP address and click into the Subnet Mask area, which should auto-fill appropriately.
9. Click OK twice to apply the settings.
Note: If you are changing your IP address to access a specific device, minimize the Network Connections window. Please be reminded, in step 7, select Obtain an IP address automatically to access the Internet again.
Windows Vista
1. Click Start, then select Control Panel.
2. Click Network and Sharing Center.
3. Click Manage network connections on the left.
4. Right-click the connection you want to change and choose Properties.
Note: If you are changing the IP address on a physical connection, it will be called “Local Area Connection”. If you are changing the IP address on a wireless connection, it will be called “Wireless Network Connection”.
5. Left-click “Internet Protocol Version (TCP/IPv4)” to select it, then click Properties.
6. Select the radio button "Use the following IP address".
7. Enter your desired IP address and click into the Subnet Mask area, which should auto-fill appropriately.
8. Click OK twice to apply the settings.
Note: If you are changing your IP address to access a specific device, minimize the Network Connections window. Please be reminded, in step 6, select Obtain an IP address automatically to access the Internet again.
Windows XP
1. Click Start, then select Control Panel.
2. Click Network Connections.
3. Right-click the connection you want to change and choose Properties.
Note: If you are changing the IP address on a physical connection, it will be called “Local Area Connection”. If you are changing the IP address on a wireless connection, it will be called “Wireless Network Connection”.
4. In the middle of the Properties window, scroll down to "Internet Protocol (TCP/IP)" and left-click on it to select it, then click Properties.
5. Select the radio button "Use the following IP address".
6. Enter your desired IP address and click into the Subnet Mask area, which should auto-fill appropriately.
7. Click OK twice to apply the settings.
Note: If you are changing your IP address to access a specific device, minimize the Network Connections window. Please be reminded, in step 5, select Obtain an IP address automatically to access the Internet again.
Mac OS
1. Click the Apple menu.
2. Click System Preferences.
3. Click Network.
4. Select the network device that you would like to configure.
Note: The IP address for a wired connection is called Local Area Connection or Ethernet. The IP address for a wireless connection is called Wireless Network Connection or Wi-Fi.
5. Click Advanced.
6. Click TCP/IP.
7. Beside Configure IPv4, select Manually.
8. In the IPv4 Address field, enter your desired IP address.
9. In the Subnet Mask field, enter a default subnet address (for example, 255.255.255.0 for 192.168.xxx.xxx).
10. Do one of the following:
.Leave the Router field blank.
.Enter the IP address of the default gateway.
11. Click OK and Apply to apply the changes.
Note: If you are changing your IP address to access a specific device, minimize the Network window. Please be reminded, in step 7, select Using DHCP to access the Internet again.