8K Ultrapro HDMI 2.1 Active Optical Cable
8K Fiber Optic HDMI 2.1 Cable (Support PS5 4K @120Hz)
8K 光ファイバー HDMI ケーブル (PS5 4K @120Hz をサポート)

8K 光ファイバー HDMI ケーブル (PS5 4K @120Hz をサポート)

セール価格$65.99 USD
SKU: C11026DGY
長さ:3M
製品の概要:
  • 比類のない 8K 60Hz 解像度
  • 没入型エンターテイメントに最適な最大 240Hz
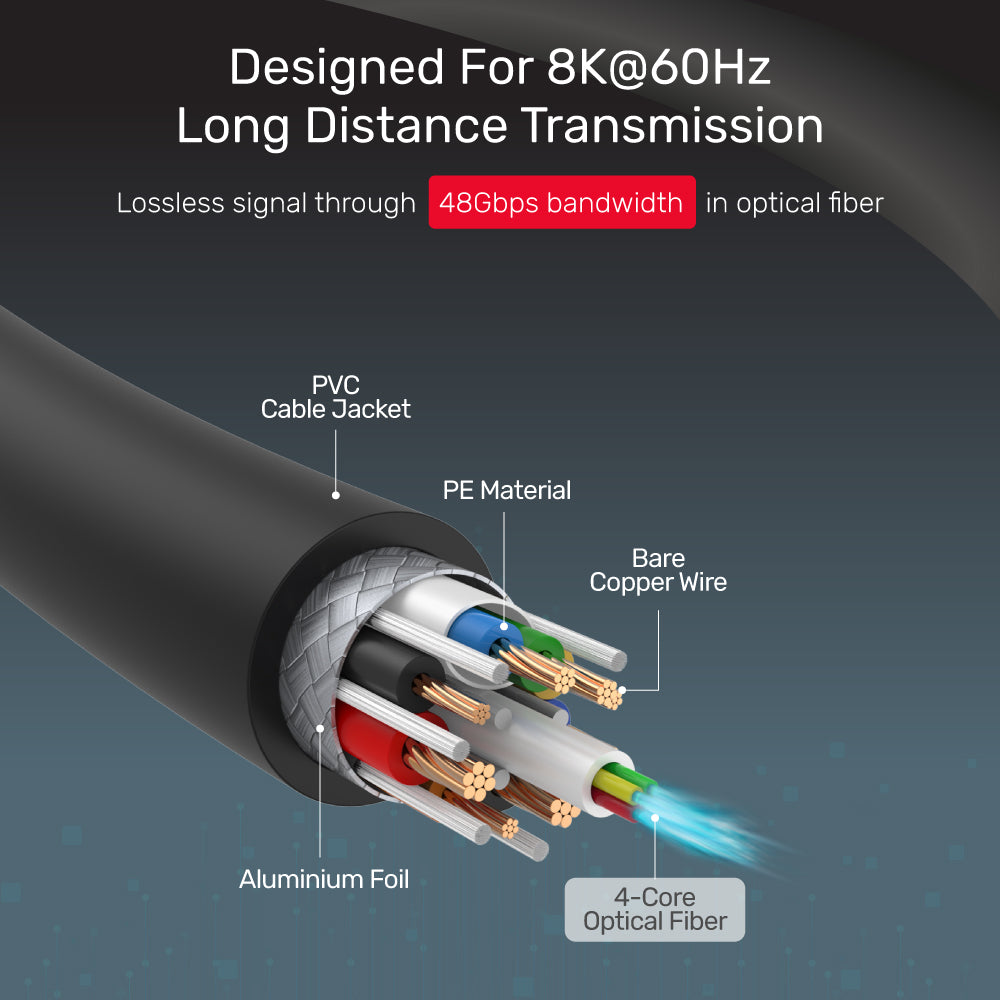
  • 無損失伝送のための光/電気ソリューション
  • 帯域幅48Gbps
  • 握りやすい亜鉛合金ハウジングと金メッキコネクタ
UNITEK アクティブ オプティカルHDMIケーブルは、最大 8K の比類のないビジュアルと、HDMI 2.1 で指定されている最大 240Hz のリフレッシュ レートまでのすべてのフレームに理想的な値を提供し、没入型のエンターテイメントとゲーム体験を楽しむことができます。光学ソリューションにより、質量信号が長距離でも損失のない方法で送信されます。

製品の特徴:
  • HDMI 2.1 で指定されているように、8K@60Hz および 4K@120Hz をサポート
  • 48Gbps の大容量帯域幅。下位互換性。
  • 最大 8K@60Hz の比類のないビジュアル、VR および 3D ディスプレイ信号を長距離でもロスレスで伝送するように設計されています。
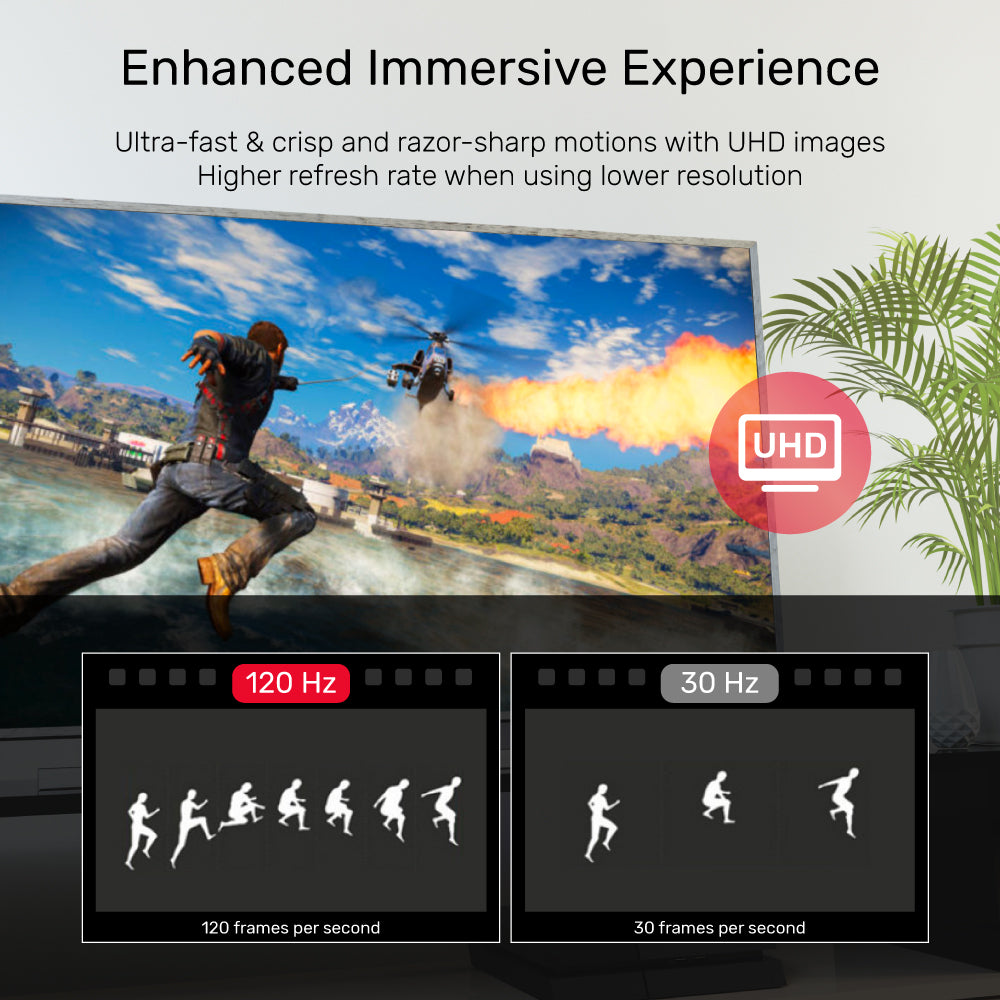
  • 120Hz のリフレッシュ レートで 4K、超高速モーション UHD 画像をくっきりと鮮明に表示し、低解像度を使用する場合は高いリフレッシュ レートを実現します。
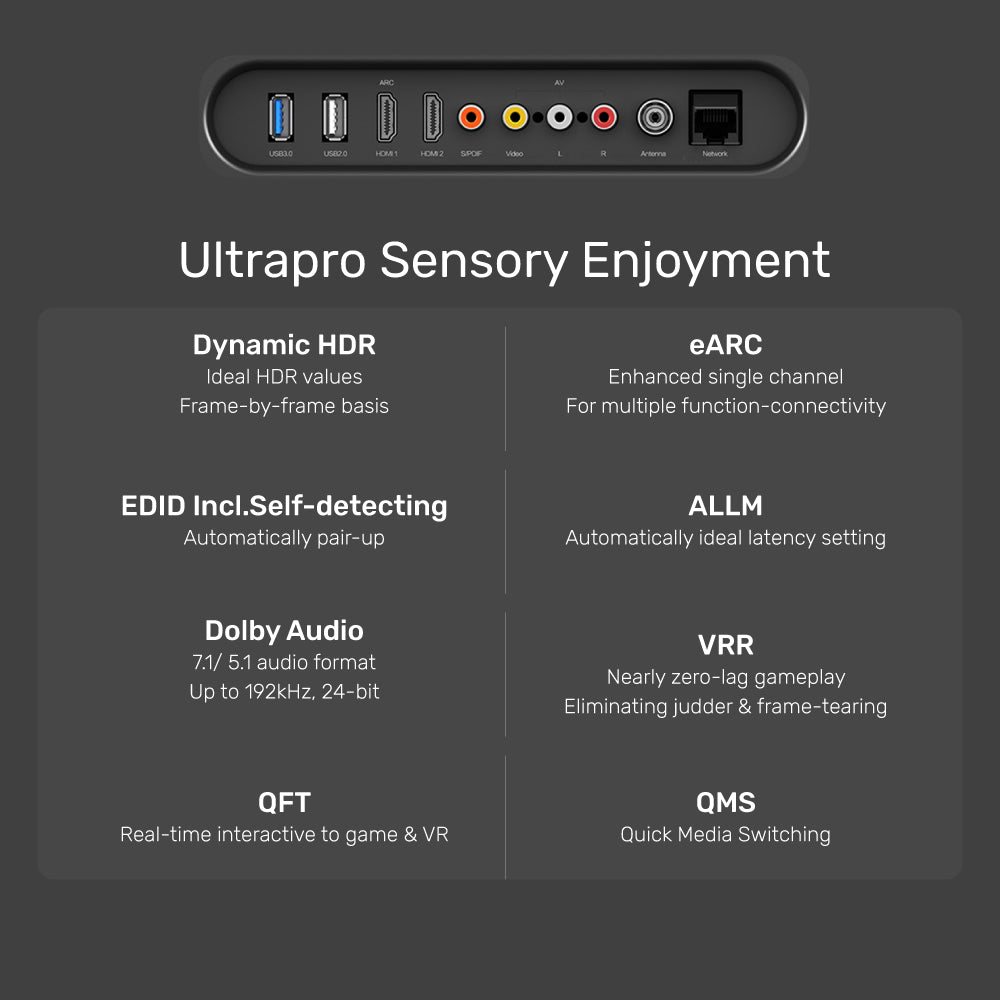
  • ダイナミック HDR を使用すると、コントラスト、深度、明るさ、およびより広い色域が、フレームごとに理想的な値で表示されます。
  • eARC を使用すると、接続が強化および簡素化され、複数のコンポーネントの検出とオーディオの最適化がさらに使いやすくなります。
  • 最大 192kHz、24 ビット、非圧縮 5.1 および 7.1 の高ビットレート オーディオ フォーマット、ドルビー固有のロスレス オーディオ フォーマット、および 32 チャンネルの非圧縮オーディオをサポートします。
  • VRR を使用すると、ラグ、ジャダー、フレーム ティアリングがほぼゼロになり、ゲームプレイがより滑らかで詳細になります。
  • EDIDを含むサポート。自己検出機能、ALLM、QMS、および QFT。
  • 強力な亜鉛合金ハウジングと耐腐食性の金メッキコネクタで作られています。
  • 考え抜かれた握りやすいデザイン。
  • 周囲の電磁干渉に対する高い耐性。無放射線環境でどなたでも安心。

ハードウェア & 寸法:
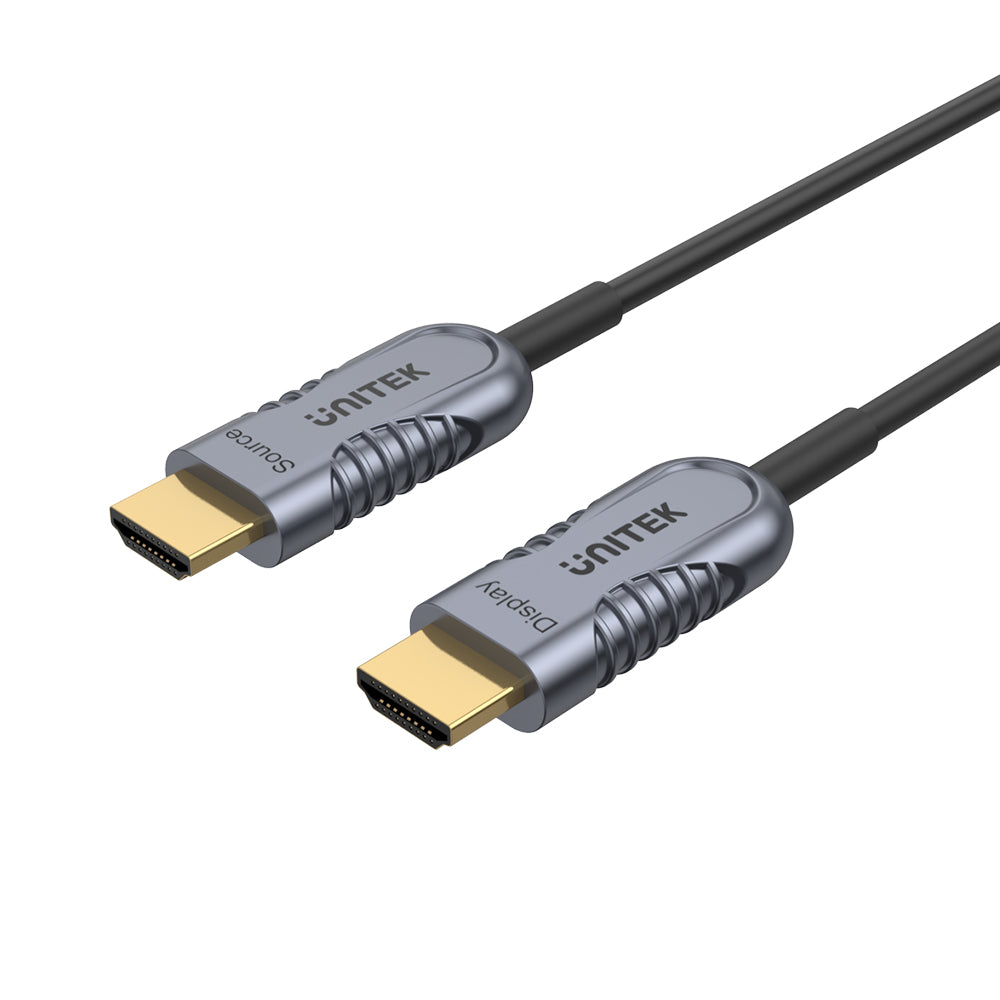
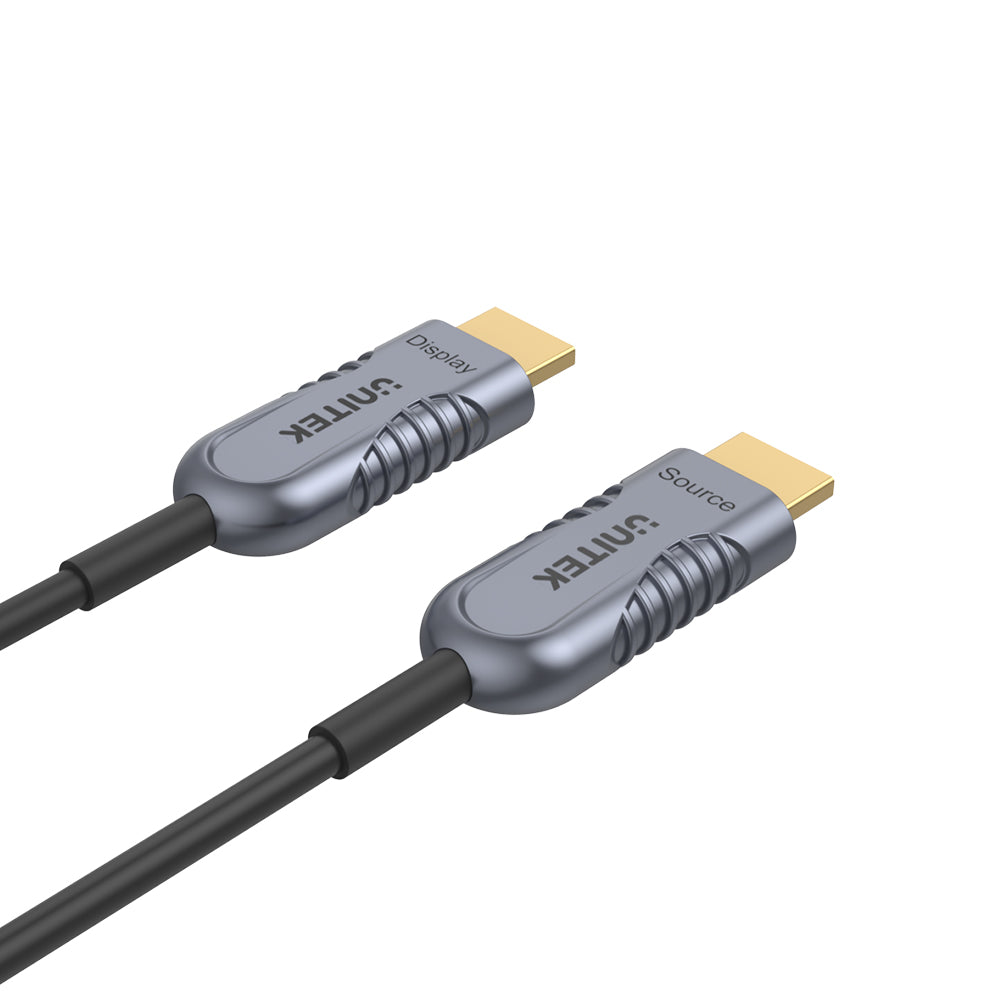
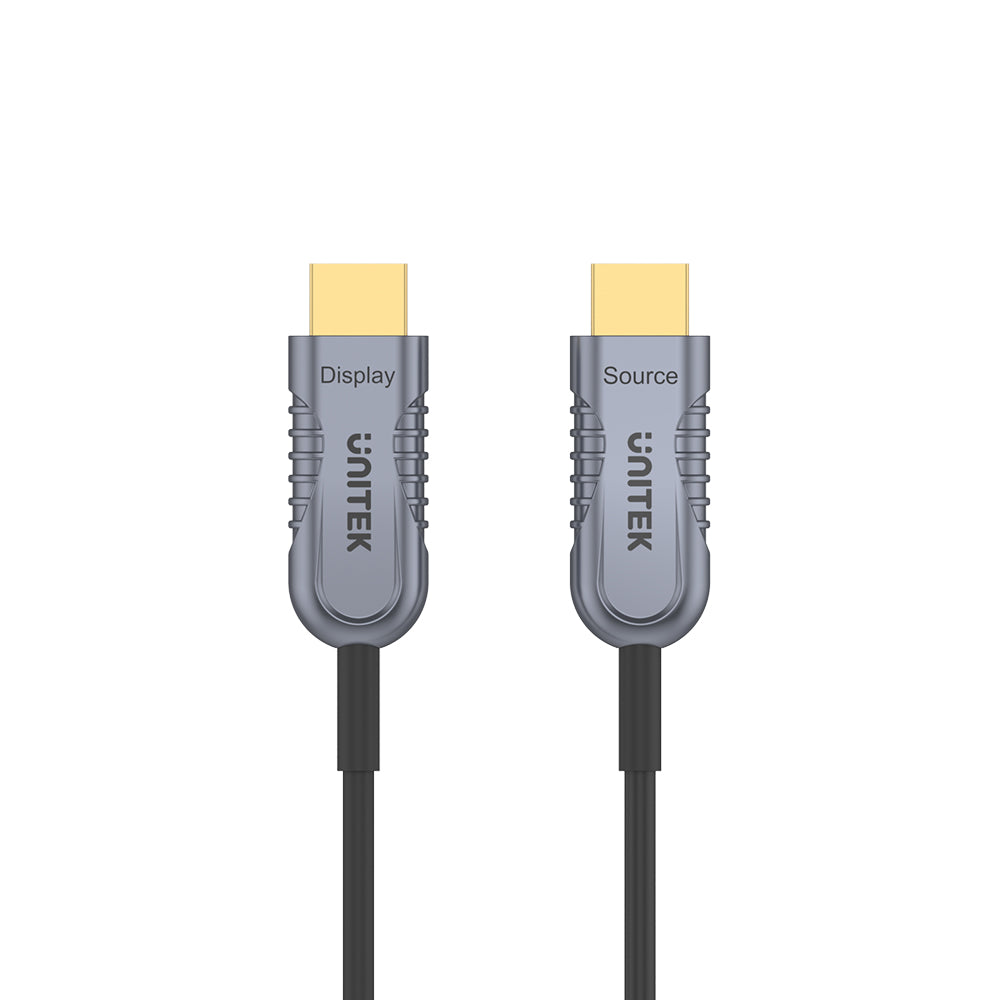
材質: 亜鉛合金ハウジング & 金メッキコネクタ
色: スペースグレイ
アップストリーム: HDMI オス
ダウンストリーム: HDMI オス
チップ 光・電気変換チップ
ケーブル長: 3M/ 5M/ 10M/ 15M/ 20M/ 30M/ 40M/ 50M/ 60M/ 70M
ケーブル外径:4.8mm

パッケージ内容:
1×8K光ファイバーHDMIケーブル
1×ユーザーマニュアル

Product Features
  • Support 8K@60Hz and 4K@120Hz, as specified in HDMI 2.1
  • 48Gbps mass-capacity bandwidth. Backward compatible.
  • Designed for transmitting up to 8K@60Hz unparalleled visual, as well as VR and 3D display signal in a lossless way even a long distance.
  • Refresh rate at 120Hz while under 4K, ultra-fast motion UHD images to be crisp and razor-sharp, and higher refresh rate when using lower resolution.
  • With Dynamic HDR, contrast, depth, brightness and wider color gamut are shown at ideal values on a frame-by-frame basis.
  • With eARC, connectivity is enhanced and simplified for greater ease of use of multiple components discovery and audio optimization.
  • Support the high-bitrate audio formats up to192kHz, 24-bit, and uncompressed 5.1 and 7.1, Dolby specific lossless audio formats, and 32-channel uncompressed audio.
  • With VRR, gameplay will be more fluid and better detailed with nearly zero lag, judder and frame tearing.
  • Support EDID incl. self-detecting function, ALLM, QMS and QFT.
  • Made with strong zinc-alloy housing and corrosion-resistant gold-plated connector.
  • Thoughtful easy-grip design.
  • High resistance against surrounding electromagnetic interference. Safe for everyone via the nil-radiation environment.
Hardware & Dimension

Material: Zinc-alloy Housing & Gold-plated Connector
Color: Space Grey
Upstream: HDMI Male
Downstream: HDMI Male
Chip Optical / Electrical Conversion Chip
Cable Length: 3M/ 5M/ 10M/ 15M/ 20M/ 30M/ 40M/ 50M/ 60M/ 70M
Cable OD: 4.8mm

User Manual
数量:

送料はチェックアウト時に計算されます。国際関税と税金が適用される場合があり、チェックアウト時に計算されません。

出荷と配達

配送料の見積もりについては、購入したい商品を「チェックアウト」し、配送の詳細を入力すると、配送料が商品の重量と配送場所に基づいて自動的に生成されます。
配送料が発生しない場合は、お問い合わせください。

通常の配送時間: 3 ~ 14 営業日
COVID-19 ガイドラインのため、最終発送日はお住まいの地域によって異なります。

遅延:
Unitek は、無関係な要因 (住所の誤り、天候、検査、労働争議、および/または輸送上の問題など) に起因する配送の遅延について責任を負いません。荷物の紛失や破損については責任を負いかねます。

関税および税金:
米国外に発送される注文には、仕向国によって課される輸入税、関税、手数料、および/または VAT (付加価値税) が課される場合があります。 UNITEKはこれらの料金を管理しておらず、それらが何であるかを予測できないため、政府から請求される税金、関税、通関手数料、および/またはVATを支払う責任はお客様にあります。税関のポリシーや関税に関する追加情報については、該当する管轄区域の現地の税関にお問い合わせください。海外からの注文は、輸入関税、税金、手数料の支払いを怠った場合、返金されません。

その他ご不明な点やお問い合わせは までお問い合わせください
There is no video signal transmission. What should I do?

There are some quick checks if you are trying to troubleshoot issues with a video cable.
You may test the connected devices to make sure that the following components are working correctly and are not the source of the issue:
·      Video cable
·      Video source
·      Video destination
Try the following methods to test your video setup components:
·      Use the video cable, video source, and another video destination (display) to setup to see if the problem is with the components.
·      Use a different video cable, video source, and the original video destination in your setup to see if the problem persists. 
Ideally, you should test a component that you know works in another setup. Otherwise, the issue might happen because of the port function of your video source, or a driver issue.
When you test the video setup components, it is recommended that you do the following:
·      Investigate that the source resolution matches the capabilities of the video destination. For example, if the video destination is only capable of 720p, then the video source cannot output 1080p, as that exceeds the capabilities of the video destination.
·      Test at a lower resolution, for example, 1024 x 768.
·      If you are using 4K resolutions, test with a shorter cable and test each of them individually.
If you are experiencing issues with audio over HDMI/DisplayPort, investigate the following:
·      The output audio over HDMI/DisplayPort setting on the source.
·      The compatible audio format on the destination and the source file format on the source.
·      The destination's volume was raised.
·      Take out the 3.5mm device if it is connecting to the hub.
·      Note: HDMI/DisplayPort to DVI/VGA cables, adapters and converters do not support audio.

Why my mouse does not move properly between the displays?

We suggest you to rearrange the monitors in Windows to match the physical location of them on your desk. 
Go through the following:
Windows 10 / 8
1. Press the Windows Key plus X and select Control Panel.
2. Click Appearance and Personalization, then click Display.
3. Click the Resolution or Adjust Resolution option from the left column, which will display your monitors as numbered icons.
4. Click Identify to display the numbers on each connected monitor, showing how the operating system has assigned their positions.
5. Click and drag the monitor icons to best match the physical location of monitors.
6. Click OK to apply the changes and close the window.
Windows 7 / Vista
1. Click the Start button and select Control Panel.
2. Click Appearance and Personalization, then click Display.
3. Click the Resolution or Adjust Resolution option from the left column, which will display your monitors as numbered icons.
4. Click Identify to display the numbers on each connected monitor, showing how the operating system has assigned their positions.
5. Click and drag the monitor icons to best match your physical setup.
6. Click OK to apply the changes and close the window.
Windows XP
1. Click the Start button and select Control Panel.
2. Double-click Display.
3. Click the Settings tab, which will display your monitors as numbered icons.
4. Click Identify to display the numbers on each connected monitor, showing how the operating system has assigned their positions.
5. Click and drag the monitor icons to best match your physical setup.
6. Click OK to apply the changes and close the window.

How do I set to mirror my primary display onto my secondary display in Windows?

Go through the following:
Windows 10 / 8
1. Press the Windows Key plus X and select Control Panel.
2. Click Appearance and Personalization, then click Display.
3. Click the Resolution or Adjust Resolution option from the left column.
4. Expand the drop-down menu next to “Multiple displays” and select Duplicate these Displays.
5. Click OK to apply the changes and close the window.
Windows 7 / Vista
1. Click the Start button and select Control Panel.
2. Click Appearance and Personalization, then click Display.
3. Click the Resolution or Adjust Resolution option from the left column.
4. Expand the drop-down menu next to “Multiple displays” and select Duplicate these Displays.
5. Click OK to apply the changes and close the window.
Windows XP
1. Click the Start button and select Control Panel.
2. Double-click Display.
3. Click the Settings tab.
4. Un-check the box beside Extend my Windows desktop onto this monitor.
5. Click OK to apply the changes and close the window.