uHUB O8+ 8-in-1 USB-C Ethernet Hub with Dual Monitor, 100W Power Delivery and Card Reader
uHUB O8+ 8-in-1 USB-C Hub with Dual Display, Ethernet and PD 100W

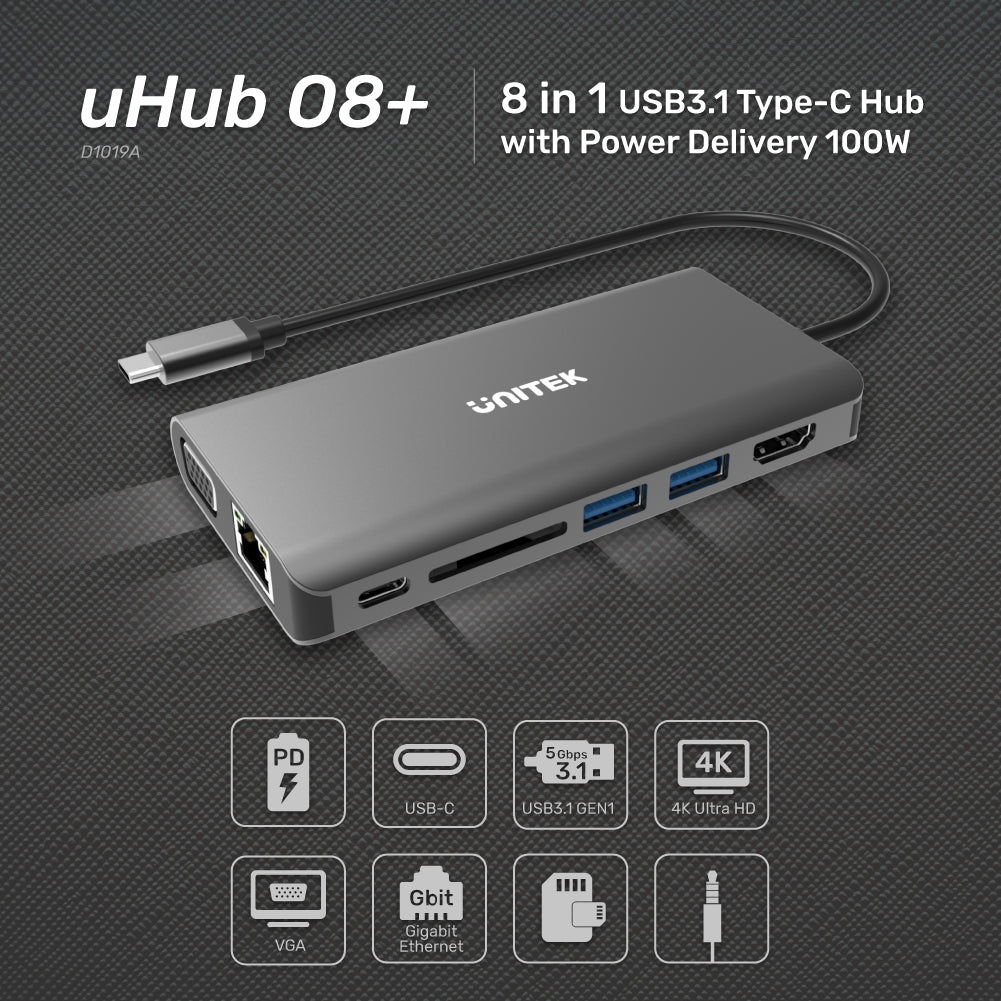
uHUB O8+ 8-in-1 USB-C イーサネット ハブ、デュアル モニター、100W 電力供給、カード リーダー付き

セール価格$75.99 USD
SKU: D1019A

製品の概要:

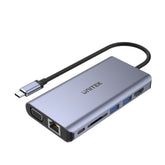
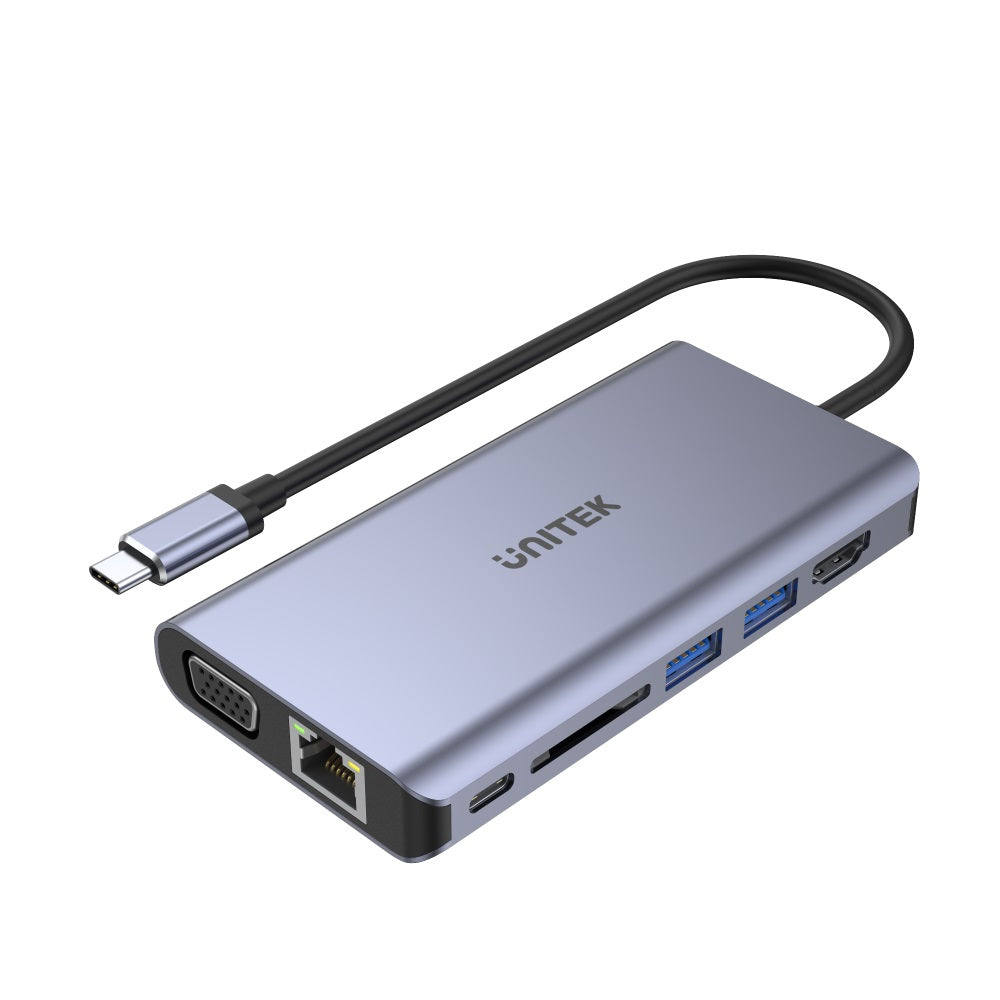
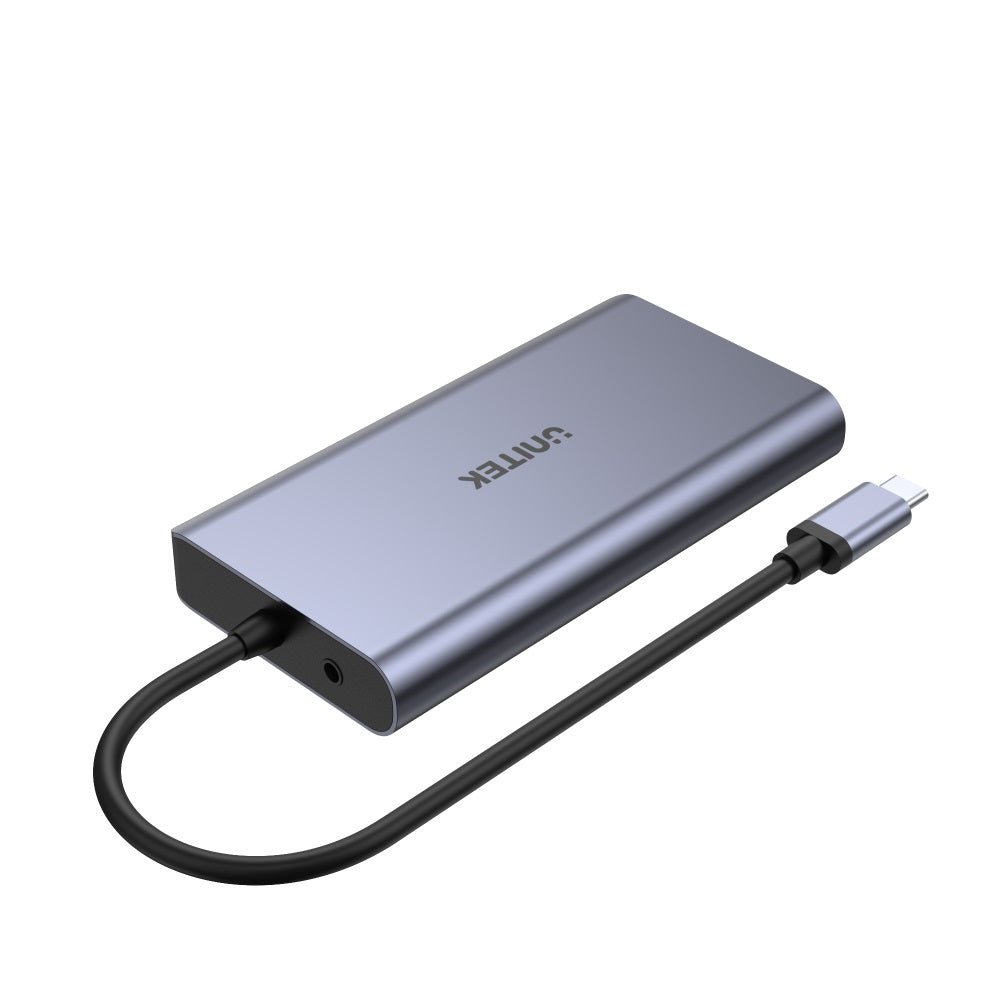
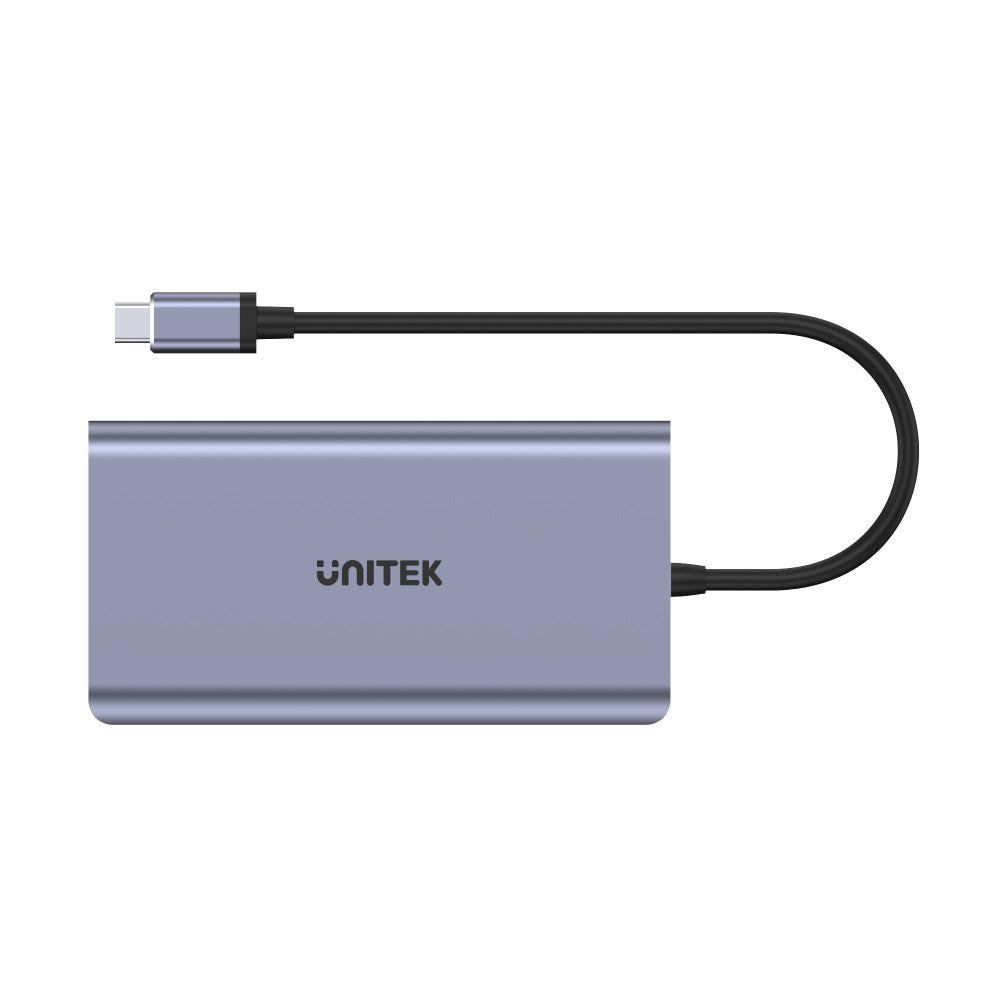
この強力なアルミ製 USB-C ハブは、USB 3.0 5Gbps データをサポートする USB-C ポートと強力な Power Delivery 100W 充電、4K HDMI & フル HD VGA、ギガビット イーサネット RJ45、カード リーダー、デュアル USB ポート、および 3.5mm オーディオを組み合わせています。ジャック。

製品の特徴:

  • USB Power Delivery Revision 3.0 Ver 1.1に対応したUSB-Cメスポートは、最大100W(20V/5A)、5Gbpsで充電と同期を同時に行うことができます。
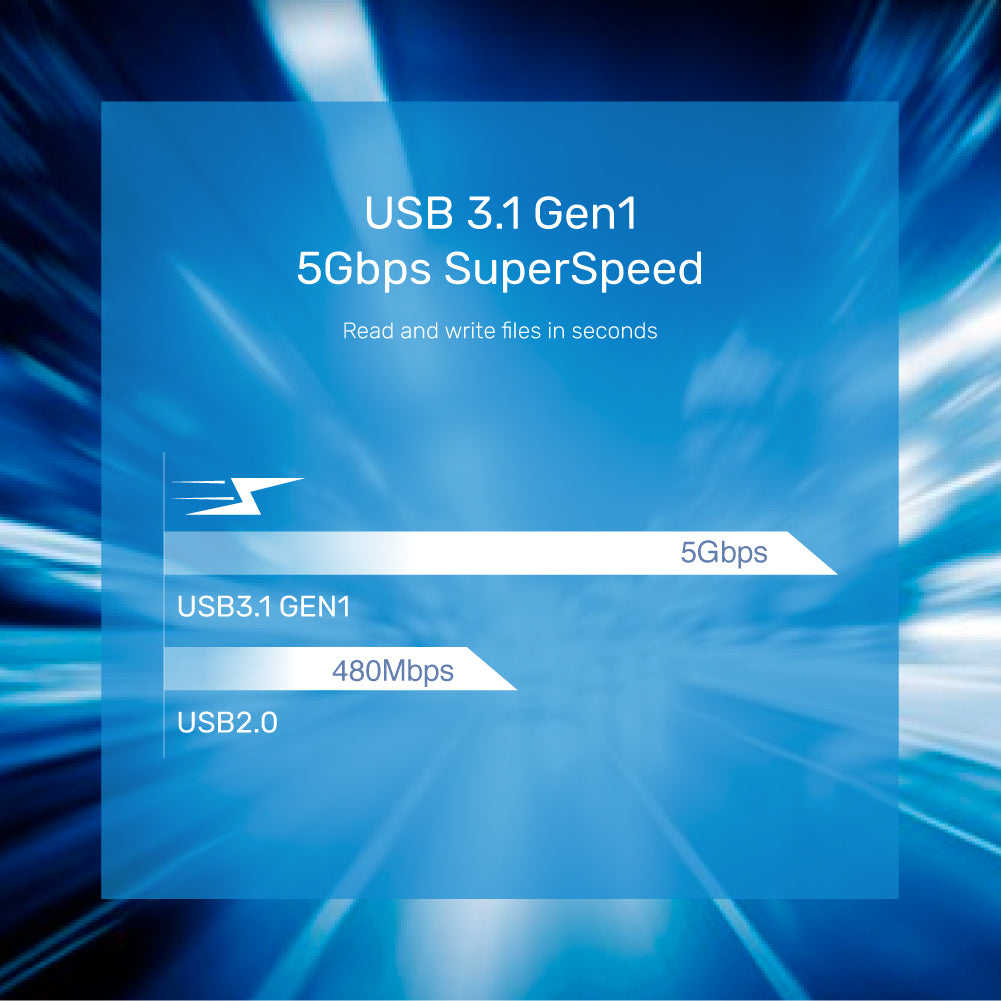
  • 2 つの USB-A メス ポートは、SuperSpeed USB、最大 5Gbps のデータ転送速度をサポートします。 USB2.0/USB1.1との下位互換性あり。
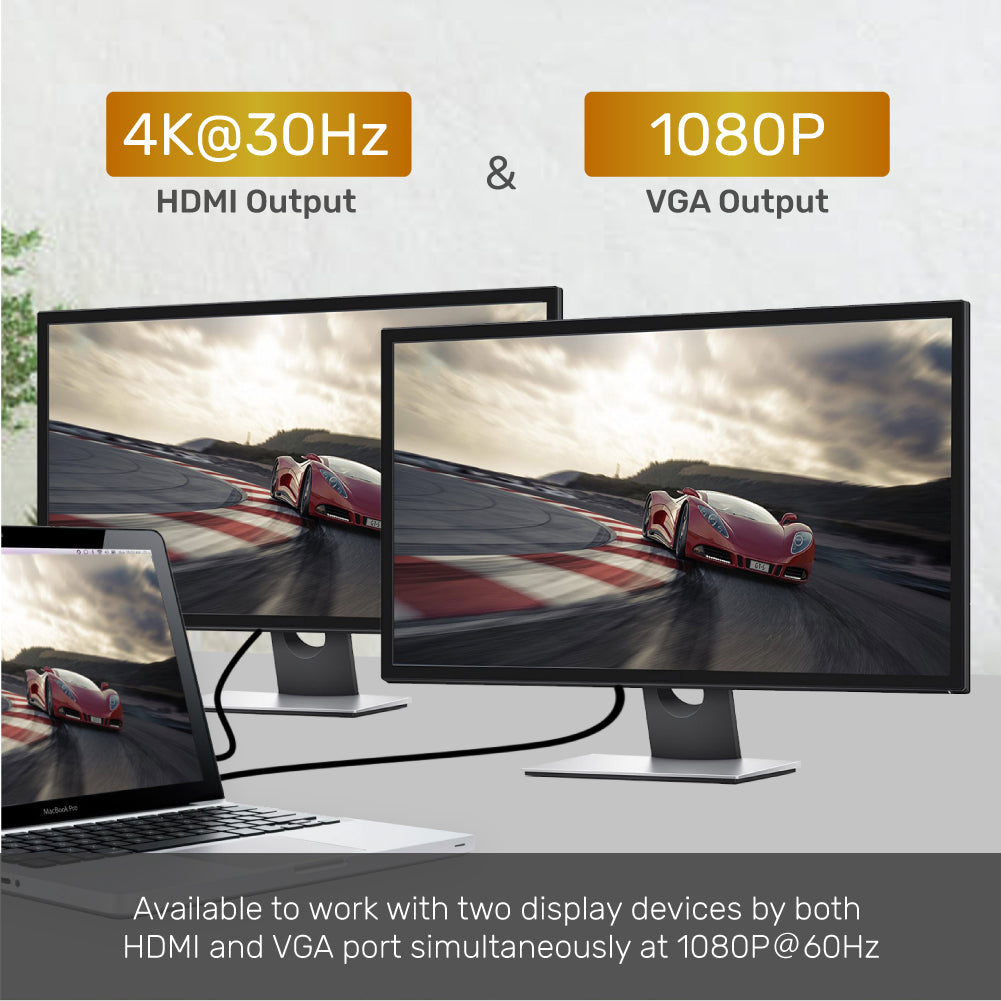
  • HDMI1.4ポートで、HDCP 1.4をサポートし、4K 30Hzの解像度で出力します。
  • VGA ポートで、フル HD 1080P 解像度をサポートします。 HDMI と VGA 出力ポートは同時に動作しますが、最大。両方のポートの解像度は 1080P 60Hz です。
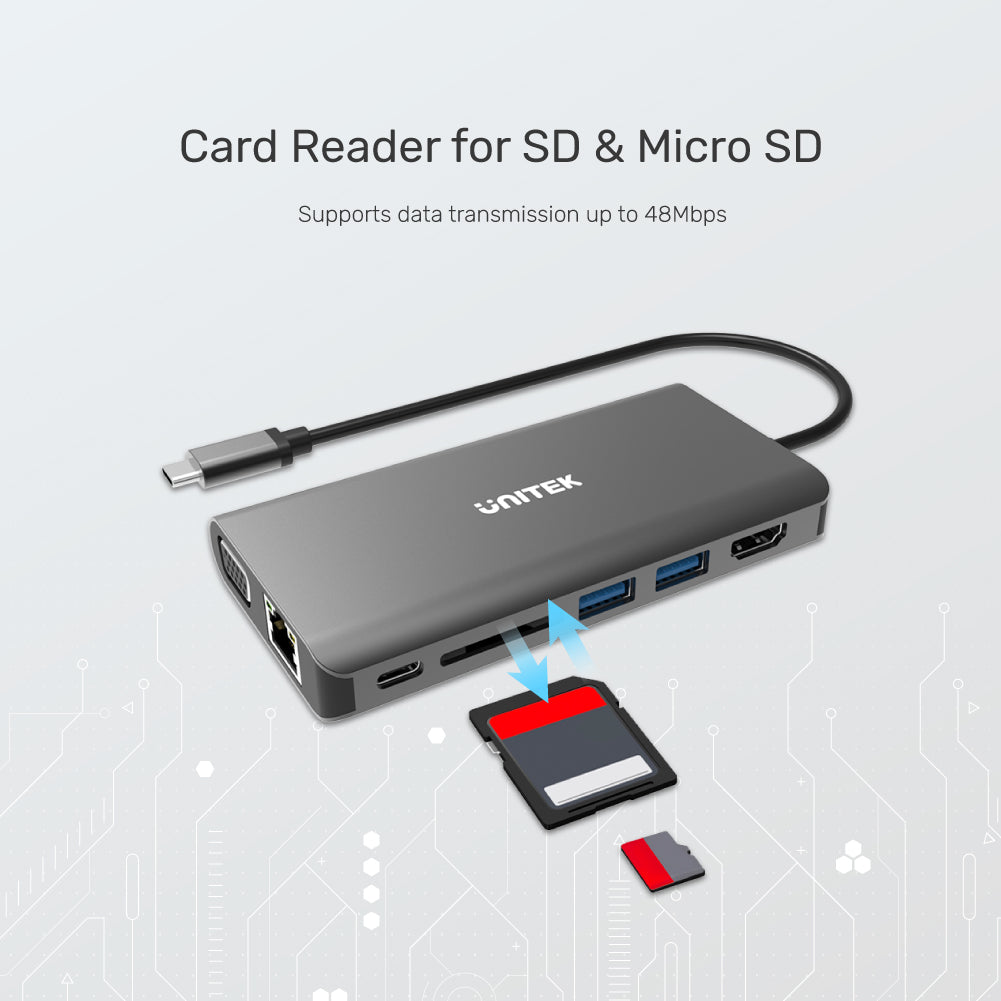
  • SDカードとマイクロSDカード用のカードリーダー付き、最大48Mbps。
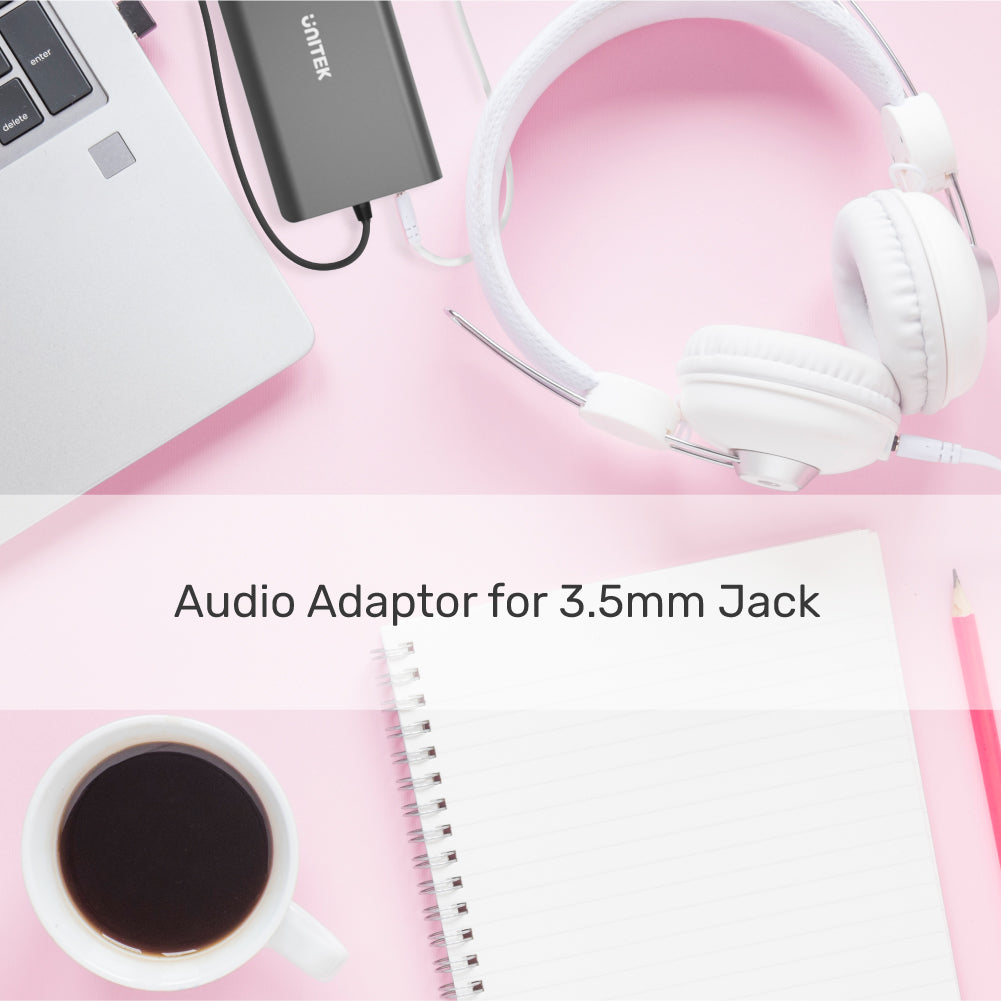
  • 3.5mm ジャック アダプターを使用すると、16 ビットのサンプリング レートで 48 k/Hz をサポートします。
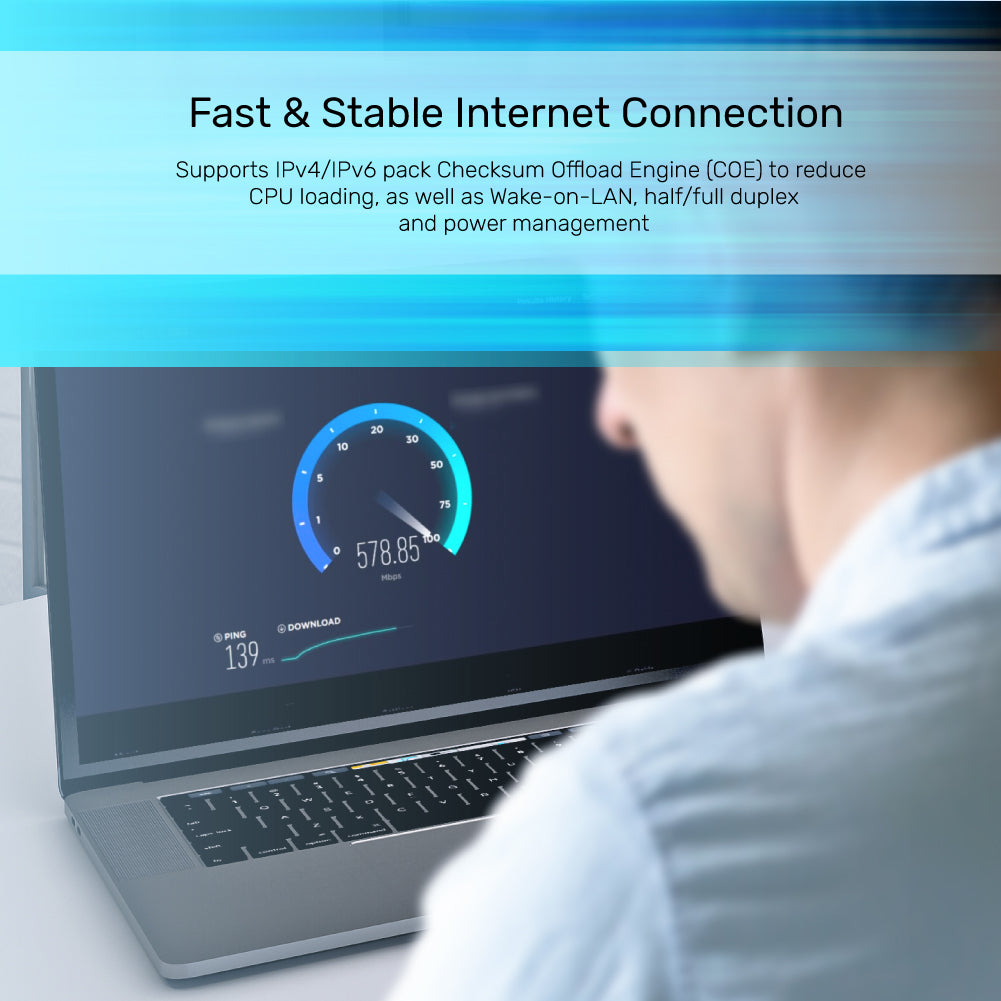
  • インターネット接続用のギガビット イーサネットは、10M/100M/1000Mbps のネットワーク伝送に自動的に適応し、IEEE 802.3 標準をサポートします。
  • IPv4/IPv6 パック チェックサム オフロード エンジン (COE) をサポートし、CPU 負荷、Wake-on-LAN、半二重/全二重、および電源管理を軽減します。
  • プラグアンドプレイ、ドライバーをインストールする必要はありません。
ハードウェア & 寸法:
  • 寸法:116mm×61mm×16.2mm
  • アップストリーム: USB-C オス
  • ダウンストリーム: PD付きUSB-C、2 x USB-A、HDMI、VGA、RJ45、SDカードスロット、オーディオ
  • 色: スペースグレイ
パッケージ内容:
1×uHUB O8+
1×ユーザーマニュアル
Product Features
  • USB-C female port supporting USB Power Delivery Revision 3.0 Ver 1.1 is able to charge and sync simultaneously, up to 100W (20V/5A) and 5Gbps.
  • TWO USB-A female ports support SuperSpeed USB, data transfer rate up to 5Gbps. Backward compatible with USB2.0/USB1.1.
  • With HDMI1.4 port, supports HDCP 1.4, output as 4K 30Hz resolution.
  • With VGA port, supports Full HD 1080P resolution. While HDMI and VGA output ports work simultaneously, the max. resolution of both ports is 1080P 60Hz.
  • With card reader for SD Card and Micro SD Card, up to 48Mbps.
  • With 3.5mm jack adapter, supports 48 k/Hz with a 16-bit sampling rate.
  • Gigabit Ethernet for your internet connection, automatically adapts to the network transmission with 10M/100M/1000Mbps and supports IEEE 802.3 standard.
  • Supports IPv4/IPv6 pack Checksum Offload Engine (COE) to reduce CPU loading, Wake-on-LAN, half/full duplex and power management.
  • Plug and play, no need to install the driver.
Hardware&Dimension
  • Dimension: 116mm x 61mm x16.2mm
  • Upstream: USB-C Male
  • Downstream: USB-C with PD, 2 x USB-A, HDMI, VGA, RJ45, SD Card Slot, Audio
  • Color: Space Grey
User Manual
数量:

送料はチェックアウト時に計算されます。国際関税と税金が適用される場合があり、チェックアウト時に計算されません。

出荷と配達

配送料の見積もりについては、購入したい商品を「チェックアウト」し、配送の詳細を入力すると、配送料が商品の重量と配送場所に基づいて自動的に生成されます。
配送料が発生しない場合は、お問い合わせください。

通常の配送時間: 3 ~ 14 営業日
COVID-19 ガイドラインのため、最終発送日はお住まいの地域によって異なります。

遅延:
Unitek は、無関係な要因 (住所の誤り、天候、検査、労働争議、および/または輸送上の問題など) に起因する配送の遅延について責任を負いません。荷物の紛失や破損については責任を負いかねます。

関税および税金:
米国外に発送される注文には、仕向国によって課される輸入税、関税、手数料、および/または VAT (付加価値税) が課される場合があります。 UNITEKはこれらの料金を管理しておらず、それらが何であるかを予測できないため、政府から請求される税金、関税、通関手数料、および/またはVATを支払う責任はお客様にあります。税関のポリシーや関税に関する追加情報については、該当する管轄区域の現地の税関にお問い合わせください。海外からの注文は、輸入関税、税金、手数料の支払いを怠った場合、返金されません。

その他ご不明な点やお問い合わせは までお問い合わせください
How do I know that my USB devices are connected via the USB hub in Windows?

Go through the following:
1. Press the Windows Key plus R, type "devmgmt.msc", and press Enter.
2. In Device Manager, under the appropriate heading, confirm that your expansion card is listed and that there isn't an exclamation mark next to it. For example, a USB controller card would be under Universal Serial Bus controllers.
3. Your USB device is listed according to the name of the chipset or the dedicated name.

How do I know that my USB devices are connected via the USB hub in macOS?

Go through the following:
1. Click the Apple icon.
2. Click About This Mac.
3. Click More Info or System Report.
4. Under the appropriate heading, please check that your USB device is listed (according to the name of the chipset or the dedicated name) and that there isn't an error. For example, a network card would be under Ethernet Cards.
5. You may have to refresh the System Information page after you plug in your device. To do so, press Command + R with the System Information page open.

Why the file transmission from an attached storage device cannot complete via the USB hub?

If you disconnect a USB-C power input from the multiport USB hub during the transmission of the files to or from an attached storage device, it will stop the transmission and may cause file corruption. It is also possible that there will be a loss of function if the power input is removed from the USB hub while it is in operation. 
It is important to always follow the disconnection steps listed following:
1. Complete all data transfers over USB to and from the attached storage device.
2. Disconnect the USB hub from the host computer.
3. Disconnect your power input from the USB hub.
4. Eject your attached storage device.

Why do I lose the connection of my external monitor when the Windows computer wakes up from sleep mode?

It is likely that Windows has automatically turned off the USB Root hub to save power and caused the issue.
The steps below instruct how to configure the USB root hub to stay on during the sleep mode of the upstream computer, to prevent this from happening.
Windows 10 / 8
On your keyboard, press the Windows Key plus X and select Control Panel.
Click Hardware and Sound, then click Power Options.
Click Change plan settings for the plan you want to change.
Click Change advanced power settings.
Click the plus sign (+) next to “USB settings” and “USB selective suspend setting” to expand the options and change the setting to Disabled.
Click OK to apply the setting.
Note: You may need to disconnect and re-connect your USB hub after applying these settings to re-establish the connection.
Windows 7 / Vista
Click the Start button and select Control Panel.
Click Hardware and Sound, then click Power Options.
Click Change plan settings for the plan you want to change.
Click Change advanced power settings.
Click the plus sign (+) next to “USB settings” and “USB selective suspend setting” to expand the options and change the setting to Disabled.
Click OK to apply the setting.
Note: You may need to disconnect and re-connect your USB hub after applying these settings in order to re-establish the connection.
Windows XP
On your desktop, right-click the My Computer icon and select Properties.
Click the Device Manager tab.
Expand Universal Serial Bus controllers by clicking the arrow to the left of it.
Right-click the first USB Root Hub device and select Properties.
Click the Power Management tab.
Clear the box next to Allow the computer to turn off this device to save power.
Click OK to apply the setting.
Repeat steps 4-7 for any remaining devices in the Universal Serial Bus Controllers section with “Root Hub” in the name.
Note: You may need to disconnect and re-connect your USB hub after applying these settings to re-establish the connection.

Why my mouse does not move properly between the displays?

We suggest you to rearrange the monitors in Windows to match the physical location of them on your desk. 
Go through the following:
Windows 10 / 8
1. Press the Windows Key plus X and select Control Panel.
2. Click Appearance and Personalization, then click Display.
3. Click the Resolution or Adjust Resolution option from the left column, which will display your monitors as numbered icons.
4. Click Identify to display the numbers on each connected monitor, showing how the operating system has assigned their positions.
5. Click and drag the monitor icons to best match the physical location of monitors.
6. Click OK to apply the changes and close the window.
Windows 7 / Vista
1. Click the Start button and select Control Panel.
2. Click Appearance and Personalization, then click Display.
3. Click the Resolution or Adjust Resolution option from the left column, which will display your monitors as numbered icons.
4. Click Identify to display the numbers on each connected monitor, showing how the operating system has assigned their positions.
5. Click and drag the monitor icons to best match your physical setup.
6. Click OK to apply the changes and close the window.
Windows XP
1. Click the Start button and select Control Panel.
2. Double-click Display.
3. Click the Settings tab, which will display your monitors as numbered icons.
4. Click Identify to display the numbers on each connected monitor, showing how the operating system has assigned their positions.
5. Click and drag the monitor icons to best match your physical setup.
6. Click OK to apply the changes and close the window.

How do I set to mirror my primary display onto my secondary display in Windows?

Go through the following:
Windows 10 / 8
1. Press the Windows Key plus X and select Control Panel.
2. Click Appearance and Personalization, then click Display.
3. Click the Resolution or Adjust Resolution option from the left column.
4. Expand the drop-down menu next to “Multiple displays” and select Duplicate these Displays.
5. Click OK to apply the changes and close the window.
Windows 7 / Vista
1. Click the Start button and select Control Panel.
2. Click Appearance and Personalization, then click Display.
3. Click the Resolution or Adjust Resolution option from the left column.
4. Expand the drop-down menu next to “Multiple displays” and select Duplicate these Displays.
5. Click OK to apply the changes and close the window.
Windows XP
1. Click the Start button and select Control Panel.
2. Double-click Display.
3. Click the Settings tab.
4. Un-check the box beside Extend my Windows desktop onto this monitor.
5. Click OK to apply the changes and close the window.

How can I charge my laptop when connecting with the USB hub?

If your USB hub equips the USB Power Delivery (PD) port, you can use it to charge your laptop computer by connecting to a PD power adapter. 
For more information on what the requirements are and about how much power this laptop docking station provides, refer to the product specifications.

Why is only one external display working with my Apple M1-based Mac?

MacBook and Mac Mini using the Apple Silicon chip support only one single external display over the Thunderbolt 3 ports, even when connected to a Thunderbolt 3 hub or adapter with multiple video output. Turning off the laptop display or using clamshell mode does not change this.
Using a USB-C DisplayLink-based hub or video adapter may be an option to allow more than one external display with an Apple M1-based Mac device.
Note: this limitation does not affect Intel-based Macs with Thunderbolt 3.